
Angel Eyes / Halo Install 2 (Umnitza)


Thread Starter
Senior Member
SL Member
Joined: Oct 2006
Posts: 1,666
From: Lake Elsinore, CA
*DISCLAIMER: You perform this mod at your own risk! You assume sole responsibility of execution and outcome of this mod. I will not be held responsible if something goes wrong...
But if you follow these directions, you should do just fine!
Ok, heres the run down on how to install a set of angel eyes, either from umnitza or oznium. This install requires that you bake your headlights, so if you're not comfortable with subjecting your headlights to 225 degrees for 15 minutes then I dont suggest this mod. Another thing, if you do decide to do this mod, work SLOWLY! These rings are very, very fragile! If you bend or stress them even the slightest little bit, they will snap! If it feels like the rings arent going to fit the way you're trying to put them in then STOP! REthink how you're trying to mount them, your patience will pay off.
Tools: You'll need a flathead and phillips head screwdriver, 10mm socket, needlenose pliers, 1/8" drill bit and drill motor, wire snips (dykes), wire stripper, and an oven that will fit a headlight. You'll also need some silicone caulking.
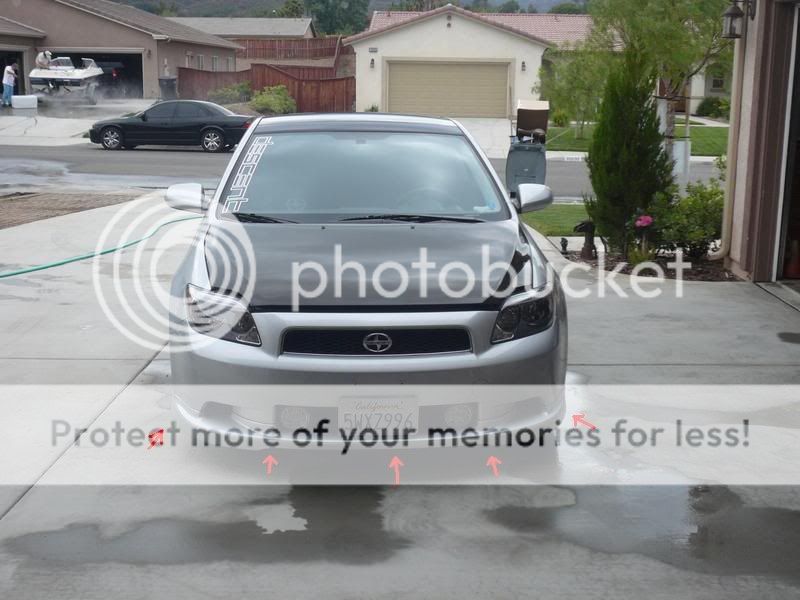
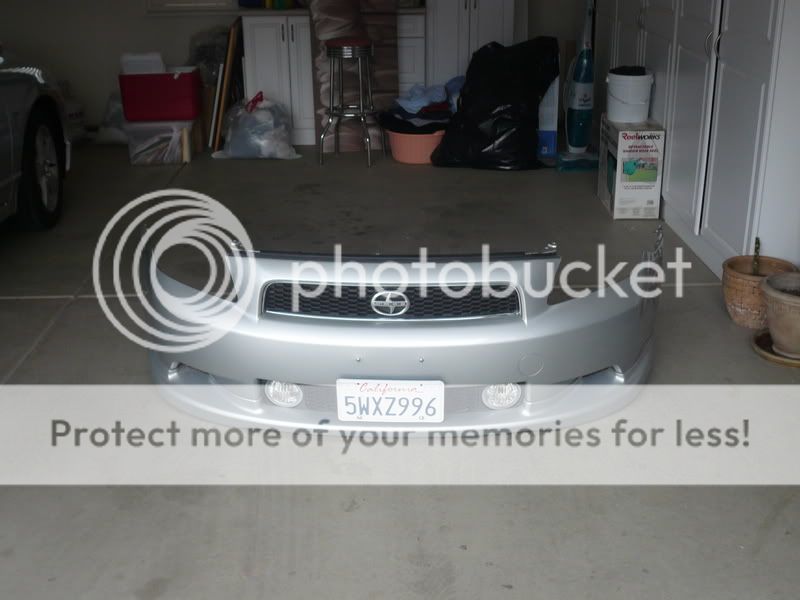
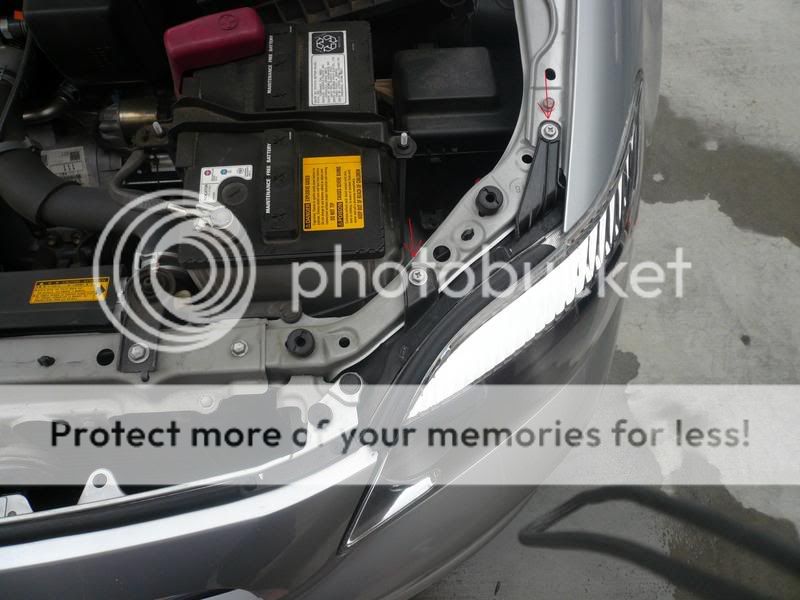
First: To get the headlights out, you have to first remove the entire front bumper facade. To do that there are a total of 11 bolts (10 mm) and 5 plastic push pins. There are 7 bolts (10 mm) along the bottom edge of the bumper, remove these. 5 of them are black and the other 2 are silver in color.
There is a bolt, like the black ones from underneath, on the edge where the bumper meets the fender well, remove it.
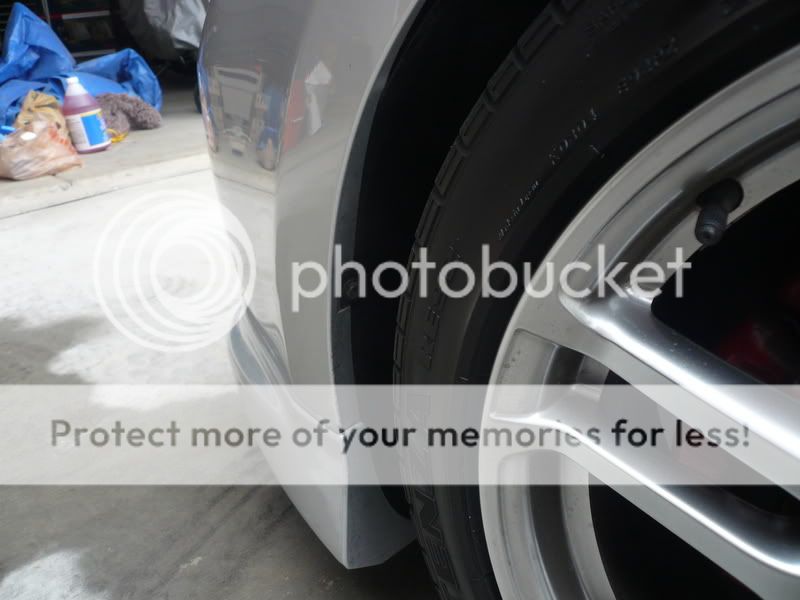
Once you've got that bolt out, pull the inner fender well back and inside you'll see another bolt, you've gotta take this one out too. Its easier to use a phillips head screw driver on this one rather than a socket or wrench.
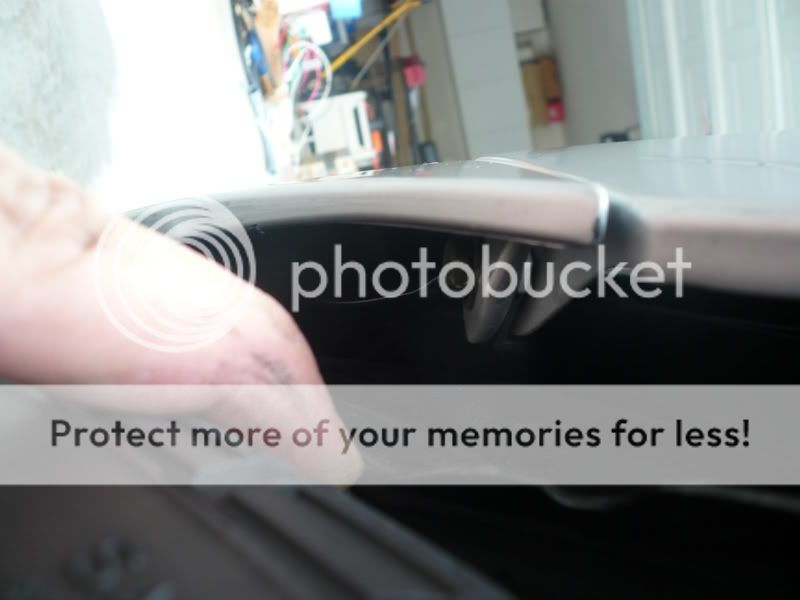
After you've got all the bolts out from underneath and from the fender wells, move to underneath the hood. There are five plastic push pins you've got to take out. 2 on either side right next to the head light and one right in the center.
Use a flat head screwdriver to pop these up and pull them out. 2 of them have rubber tops on them and are a little harder to pull out, but use a little elbow grease and they'll come out. Once all the pins are out, pull the two upper corners of the bumper away from the fender on either side. The bumper should now slide out pretty easy. (if you have foglights, be sure to disconnect the wires to them.)
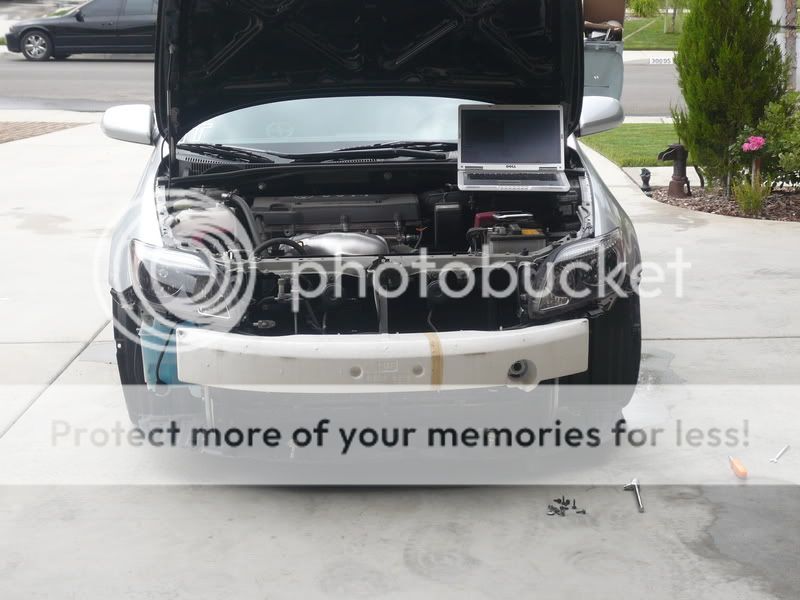
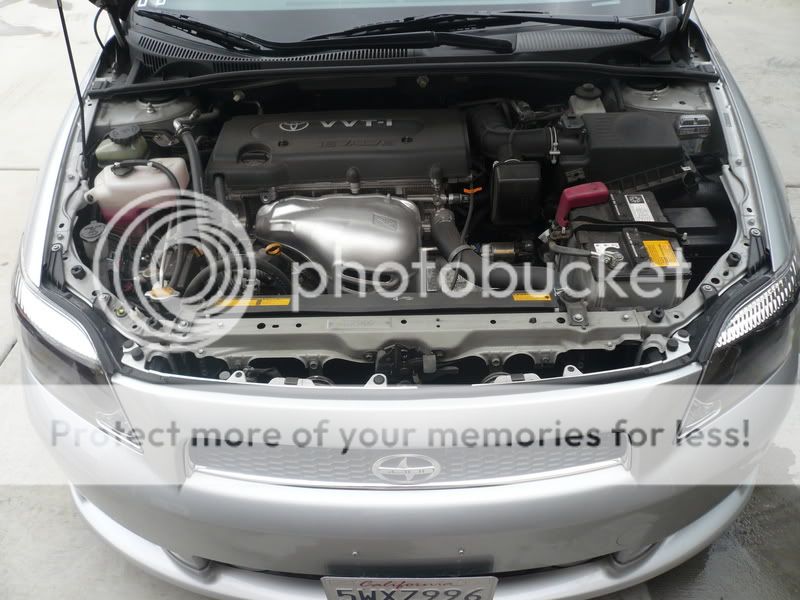
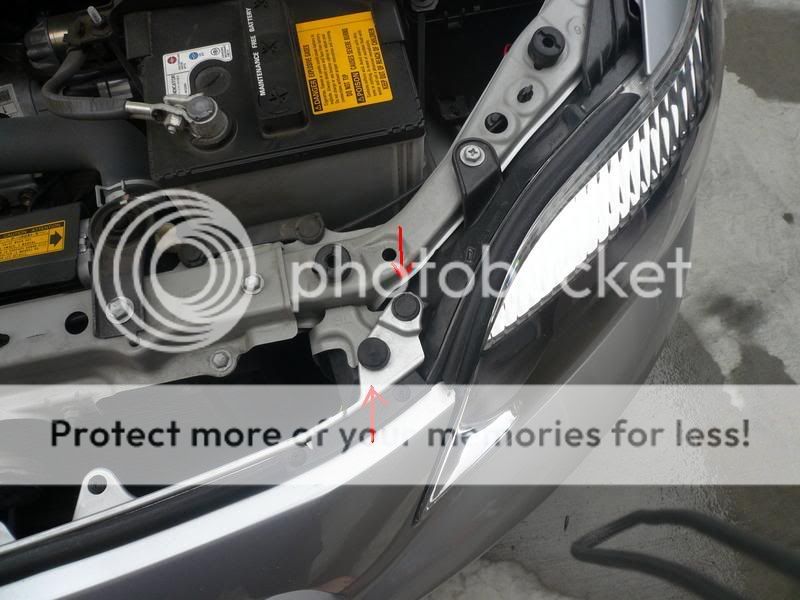
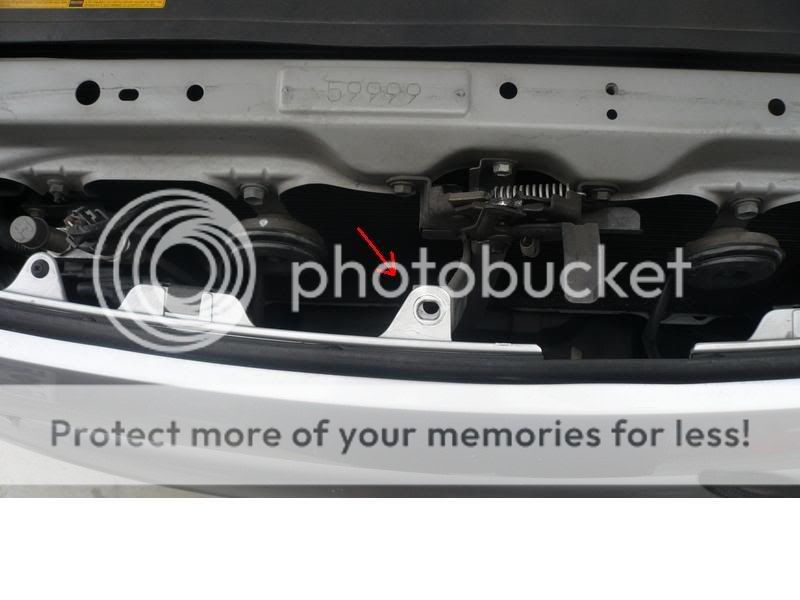
Now you can start to take out the headlights, the procedure is exactly the same for both sides. First disconnect all the bulb connections. I found it easier to leave the bulbs in the housing rather than pulling them all out and leaving them hanging. There are 3 bolts (10 mm) holding the headlights into place, two on top...
and one on the side...
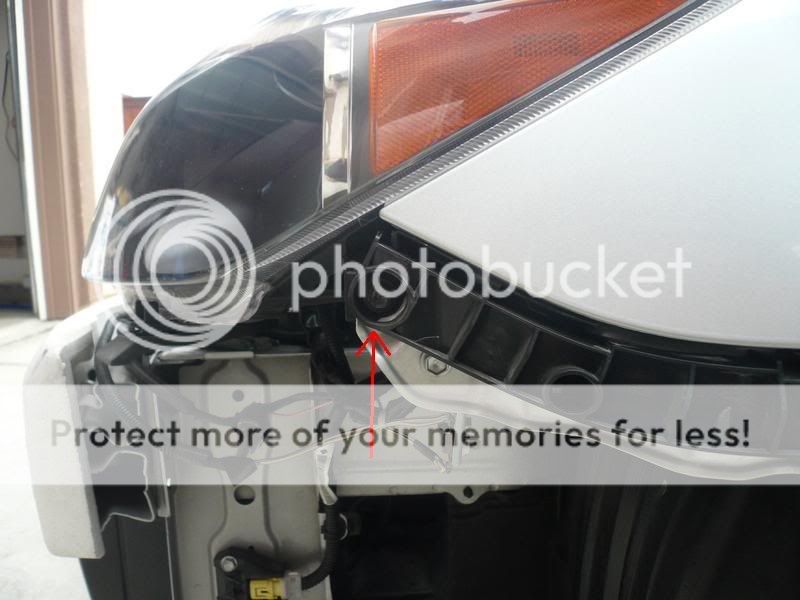
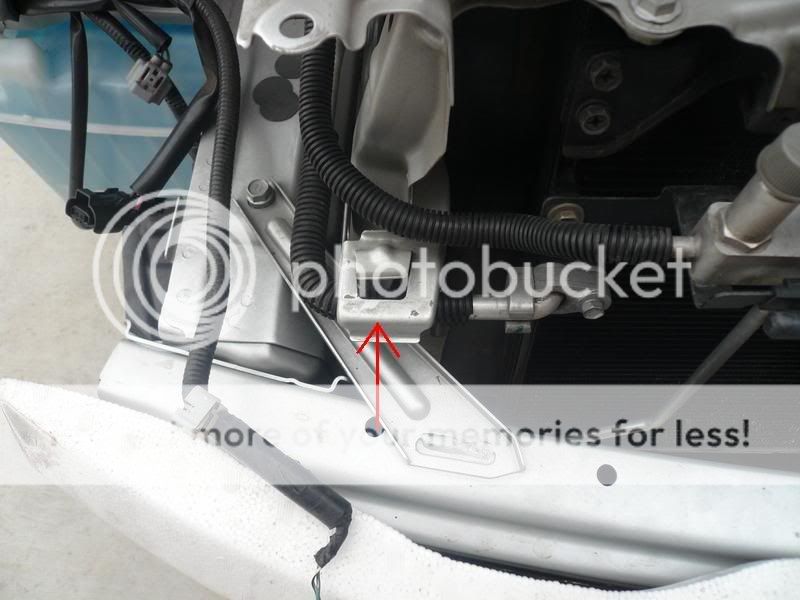
once these are out the headlight should slide right out. It might take a little force, this tab might have to be pried up a little bit...
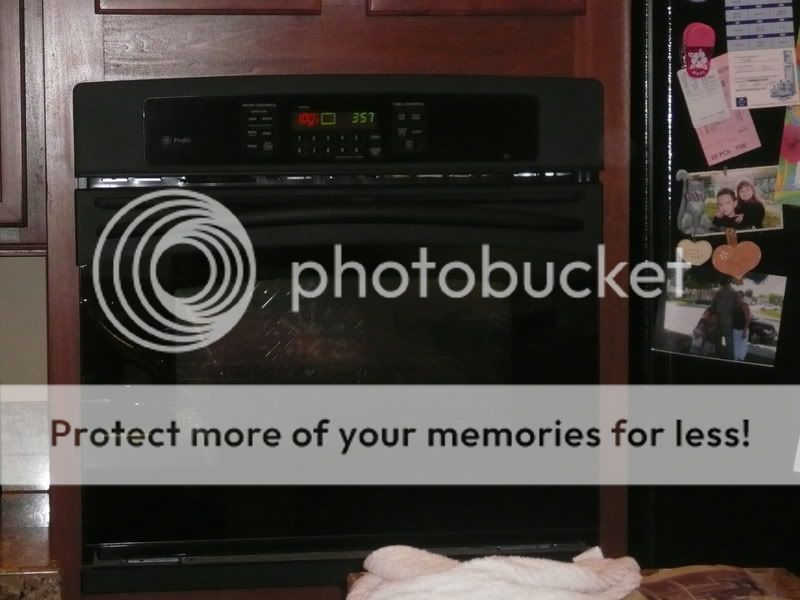
Once you've got both headlights out take them inside and preheat your oven to 225. DO NOT go any higher than 225! you will melt the housing! dont think that putting the housing in under broil will allow you to only have it in the oven for 5 minutes. It wont, the heat becomes too concentrated and will melt the housing instantly!
I chose to work one headlight at a time. First by removing all the bulbs from the housing then second, removing the 4 screws that hold the back to the lens and third removing this plastic bracket...
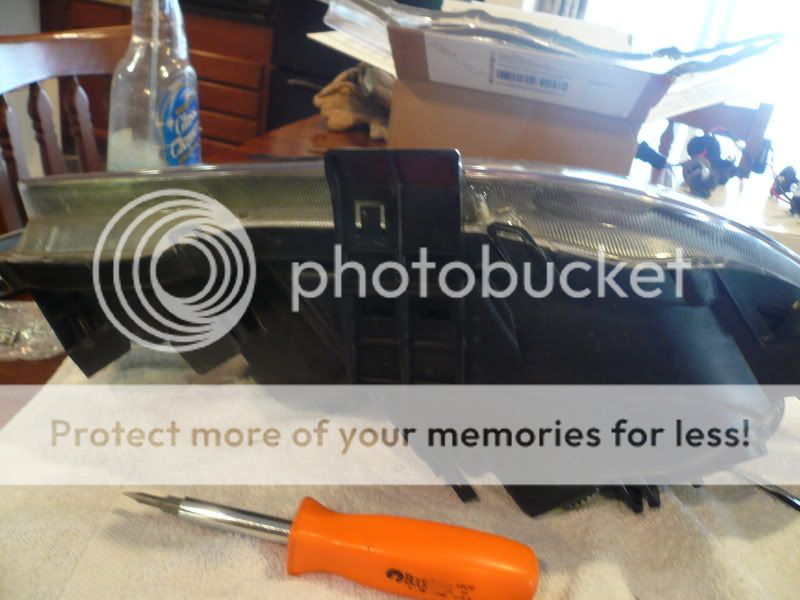
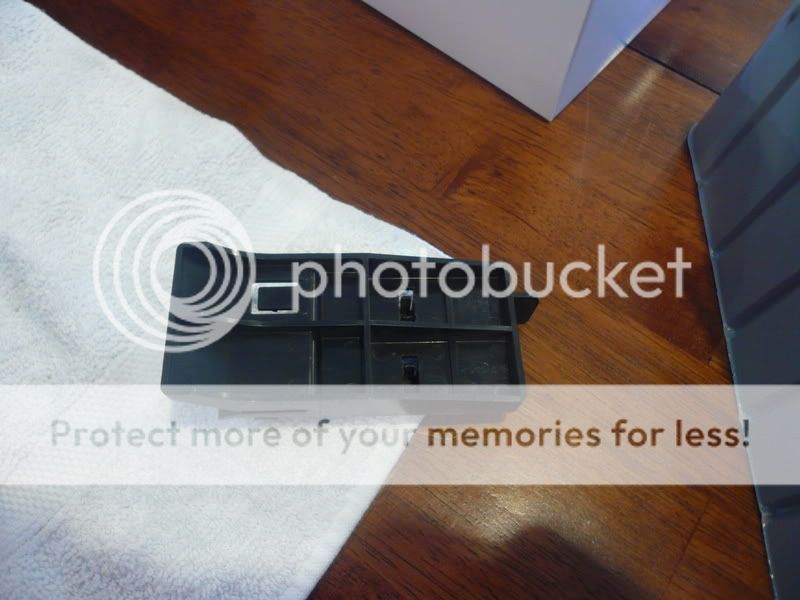
You'll need some small needle nose plyers to pinch the two fastners...
Once you've got all the screws out you can toss the housing in the oven. But before I made sure the lens was doubly clean. I hit it with some glass cleaner real quick.
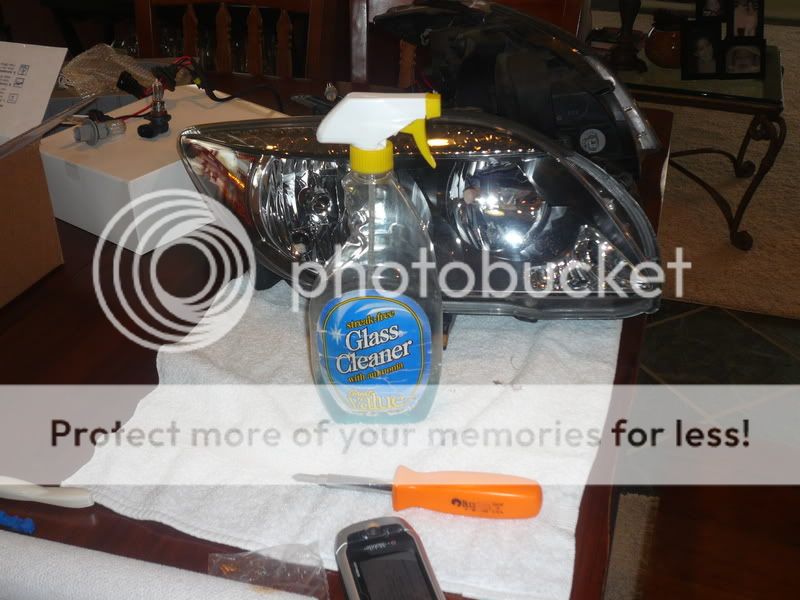
Then I put the housing on a cookie sheet. (I used a towel on the cookie sheet just to be sure nothing melted.) Put the housing in the oven for 15 minutes.
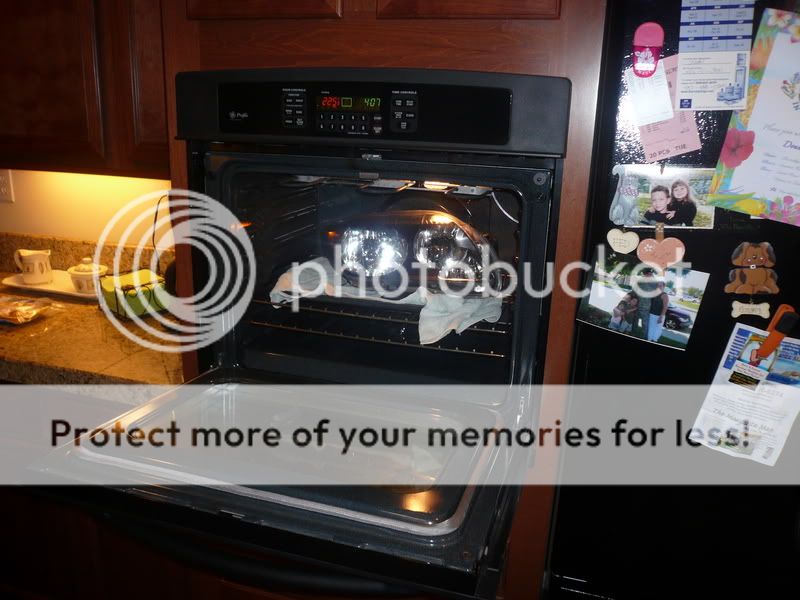
While the first one is baking, you can work on taking apart the second headlight. Take the first housing out of the oven after 15 min and toss the other one in. Dont forget the oven mits, its gonna be hot!
You need to work quick, but gently here. Use a flat head screwdriver the pry apart these tabs...
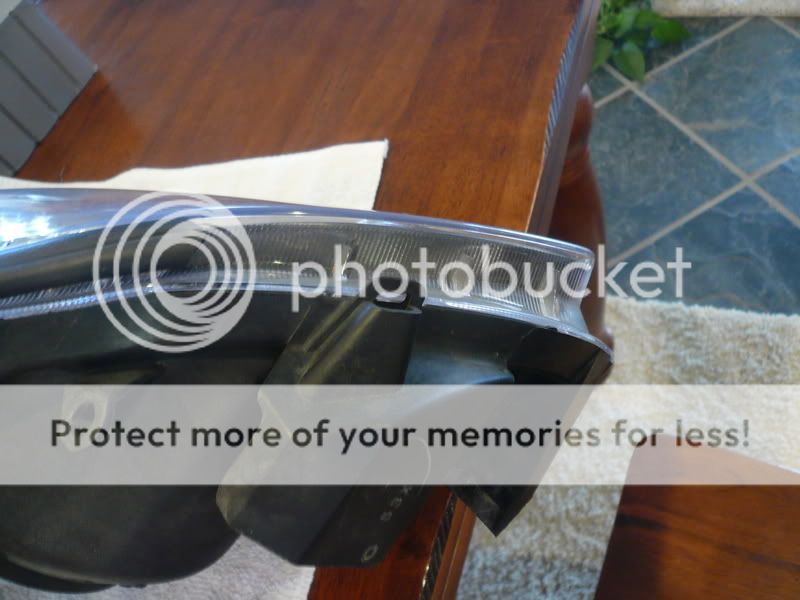
I found it easiest to start in the turn signal corner of the housing and pull apart from there. It will be tough to pull it apart, but just be sure you're not forcing anything, aka breaking any tabs. Be careful that none of the sealant gets on the lens, its pretty tough to get off.
Once the two halves are apart, you can set the back aside.
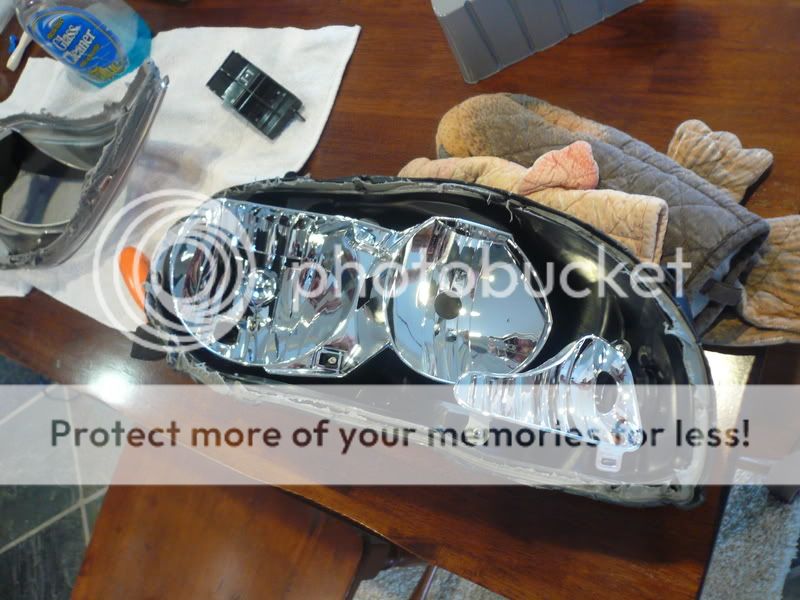
There are two screws holding the black cover to the lens...

take those out. The black cover is where the rings will be mounted.
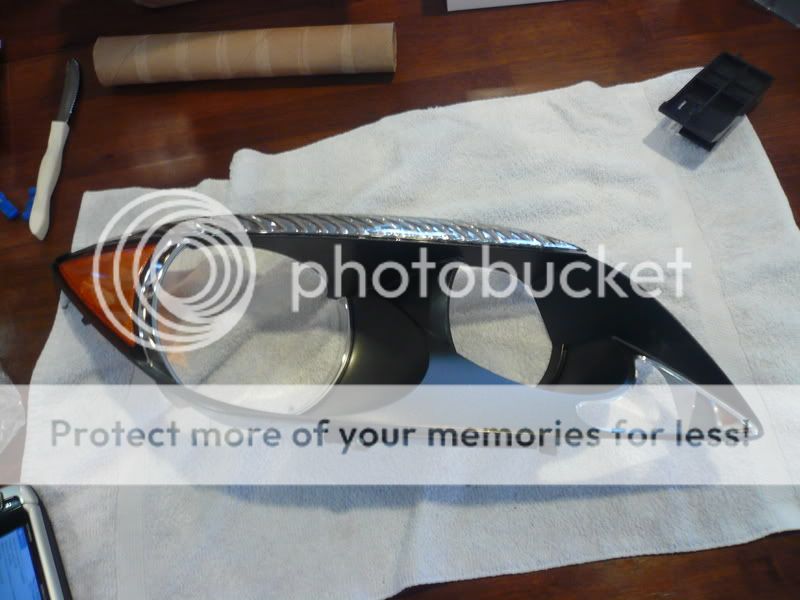
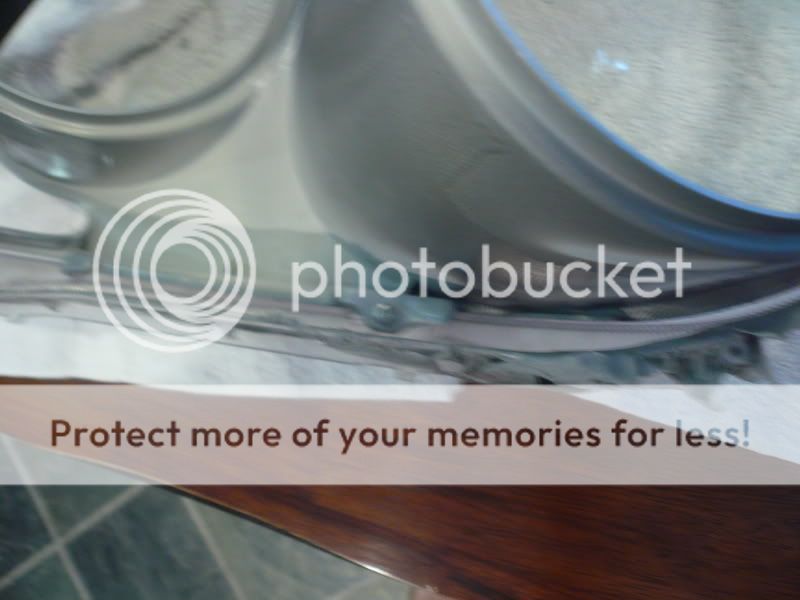
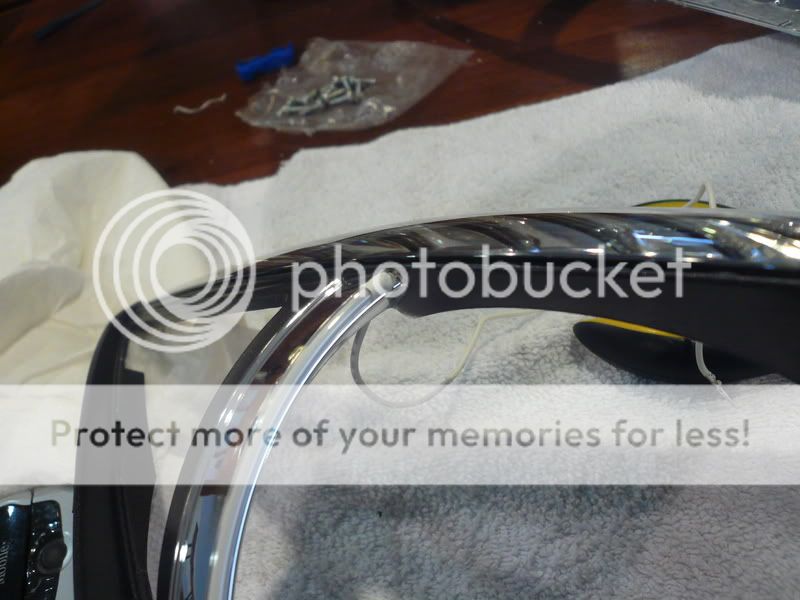
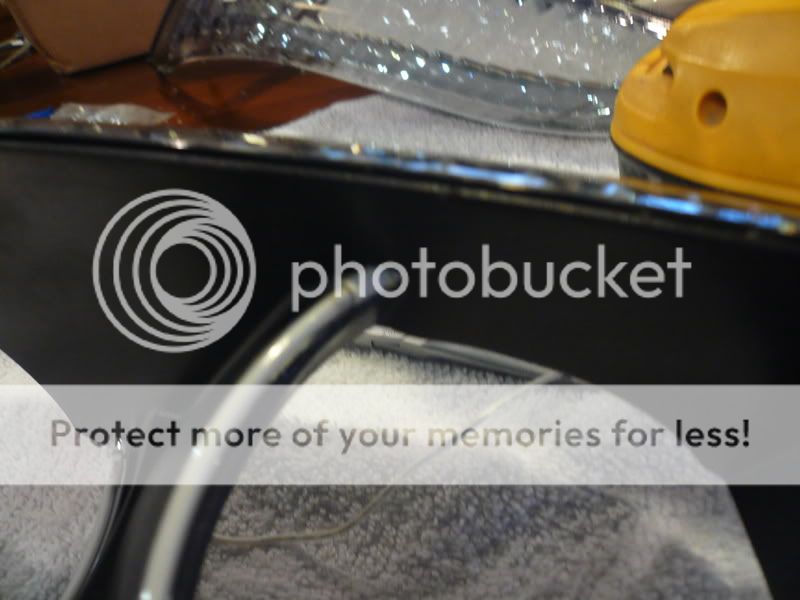
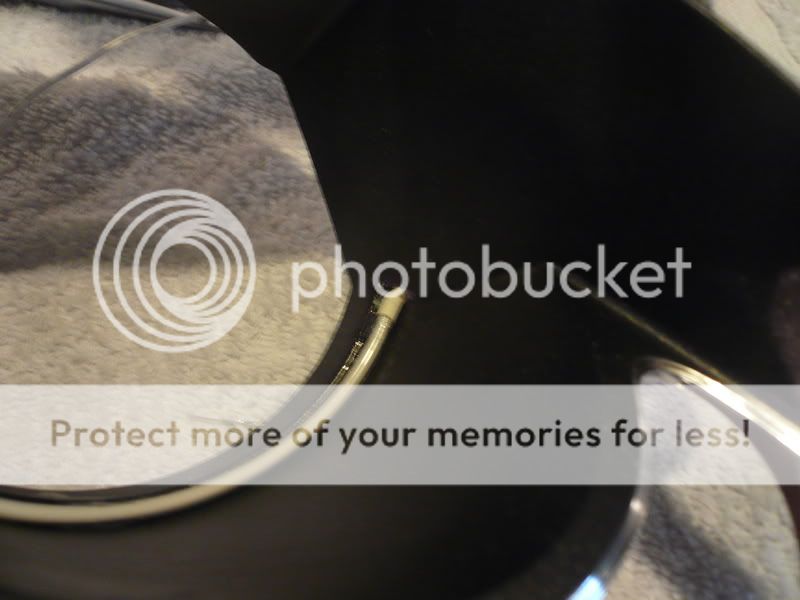
Now you'll need a 1/8" dill and a drill motor to drill holes to run the wires for the rings through. first you'll want to test fit the rings then mark where you'll need to drill... (the best way for you the drill the holes for the small ring is so the wires will stick straight up through the cover versus turning 90 degrees and coming straight out the back like the large ring'd wires do, you'll see in the pictures below...
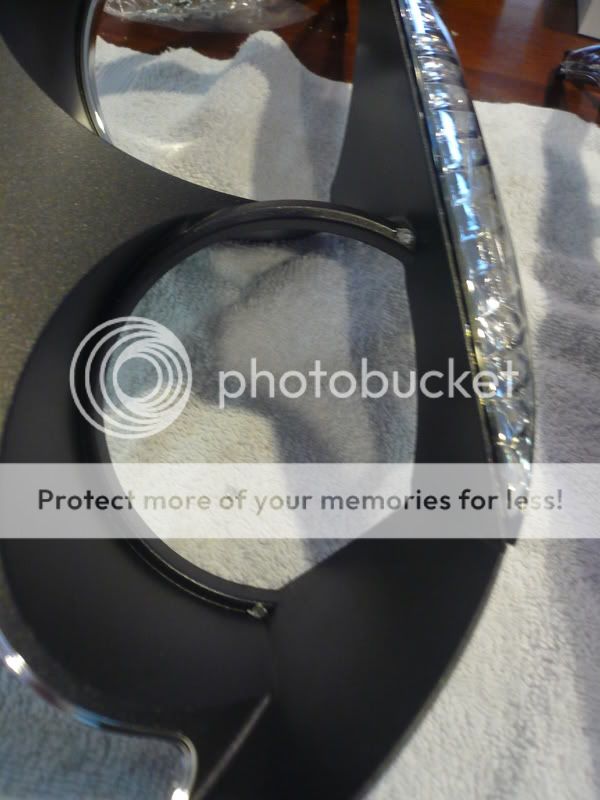
Once you've got the holes drilled you can mount the rings. This is where you'll want to take your time! DO NOT put pressure on the rings, even the slightest crack and the ring will be useless. I used clear silicone to hold the rings in place, it isnt as rigid as super glue or epoxy and wont yellow in the sun. (depending on where you drilled your holes for the wires, you may or may not have to use silicone near the ends of the rings. I had to use a small dab at the bottom of the ring. The ends of the ring at the top hold the ring sufficiently)
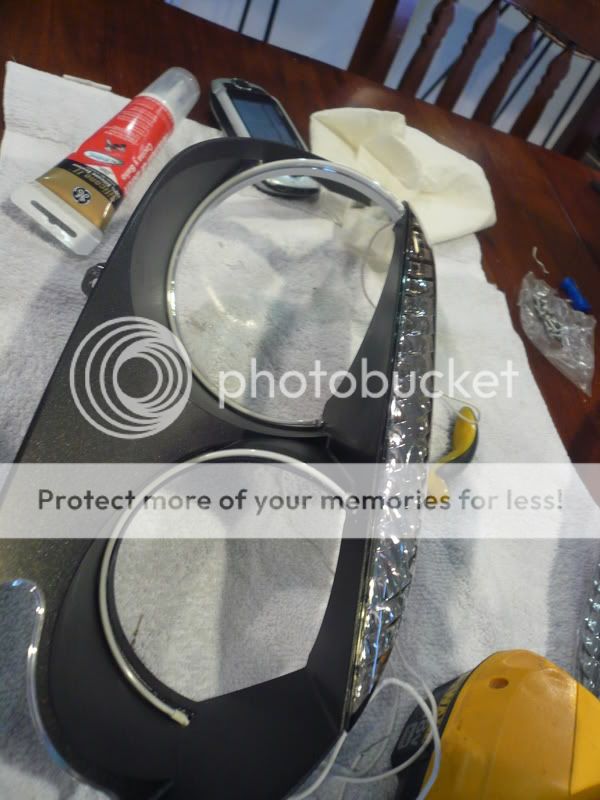
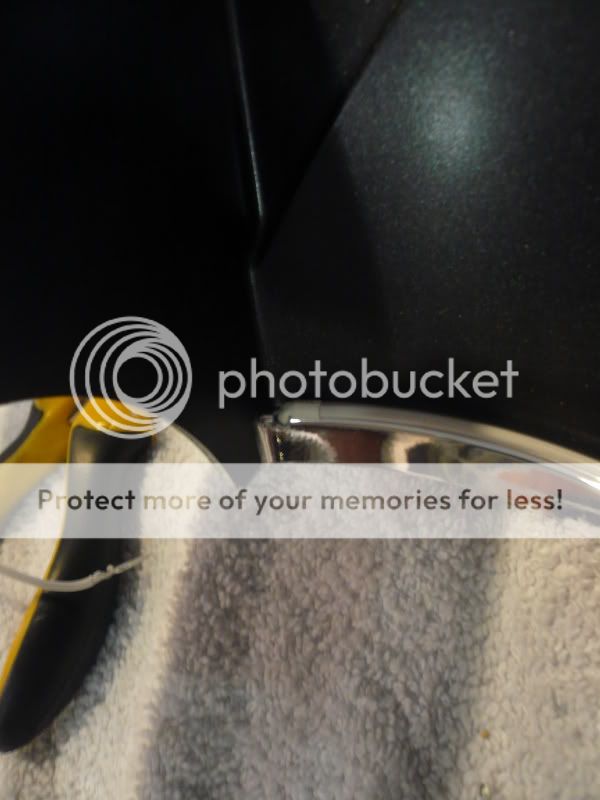
I put a small amount of silicone on the back side of the cover around the wires as well...
(edited 12/15/07)Sorry I dont have pics of this step but I've found it is best to mount the converter box on the inside of the headlight housing. There is a perfect spot right in between the high and low beams on the back half (black in color) of the headlight housing. It sits right along side the high beam housing. Not sure if this makes sense, but you should see where it is when you have the headlight apart.
Now you can put the cover back in the lens. And reattach using the same screws you took out.
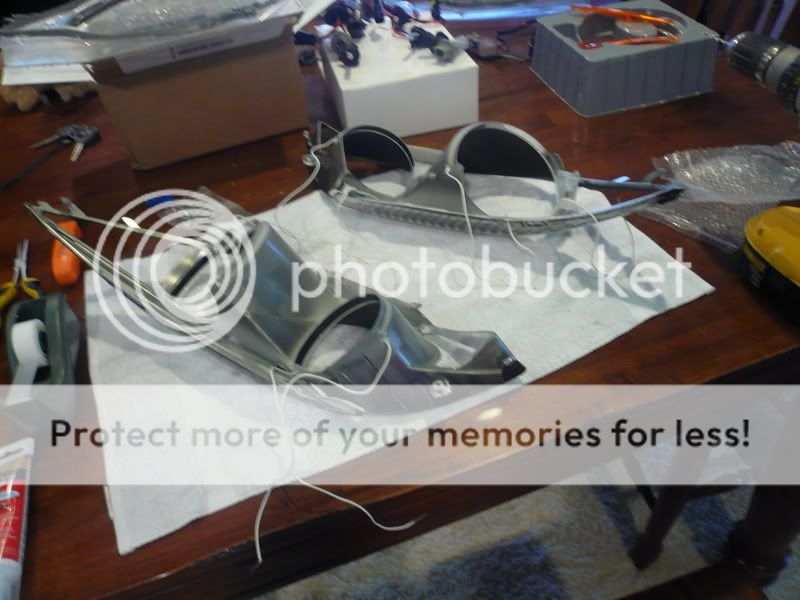
You'll need to drill holes in the headlight backing to run the wires through. the positioning on this is up to you. Just make sure you dont drill through a reflector or anything.
After you've got the holes drilled through the backing of the housing, put the two halves of the housing back together. Run the wires through the holes you drilled, and sandwich the pieces back together. Get as close as possible to actual fitment, then toss back in the oven again at 225 degrees for 15 min to soften the sealant. Once everything is warm and soft, pull the housing out of the oven and press the two halves together. Make sure all the tabs click into place, and put all four screws back in. You'll need to put silicone around the holes you drilled for the wires to make sure the headlight stays sealed. Now comes the wiring...
Wiring is another thing that i'll leave up to you, some choose to run it on a separate switch, some want to wire it to the running or "city" lights. I chose to wire to the running lights and have them replace the small bulb that sits at the bottom of the low beam housing. This is how I altered the stock harness...
Cut out the bulb holder

and wired in the ballast box...
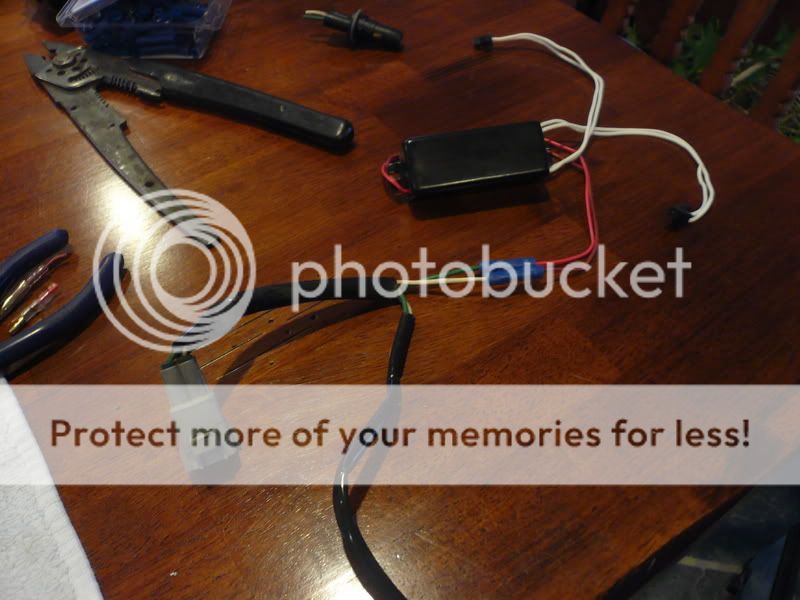
I'm pretty sure all the colors are the same, but I'm not making any guarantees. On mine the green wire was hot (+) and the white w/ black stripe wire was groung (-).
Here's some alternative wiring diagrams provided by DASKID. One is if you have an aftermarket alarm installed and the other is if you want to wire it to a switch...
I mounted the ballast box underneath the headlight with some double sided tape. There's a spot underneath the highbeam housing that fits perfectly. But you can mount it wherever you see fit.
**You may want to be safe and run a bead of silicone around the ballast box to make sure its completely sealed. And depending on how you've wired up the halos you might want to silicone the connections to be really safe.
Once everythings wired up, its just a matter of reversing the removal steps. Put all the bulbs back in, connect all harness connections, install headlights and put the bumper back on!
Here are the night pics finally! They still dont do the lights justice...
Just the angel eyes...

Far away shot with Angel eyes and 6k HID's

Close-up with Angel eyes on and 6k HID's

From start to finish (if i wouldnt have had any distracions, i.e. dinner, family etc..) I would say this took me about 3-4 hours to complete. Dont be in a rush though, patience is the key here!
But if you follow these directions, you should do just fine!
Ok, heres the run down on how to install a set of angel eyes, either from umnitza or oznium. This install requires that you bake your headlights, so if you're not comfortable with subjecting your headlights to 225 degrees for 15 minutes then I dont suggest this mod. Another thing, if you do decide to do this mod, work SLOWLY! These rings are very, very fragile! If you bend or stress them even the slightest little bit, they will snap! If it feels like the rings arent going to fit the way you're trying to put them in then STOP! REthink how you're trying to mount them, your patience will pay off.
Tools: You'll need a flathead and phillips head screwdriver, 10mm socket, needlenose pliers, 1/8" drill bit and drill motor, wire snips (dykes), wire stripper, and an oven that will fit a headlight. You'll also need some silicone caulking.
First: To get the headlights out, you have to first remove the entire front bumper facade. To do that there are a total of 11 bolts (10 mm) and 5 plastic push pins. There are 7 bolts (10 mm) along the bottom edge of the bumper, remove these. 5 of them are black and the other 2 are silver in color.
There is a bolt, like the black ones from underneath, on the edge where the bumper meets the fender well, remove it.
Once you've got that bolt out, pull the inner fender well back and inside you'll see another bolt, you've gotta take this one out too. Its easier to use a phillips head screw driver on this one rather than a socket or wrench.
After you've got all the bolts out from underneath and from the fender wells, move to underneath the hood. There are five plastic push pins you've got to take out. 2 on either side right next to the head light and one right in the center.
Use a flat head screwdriver to pop these up and pull them out. 2 of them have rubber tops on them and are a little harder to pull out, but use a little elbow grease and they'll come out. Once all the pins are out, pull the two upper corners of the bumper away from the fender on either side. The bumper should now slide out pretty easy. (if you have foglights, be sure to disconnect the wires to them.)
Now you can start to take out the headlights, the procedure is exactly the same for both sides. First disconnect all the bulb connections. I found it easier to leave the bulbs in the housing rather than pulling them all out and leaving them hanging. There are 3 bolts (10 mm) holding the headlights into place, two on top...
and one on the side...
once these are out the headlight should slide right out. It might take a little force, this tab might have to be pried up a little bit...
Once you've got both headlights out take them inside and preheat your oven to 225. DO NOT go any higher than 225! you will melt the housing! dont think that putting the housing in under broil will allow you to only have it in the oven for 5 minutes. It wont, the heat becomes too concentrated and will melt the housing instantly!
I chose to work one headlight at a time. First by removing all the bulbs from the housing then second, removing the 4 screws that hold the back to the lens and third removing this plastic bracket...
You'll need some small needle nose plyers to pinch the two fastners...
Once you've got all the screws out you can toss the housing in the oven. But before I made sure the lens was doubly clean. I hit it with some glass cleaner real quick.
Then I put the housing on a cookie sheet. (I used a towel on the cookie sheet just to be sure nothing melted.) Put the housing in the oven for 15 minutes.
While the first one is baking, you can work on taking apart the second headlight. Take the first housing out of the oven after 15 min and toss the other one in. Dont forget the oven mits, its gonna be hot!
You need to work quick, but gently here. Use a flat head screwdriver the pry apart these tabs...
I found it easiest to start in the turn signal corner of the housing and pull apart from there. It will be tough to pull it apart, but just be sure you're not forcing anything, aka breaking any tabs. Be careful that none of the sealant gets on the lens, its pretty tough to get off.
Once the two halves are apart, you can set the back aside.
There are two screws holding the black cover to the lens...
take those out. The black cover is where the rings will be mounted.
Now you'll need a 1/8" dill and a drill motor to drill holes to run the wires for the rings through. first you'll want to test fit the rings then mark where you'll need to drill... (the best way for you the drill the holes for the small ring is so the wires will stick straight up through the cover versus turning 90 degrees and coming straight out the back like the large ring'd wires do, you'll see in the pictures below...
Once you've got the holes drilled you can mount the rings. This is where you'll want to take your time! DO NOT put pressure on the rings, even the slightest crack and the ring will be useless. I used clear silicone to hold the rings in place, it isnt as rigid as super glue or epoxy and wont yellow in the sun. (depending on where you drilled your holes for the wires, you may or may not have to use silicone near the ends of the rings. I had to use a small dab at the bottom of the ring. The ends of the ring at the top hold the ring sufficiently)
I put a small amount of silicone on the back side of the cover around the wires as well...
(edited 12/15/07)Sorry I dont have pics of this step but I've found it is best to mount the converter box on the inside of the headlight housing. There is a perfect spot right in between the high and low beams on the back half (black in color) of the headlight housing. It sits right along side the high beam housing. Not sure if this makes sense, but you should see where it is when you have the headlight apart.
Now you can put the cover back in the lens. And reattach using the same screws you took out.
You'll need to drill holes in the headlight backing to run the wires through. the positioning on this is up to you. Just make sure you dont drill through a reflector or anything.
After you've got the holes drilled through the backing of the housing, put the two halves of the housing back together. Run the wires through the holes you drilled, and sandwich the pieces back together. Get as close as possible to actual fitment, then toss back in the oven again at 225 degrees for 15 min to soften the sealant. Once everything is warm and soft, pull the housing out of the oven and press the two halves together. Make sure all the tabs click into place, and put all four screws back in. You'll need to put silicone around the holes you drilled for the wires to make sure the headlight stays sealed. Now comes the wiring...
Wiring is another thing that i'll leave up to you, some choose to run it on a separate switch, some want to wire it to the running or "city" lights. I chose to wire to the running lights and have them replace the small bulb that sits at the bottom of the low beam housing. This is how I altered the stock harness...
Cut out the bulb holder
and wired in the ballast box...
I'm pretty sure all the colors are the same, but I'm not making any guarantees. On mine the green wire was hot (+) and the white w/ black stripe wire was groung (-).
Here's some alternative wiring diagrams provided by DASKID. One is if you have an aftermarket alarm installed and the other is if you want to wire it to a switch...
Originally Posted by Daskid
Disclaimer:
Okay. This requires logic and keen observation.
Angel Eye Wiring
You'll need:
Two automotive relays from any electronic or automotive store.
Wires
Electrical Tape
20A Fuse
Fuse Holder
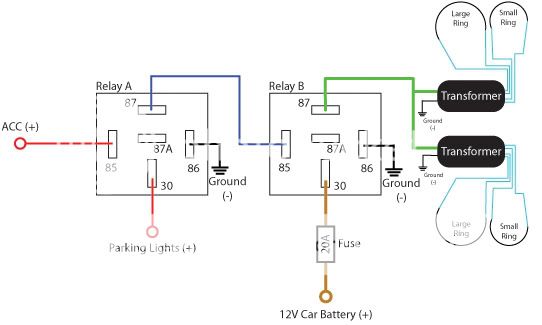
Remember that the RED and BROWN wires are positive (+) and the BLACK wires are negative (-).
The BLUE and GREEN wires are positive (+) too but it goes in between components.
The CYAN wires are the WHITE wires you'll see dangling from the transformers with a terminal at the end. Just connect the angel eyes to them.
-------------------------------------------------------------
What happens to this circuit is:
The angle eyes won't turn on when only the parking lights are on. This prevents the angel eyes from turning on and off together with any aftermarket alarm. They will only turn on when you have your key on the ACC switch and when the parking lights are on. Thus, making the angel eyes turn on when you're keys are inserted to ACC. I hope that made sense...
-------------------------------------------------------------
Angel Eye Wiring with Switch
You can use this circuit if you wish to turn off your angel eyes whenever you want. Still has the same principle but a Toggle Switch is inserted inline with the ACC (+) wire.
You'll need:
The same items as the circuit above. Just buy a toggle switch.

-------------------------------------------------------------
PM me if you have questions. I hope this helps.
Okay. This requires logic and keen observation.
Angel Eye Wiring
You'll need:
Two automotive relays from any electronic or automotive store.
Wires
Electrical Tape
20A Fuse
Fuse Holder
Remember that the RED and BROWN wires are positive (+) and the BLACK wires are negative (-).
The BLUE and GREEN wires are positive (+) too but it goes in between components.
The CYAN wires are the WHITE wires you'll see dangling from the transformers with a terminal at the end. Just connect the angel eyes to them.
-------------------------------------------------------------
What happens to this circuit is:
The angle eyes won't turn on when only the parking lights are on. This prevents the angel eyes from turning on and off together with any aftermarket alarm. They will only turn on when you have your key on the ACC switch and when the parking lights are on. Thus, making the angel eyes turn on when you're keys are inserted to ACC. I hope that made sense...
-------------------------------------------------------------
Angel Eye Wiring with Switch
You can use this circuit if you wish to turn off your angel eyes whenever you want. Still has the same principle but a Toggle Switch is inserted inline with the ACC (+) wire.
You'll need:
The same items as the circuit above. Just buy a toggle switch.
-------------------------------------------------------------
PM me if you have questions. I hope this helps.
**You may want to be safe and run a bead of silicone around the ballast box to make sure its completely sealed. And depending on how you've wired up the halos you might want to silicone the connections to be really safe.
Once everythings wired up, its just a matter of reversing the removal steps. Put all the bulbs back in, connect all harness connections, install headlights and put the bumper back on!
Here are the night pics finally! They still dont do the lights justice...
Just the angel eyes...
Far away shot with Angel eyes and 6k HID's
Close-up with Angel eyes on and 6k HID's
From start to finish (if i wouldnt have had any distracions, i.e. dinner, family etc..) I would say this took me about 3-4 hours to complete. Dont be in a rush though, patience is the key here!


NOTE!!!
MAKE SURE TO RUN SILICONE AROUND THE POWER INVERTER FOR THE ANGEL EYES (the black box wiht the white, red and brown wires coming off it)!!
THIS IS VERY IMPORTANT. because if water gets in there thats it, the angel eyes wont work, and you wil lhave to get new ones. its a pain in the **** to deal with that. and make sure to cover all connection with either black silicone, heat shrink, or electrical tape to ensure that they are all waterproof.
also to prevent any form of condensation i ran a bead of black silicone along the edge of the headlights (outside) after i sealed them back up. no problems yet and i did it a few days ago, washed my car and it poured :D
btw this is an awesome DIY just wanted to add a couple points that i came across on my way

MAKE SURE TO RUN SILICONE AROUND THE POWER INVERTER FOR THE ANGEL EYES (the black box wiht the white, red and brown wires coming off it)!!
THIS IS VERY IMPORTANT. because if water gets in there thats it, the angel eyes wont work, and you wil lhave to get new ones. its a pain in the **** to deal with that. and make sure to cover all connection with either black silicone, heat shrink, or electrical tape to ensure that they are all waterproof.
also to prevent any form of condensation i ran a bead of black silicone along the edge of the headlights (outside) after i sealed them back up. no problems yet and i did it a few days ago, washed my car and it poured :D
btw this is an awesome DIY
Thread Starter
Senior Member
SL Member
Joined: Oct 2006
Posts: 1,666
From: Lake Elsinore, CA
I got my halos from umnitza, there ballast box is pretty well sealed. But yeah, if the box from oznium doesnt seem to be sealed then definately run some silicone around it!

Senior Member
SL Member
Joined: Feb 2006
Posts: 427
From: Marysville, WA
very nice and informative DIY
same things I would point out after having done CCFL on my car (before I have my anzo's) and my brothers IS300..
- be VERY careful handling them
- seal up ballast
- test run before putting headlights together (see if it works)
- seal up headlights with silicon (no fogging)
- patience is key
and also great DIY for ppl learning how to bake headlights.. while its open.. paint them eyebrow and maybe smoke/clear out them sidemarkers


Thread Starter
Senior Member
SL Member
Joined: Oct 2006
Posts: 1,666
From: Lake Elsinore, CA
yes i know about their customer service, haha! trust me, i've had the horrible experience of doing business with them! it took 20 days for these to get to my house! thats nearly 3 weeks to get from the bay area, ca to so cal.
anyway, yes i like HIL. Hence the name...
anyway, yes i like HIL. Hence the name...
haha yea, i thought so HIL is sick. i saw them live a few months back... maybe thanksgiving time... w/e when ever they were in NY with senses fail lol. but im adding you on mspace if ya dont mind 

Thread Starter
Senior Member
SL Member
Joined: Oct 2006
Posts: 1,666
From: Lake Elsinore, CA
I might be able to, out of school for the summer so I've got free time! but its not too difficult really. Just be VERY gentle and VERY patient. i cant stress the gentleness enough!