Baking taillights?!?
 09-24-2007, 10:30 PM
#1
Senior Member
SL Member
Thread Starter

Join Date: Feb 2006
Location: Blue Springs, MO
Posts: 2,184
Is it possible to bake taillights? I was looking to do this to maybe paint the inside of the tail light... does anyone have pictures of this???
How many people have baked the headlights and painting the brow?? I saw it done at a car show yesterday and I like it a lot, I think it is a lot better alternative than an overlay because I don't want any bubbles in the overlay or don't want it to get chipped, etc.
If anyone has pictures of any of these done feel free to post em up!
 09-24-2007, 10:34 PM
#2
Senior Member
SL Member

Join Date: Mar 2007
Location: Los Angeles, CA
Posts: 3,585
Baking is a little bit sketchy. I baked my headlights and I thought everything was fine, but after it started raining, I noticed water was somehow getting into one of them. I think it's just luck if you reseal them correctly because I did one right and one wrong it seems. And once the water gets in, it doesn't leave until you bake it open again. Gonna have to do that sometime this week.
09-24-2007, 10:37 PM
#3
Senior Member
Fail, INC
Club One
SL Member

Join Date: May 2005
Location: Team Sharpie
Posts: 10,213
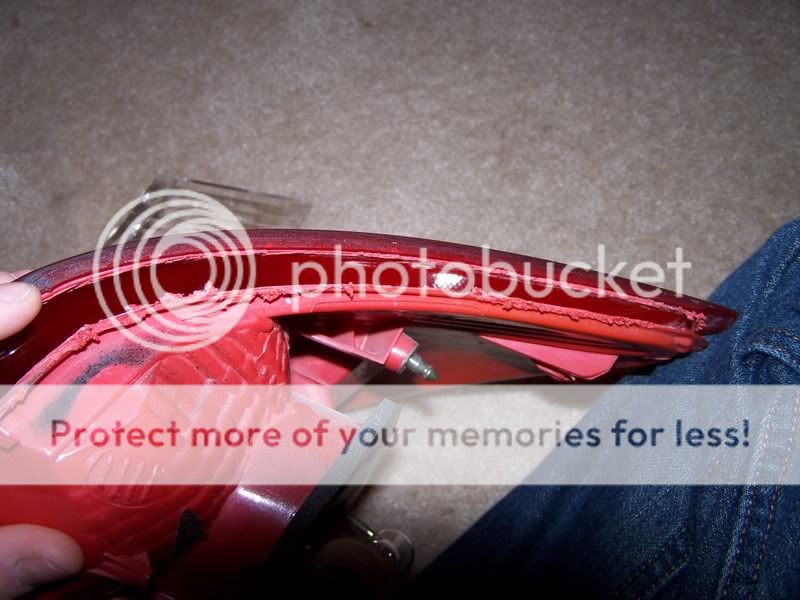
Baking the tail lights would be a bad idea, they will most likely be ruined by the heat. If you wanna get inside the tails, you need to cut them open.
Baking the head lights is easier than it sounds like it would be. Mine sealed up without any issues.
Baking the head lights is easier than it sounds like it would be. Mine sealed up without any issues.
09-24-2007, 10:48 PM
#5
Senior Member
Fail, INC
Club One
SL Member
Join Date: May 2005
Location: Team Sharpie
Posts: 10,213
You can see in these pics what I did to the side marker:

And here you can see that the "eye brow" has been painted:

As for the tail lights, I started this project a while ago and have yet to finish it:
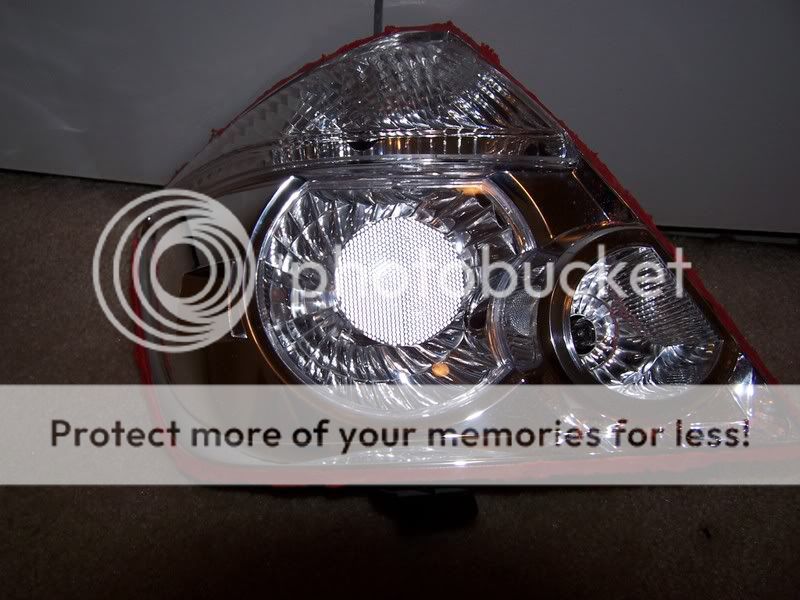


This is where you cut the tail lights apart:
There is a great write up on head light baking in the tech articles. I followed that guide when I did mine.
And here you can see that the "eye brow" has been painted:
As for the tail lights, I started this project a while ago and have yet to finish it:
This is where you cut the tail lights apart:
There is a great write up on head light baking in the tech articles. I followed that guide when I did mine.
09-24-2007, 10:52 PM
#6
Senior Member
Fail, INC
Club One
SL Member
Join Date: May 2005
Location: Team Sharpie
Posts: 10,213
Originally Posted by RodC
Is there a technique to resealing them correctly? I did both of mine in the same way, but one worked and one failed.
I put the pieces back together and then stuck the assembly in the oven for a few minutes and then squeezed the parts together. Then back into the oven, and then squeezed again. I also waited to tighten the screws down 'till the sealant was nice and hot.
09-24-2007, 10:56 PM
#7
Senior Member
SL Member
Join Date: Mar 2007
Location: Los Angeles, CA
Posts: 3,585
Hmm, so it sounds like you did two rounds of heat and squeeze. When I did mine, I just placed them together cold, put them in the oven, then pressed them together when they were hot, and that was it. I felt like the two parts were not as close to each other as when I started.
09-25-2007, 02:34 AM
#12
Senior Member
Fail, INC
Club One
SL Member
Join Date: May 2005
Location: Team Sharpie
Posts: 10,213
I used Duplicolor engine enamel and spray tint. The headlights probably don't get hot enough to require that paint, but it's what I had on hand.
I believe there are few members on SL that have color matched their head lights with factory paint without any problems.
I believe there are few members on SL that have color matched their head lights with factory paint without any problems.
09-25-2007, 02:57 AM
#14
Senior Member
Fail, INC
Club One
SL Member
Join Date: May 2005
Location: Team Sharpie
Posts: 10,213
I don't know if Sparks has paint, and I think you can only get those little touch up paint pens at the dealership. If you're going to DIY, this site sells rattle cans of factory paint. Or if you're having a shop do the work they will take care of obtaining factory paint for you.
09-25-2007, 01:10 PM
#16
Senior Member
SL Member
Join Date: Sep 2006
Location: Hammond, Louisiana
Posts: 261
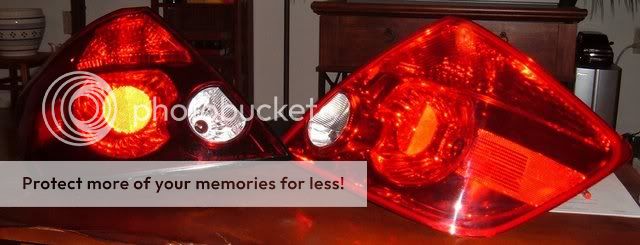
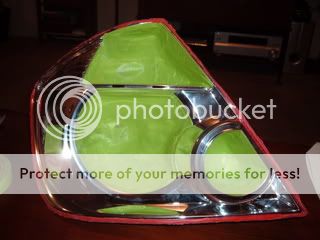
I did my taillights but like captainlaziness said.... you have to cut them open. There is no adhesive sealant around them so baking doesn't do any good.
I taped off the necessary reflective parts and painted the rest black. Then put the stock red lens back on. It's extremely subtle but for people that know what stock looks like, you can tell.
taped off:
painted:
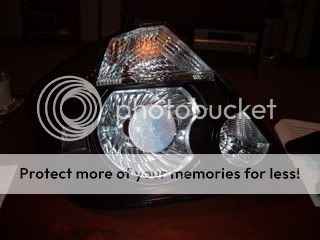
sealed:
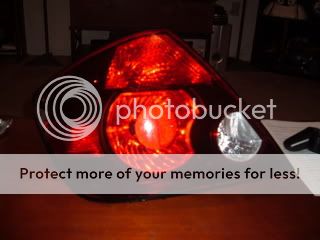
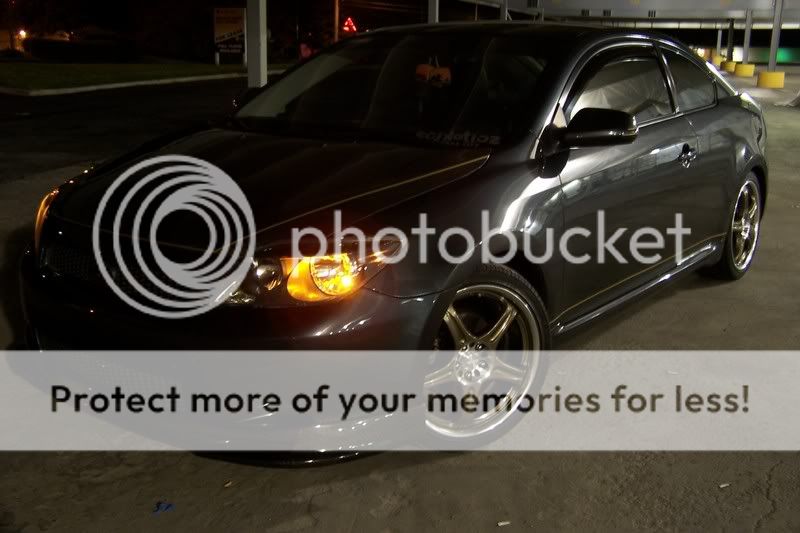
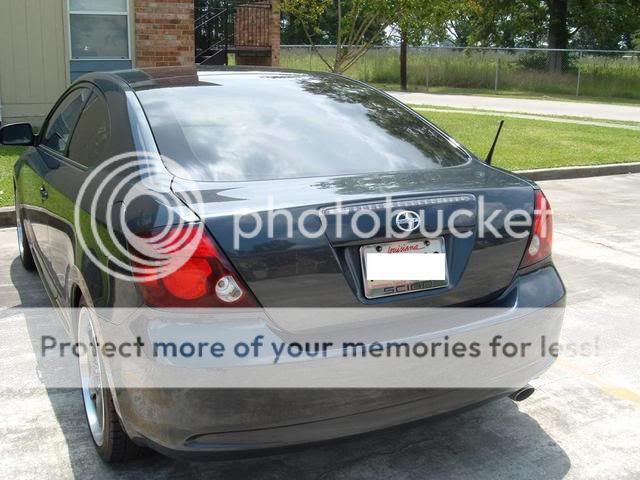
on the car:
I taped off the necessary reflective parts and painted the rest black. Then put the stock red lens back on. It's extremely subtle but for people that know what stock looks like, you can tell.
taped off:
painted:
sealed:
on the car:

 09-25-2007, 10:25 PM
#18
Senior Member
SL Member
Thread Starter
Join Date: Feb 2006
Location: Blue Springs, MO
Posts: 2,184
I think they look awesome rhino! I definately want to do that when I have some time... do you have any stock pictures I could compare it to? I think they look very different!