
Customized JLevi Headlights_customized_with cut-off fix also
 03-01-2007, 03:59 AM
#41
Senior Member
SL Member

Join Date: Mar 2006
Location: Carmel, Indiana
Posts: 311
I want to do this to the Jlevi's that I may get. Kinda worried though, I'm NO good at wiring and electrical.
ALSO, does anyone know if the eyebrow can be replaced? The set I'm looking at has an amber eyebrow, but I'd like the clear one like ndo54.
ALSO, does anyone know if the eyebrow can be replaced? The set I'm looking at has an amber eyebrow, but I'd like the clear one like ndo54.
 03-04-2007, 11:08 PM
#44
Member
SL Member
Thread Starter

Join Date: Aug 2006
Location: Omaha, NE
Posts: 54
I ordered the round CCFL rings from zipzoomfly.com.
The turn signal uses the same stock OEM bulb that came with the car, no changes.
I never thought of using CCFL for the the eyebrow also, but that sounds like a good idea . you can prolly get a 6inch ccfl tube in there.
The turn signal uses the same stock OEM bulb that came with the car, no changes.
I never thought of using CCFL for the the eyebrow also, but that sounds like a good idea
. you can prolly get a 6inch ccfl tube in there.


 03-06-2007, 02:13 AM
#48
Member
SL Member
Thread Starter
Join Date: Aug 2006
Location: Omaha, NE
Posts: 54
Hey Zoso,
The round ccfl (80mm) tubes fit perfectly into the JLevi halos, but they are too small for stock headlights. Technically, if you put them far enough into the reflector dome, they will fit, but it would just look weird. They do have a 120mm round ccfl tube that may fit the stock headlights, but im not sure how big the stock reflectors are.
The round ccfl (80mm) tubes fit perfectly into the JLevi halos, but they are too small for stock headlights. Technically, if you put them far enough into the reflector dome, they will fit, but it would just look weird. They do have a 120mm round ccfl tube that may fit the stock headlights, but im not sure how big the stock reflectors are.
 03-20-2007, 03:35 AM
#51
Member
SL Member
Thread Starter
Join Date: Aug 2006
Location: Omaha, NE
Posts: 54
hey there lilroma,
I am assuming you are asking about the CCFL rings. The ones i got were about 5 bucks a piece. so i spent about 20 dollars shipped for 4 of them. You can find them from about 6-20 dollars a piece for 80mm CCFL rings. I have noticed that they have been in short supply lately though.
I am assuming you are asking about the CCFL rings. The ones i got were about 5 bucks a piece. so i spent about 20 dollars shipped for 4 of them. You can find them from about 6-20 dollars a piece for 80mm CCFL rings. I have noticed that they have been in short supply lately though.
03-22-2007, 12:08 PM
#52
Senior Member
SL Member

Join Date: Jun 2006
Location: Winter Garden, FL ( Orl)
Posts: 258
i have 4 of those rings brand new on the package for sale... i decided to sell my headlights and the person is not gointo do this so i spent my money for nothing.... they are brand new in the package and still are in the ups box... i only tore the box open to make sure they were in there... the color is Blue...( uv blue) i paid 8 sumthing for the rings + shipping so if anybody needs them shoot me some offers
05-06-2007, 07:17 AM
#53
Member
SL Member

Join Date: Apr 2006
Posts: 99
just wanted to check on your cutoff adjust retro? if you have done it could you put up some pics. i retroed these headlights with HID's and they put good amount of light down the road but that steep flare really ____es people off on the freeway, and its screaming "pull me over" for having a flare at all on the left. i light up the sides of buildings even after adjusting them. i would be so satisfied if the cutoff could be fixed.
05-08-2007, 03:14 AM
#54
Member
SL Member
Thread Starter
Join Date: Aug 2006
Location: Omaha, NE
Posts: 54
Hey there,
I did the mods, but had to readjust them like 3 times, cuz the cutoff wasnt totally correct. First off, let me say that the headlights themselves were manufactured wrong. you get 2 passenger side cutoffs, oddly enough. Thats why you see the driver's side one so messed up. The headlights also dont mount onto the car perfectly after you bake them up (thats what i am assuming because i never put the lights on before i baked them up). So this adds to the oddness of the cutoff for the driver's side. When i have a bit of time, i will post up some pics of the cut-off fix, but im taking classes over the summer also, so time is hard to come by.
I did the mods, but had to readjust them like 3 times, cuz the cutoff wasnt totally correct. First off, let me say that the headlights themselves were manufactured wrong. you get 2 passenger side cutoffs, oddly enough. Thats why you see the driver's side one so messed up. The headlights also dont mount onto the car perfectly after you bake them up (thats what i am assuming because i never put the lights on before i baked them up). So this adds to the oddness of the cutoff for the driver's side. When i have a bit of time, i will post up some pics of the cut-off fix, but im taking classes over the summer also, so time is hard to come by.

 05-10-2007, 03:54 AM
#57
Member
SL Member
Thread Starter
Join Date: Aug 2006
Location: Omaha, NE
Posts: 54
Well, my headlights are still apart, i just need to bake them together again and then install (havent done yet, dont have the time...sigh). Taking a summer class to get my MBA, so i dont have time  . Good news is, the class ends at the end of June, so the wait isnt too long .
.
05-19-2007, 09:14 PM
#59
Member
SL Member
Thread Starter
Join Date: Aug 2006
Location: Omaha, NE
Posts: 54
Here are the cut-off fix instructions:
Bake up and open like normal. That process can be found on a previous page of this post.
Unscrew the screws pointed to by the white arrows to remove the lens housing. The screws dont come out, they just start pushing the housing outwards.
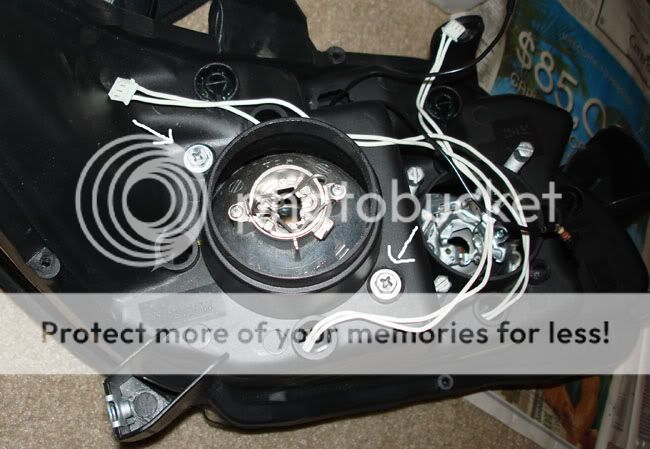
Remove housing:

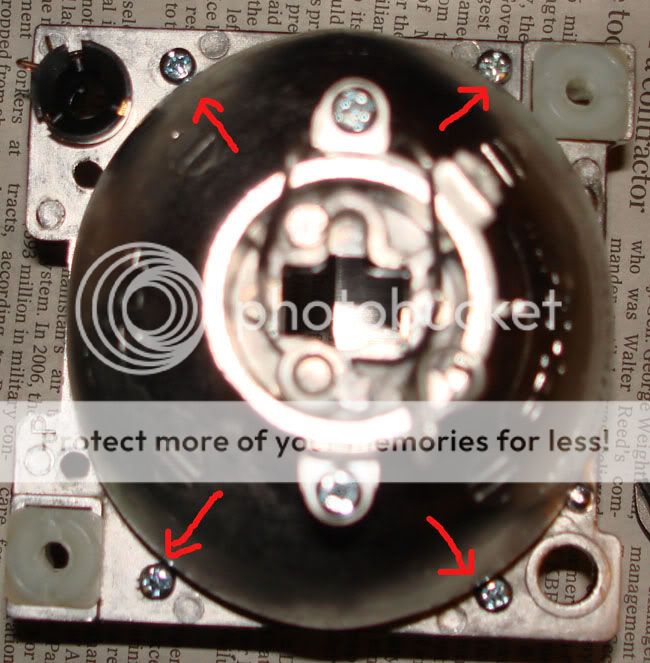
Unscrew 4 screws pointed to by red arrows to remove the back of the lens housing to get to the cut-off plate.
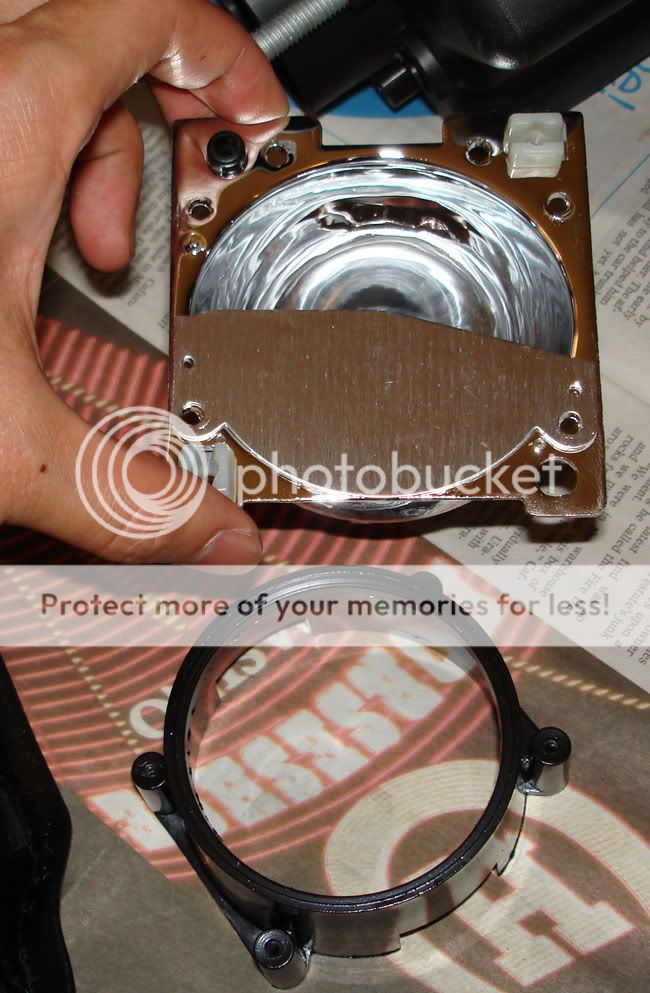
Here is a picture of the cut-off plate and the bracket it attaches to after you remove the back of the lens housing. I removed the project lens, but you dont need to do so to fix the cut-off.
Remove the cut-off plate and trace it on some metal stuff you have laying around. Dont forget to mark where the holes for the screws will go.( I went to Menards and bought some ventilation duct material)
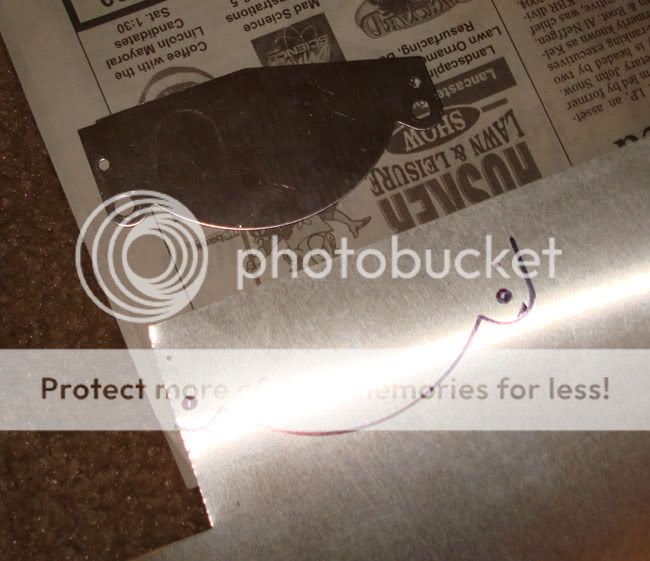
Cut out the tracing and make the holes where the screws will go back through.
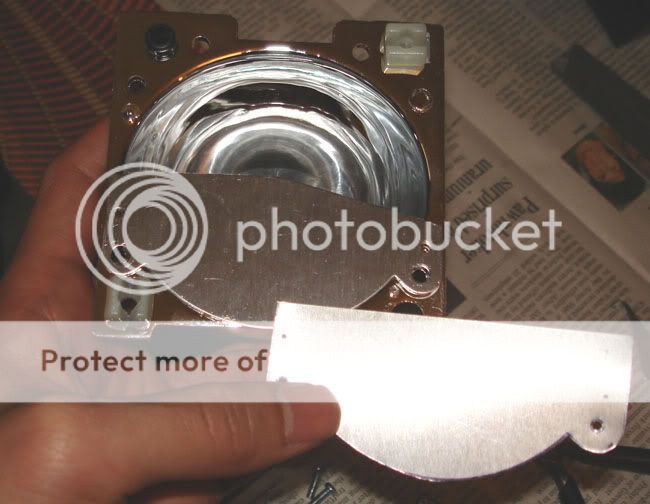
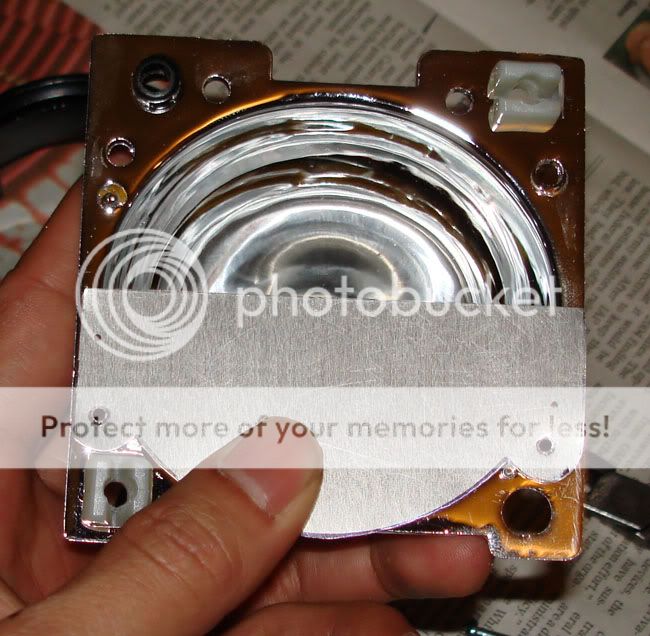
Lay the cut-out over the original plate:
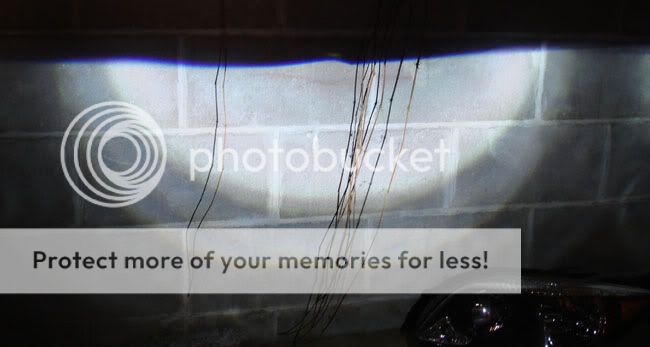
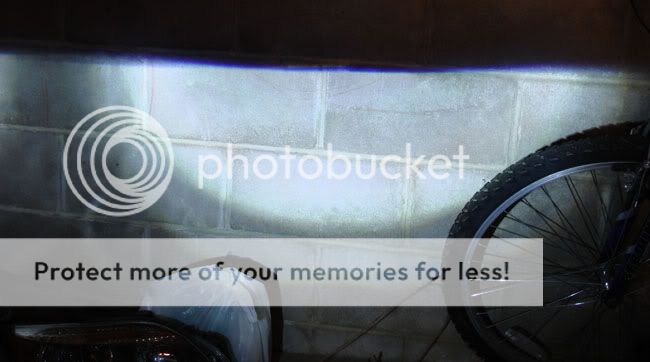
From here, screw everything back down and put the lens housing back into the headlight housing. Without putting it all back together, install the headlights onto your car, because adjustments will no doubt need to be made to get the cut-off looking right. After you are happy with how the cut-off looks after you install the headlights, take the headlights off. Put it all back together. Then bake it so it seals up again. After about 5 tries, here is what my cut-off will look like, hopefully.
Driver side:
Passenger side:
Bake up and open like normal. That process can be found on a previous page of this post.
Unscrew the screws pointed to by the white arrows to remove the lens housing. The screws dont come out, they just start pushing the housing outwards.
Remove housing:
Unscrew 4 screws pointed to by red arrows to remove the back of the lens housing to get to the cut-off plate.
Here is a picture of the cut-off plate and the bracket it attaches to after you remove the back of the lens housing. I removed the project lens, but you dont need to do so to fix the cut-off.
Remove the cut-off plate and trace it on some metal stuff you have laying around. Dont forget to mark where the holes for the screws will go.( I went to Menards and bought some ventilation duct material)
Cut out the tracing and make the holes where the screws will go back through.
Lay the cut-out over the original plate:
From here, screw everything back down and put the lens housing back into the headlight housing. Without putting it all back together, install the headlights onto your car, because adjustments will no doubt need to be made to get the cut-off looking right. After you are happy with how the cut-off looks after you install the headlights, take the headlights off. Put it all back together. Then bake it so it seals up again. After about 5 tries, here is what my cut-off will look like, hopefully.
Driver side:
Passenger side: