
Best, easiest LED underdash/cubby light mod! *CATHODES*
 02-11-2007, 10:10 PM
#1
Member
SL Member
Thread Starter

Join Date: Jan 2007
Posts: 80
Ok, so I am pretty bad at modding (as I blew a fuse experimenting trying to do this mod, before I figured out the right way to do it. Maybe others have described this before but I think this way is the fastest, safest, easiest way to do it.
After much harassment, I replaced the LEDs with cathodes. I figured I could try it risk free since I have a two-cathode blue PC kit in my computer. At the end is an appendix on how to do it this way. The cathodes are very pretty, their light is nicely diffused without being overpowering. I'll stick with it.
Ingredients:
Autozone 3 blue LED super simple kit (the one with just 3 blue leds with tails): $10
18-22 gauge crimp tubes, black electrical tape, 18ga wire: under $2 worth
Wire crimper/cutter/stripper tool
1. Unpack the LED kit and make sure all the red and black wire ends have been stripped sufficiently. Insert all the red wires into one end of one of the crimp tubes and squish that end. On the other end of the crimp tube, take a 12" section of 18ga wire, strip both ends, put one end into the crimp tube, squish. Seal with black electrical tape the edges of the tubes. If you don't know what a crimp tube is, look it up; it's a metal tube that's got a plastic outer safety coating and it has a divider in the center, so wires can go into each end of the tube halfway, stop, and be crimped in place, and thus connected cleanly. Do the same thing to the black wires. Now you have all 3 LEDs connected in parallel with a nice long positive and negative wire pair with stripped ends ready to connect into the factory system.
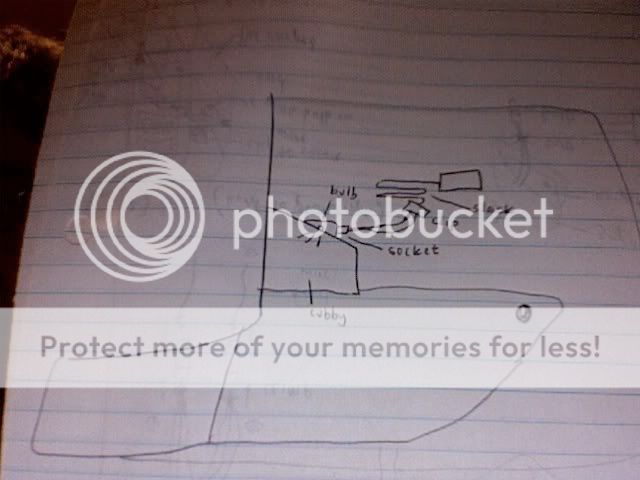
2. On the passenger side footwell, pull out the plastic stud that's securing the carpet to the left of where one's feet would be (there's only one) that is securing the carpet. Now, peel back the carpet. Reach your hand in this hole and you'll feel to your left the wire and bulb that is inserted in the cubby bulb hole (look at the inside of the cubby). You can tell you have the right spot if there is a small plastic rounded hump ahead of where the wire inserts. Pull it out of its hole, it will come out very easily, and then pull that wire with the bulb on the end towards you and out to inspect it. Now, trace the wire back with your hand and you'll see it's secured inside your dash by a plastic clip to shorten the wire. Just feel around and pull the wire out of the clip that is making it short and hard to work with. Once it's unclipped (don't be shy, it's easy to get out of its clip) pull that wire all the way out towards you and you have plenty to work with. Cut the bulb/socket off of this wire about 3" back from the socket and use scissors to remove the grey jacketing protecting the wire (also comes off easily).
3. Strip this factory wire so some copper is exposed (it's 20-22ga) and crimp a crimptube onto each and secure with black electrical tape. Put the positive and negative wires of your leds into each of these (doesn't matter which) and crimp, secure with tape. Nearly done. Turn on your headlights to see if it worked.
4. Pick one of the LED tails and slip it through the hole that is now open as you removed the bulb, and pull the LED through into the cubby (again, the ceiling of the cubby has this little recessed bulb hole). Plaster the bulb tail to the ceiling with BET and make sure the LED is oriented as you want and far enough out, but not visible unless you crane your neck under.
5. Route one of the tails underneath the passenger footwell and put it decently far back, get the wires out of visibility as best you can, and secure with copious BET (unless you have a way you prefer).
6. Route the other tail through the driver's side footwell (open up the carpet adjoining the console as you did on the passenger side) and use a flashlight and you can see all the way through to where you were, have a buddy pass the LED through and you can secure it about 4" outside of the hole (there's a nice, easy spot for it). Resecure the carpet on both sides, make sure all wires are hidden, and all ugly wires taped down nicely.
Done. Now, there is no excuse for paying the dealer $200 for this. I guess the LED cupholders are harder, although probably still pretty easy with a bit of drilling and disassembly. This mod, however, is too simple. Your pretty lights will turn on and off with the headlights.
*APPENDIX* I have been hated on for using single LEDs, which are passable but not real bright or even. If you're a cheapskate, just do the LEDs, but you can get on directron.com a PC blue cathode kit for like $6. Buy one, and where the 4-pin cable to plug into a computer connects to the blue inverter box that powers the 2 cathodes, cut the wire and strip the ends. Now you can power this box with a 9V battery or a car 12V system (car runs it nice and bright) Keep one of the LEDs to light your cubby. Instead of splicing in the other 2 LEDs, just splice one of the LEDs but cut the LED off and use its wire. Hook this up to the cathode and if it doesn't work, reverse the polarity. Open the carpet on both sides as before, pass one cathode through to the drivers' side and tape it up there or use zip ties. Put the other cathode up in the passenger footwell, and move the excess wires and the inverter into the void inside the console and reattach the carpet. Now you will have lots of glow.
Don't ask for more pictures, it's not rocket science to put a pair of cathodes on with wire instead of the LEDs. I'll get up pix of the finished product once it stops raining.
After much harassment, I replaced the LEDs with cathodes. I figured I could try it risk free since I have a two-cathode blue PC kit in my computer. At the end is an appendix on how to do it this way. The cathodes are very pretty, their light is nicely diffused without being overpowering. I'll stick with it.
Ingredients:
Autozone 3 blue LED super simple kit (the one with just 3 blue leds with tails): $10
18-22 gauge crimp tubes, black electrical tape, 18ga wire: under $2 worth
Wire crimper/cutter/stripper tool
1. Unpack the LED kit and make sure all the red and black wire ends have been stripped sufficiently. Insert all the red wires into one end of one of the crimp tubes and squish that end. On the other end of the crimp tube, take a 12" section of 18ga wire, strip both ends, put one end into the crimp tube, squish. Seal with black electrical tape the edges of the tubes. If you don't know what a crimp tube is, look it up; it's a metal tube that's got a plastic outer safety coating and it has a divider in the center, so wires can go into each end of the tube halfway, stop, and be crimped in place, and thus connected cleanly. Do the same thing to the black wires. Now you have all 3 LEDs connected in parallel with a nice long positive and negative wire pair with stripped ends ready to connect into the factory system.
2. On the passenger side footwell, pull out the plastic stud that's securing the carpet to the left of where one's feet would be (there's only one) that is securing the carpet. Now, peel back the carpet. Reach your hand in this hole and you'll feel to your left the wire and bulb that is inserted in the cubby bulb hole (look at the inside of the cubby). You can tell you have the right spot if there is a small plastic rounded hump ahead of where the wire inserts. Pull it out of its hole, it will come out very easily, and then pull that wire with the bulb on the end towards you and out to inspect it. Now, trace the wire back with your hand and you'll see it's secured inside your dash by a plastic clip to shorten the wire. Just feel around and pull the wire out of the clip that is making it short and hard to work with. Once it's unclipped (don't be shy, it's easy to get out of its clip) pull that wire all the way out towards you and you have plenty to work with. Cut the bulb/socket off of this wire about 3" back from the socket and use scissors to remove the grey jacketing protecting the wire (also comes off easily).
3. Strip this factory wire so some copper is exposed (it's 20-22ga) and crimp a crimptube onto each and secure with black electrical tape. Put the positive and negative wires of your leds into each of these (doesn't matter which) and crimp, secure with tape. Nearly done. Turn on your headlights to see if it worked.
4. Pick one of the LED tails and slip it through the hole that is now open as you removed the bulb, and pull the LED through into the cubby (again, the ceiling of the cubby has this little recessed bulb hole). Plaster the bulb tail to the ceiling with BET and make sure the LED is oriented as you want and far enough out, but not visible unless you crane your neck under.
5. Route one of the tails underneath the passenger footwell and put it decently far back, get the wires out of visibility as best you can, and secure with copious BET (unless you have a way you prefer).
6. Route the other tail through the driver's side footwell (open up the carpet adjoining the console as you did on the passenger side) and use a flashlight and you can see all the way through to where you were, have a buddy pass the LED through and you can secure it about 4" outside of the hole (there's a nice, easy spot for it). Resecure the carpet on both sides, make sure all wires are hidden, and all ugly wires taped down nicely.
Done. Now, there is no excuse for paying the dealer $200 for this. I guess the LED cupholders are harder, although probably still pretty easy with a bit of drilling and disassembly. This mod, however, is too simple. Your pretty lights will turn on and off with the headlights.
*APPENDIX* I have been hated on for using single LEDs, which are passable but not real bright or even. If you're a cheapskate, just do the LEDs, but you can get on directron.com a PC blue cathode kit for like $6. Buy one, and where the 4-pin cable to plug into a computer connects to the blue inverter box that powers the 2 cathodes, cut the wire and strip the ends. Now you can power this box with a 9V battery or a car 12V system (car runs it nice and bright) Keep one of the LEDs to light your cubby. Instead of splicing in the other 2 LEDs, just splice one of the LEDs but cut the LED off and use its wire. Hook this up to the cathode and if it doesn't work, reverse the polarity. Open the carpet on both sides as before, pass one cathode through to the drivers' side and tape it up there or use zip ties. Put the other cathode up in the passenger footwell, and move the excess wires and the inverter into the void inside the console and reattach the carpet. Now you will have lots of glow.
Don't ask for more pictures, it's not rocket science to put a pair of cathodes on with wire instead of the LEDs. I'll get up pix of the finished product once it stops raining.


 02-12-2007, 01:53 AM
#12
Member
SL Member
Thread Starter
Join Date: Jan 2007
Posts: 80

Here is the finished product.
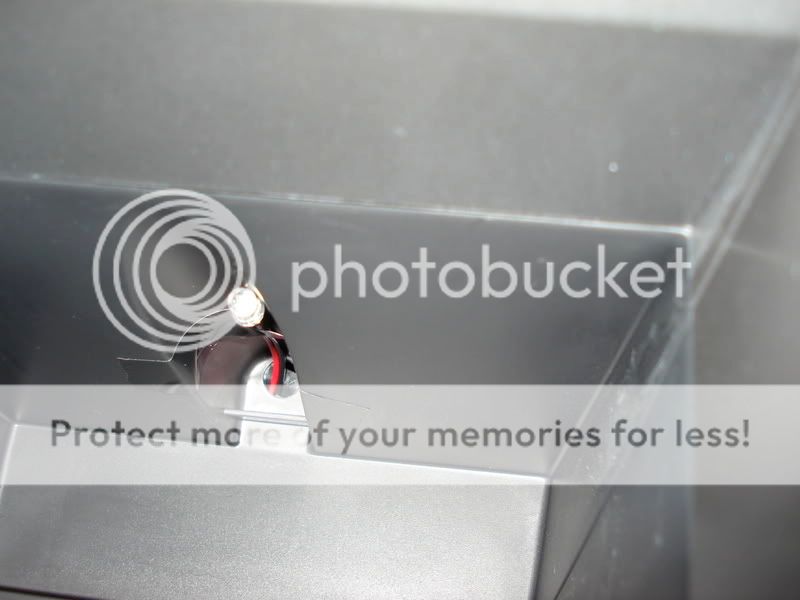
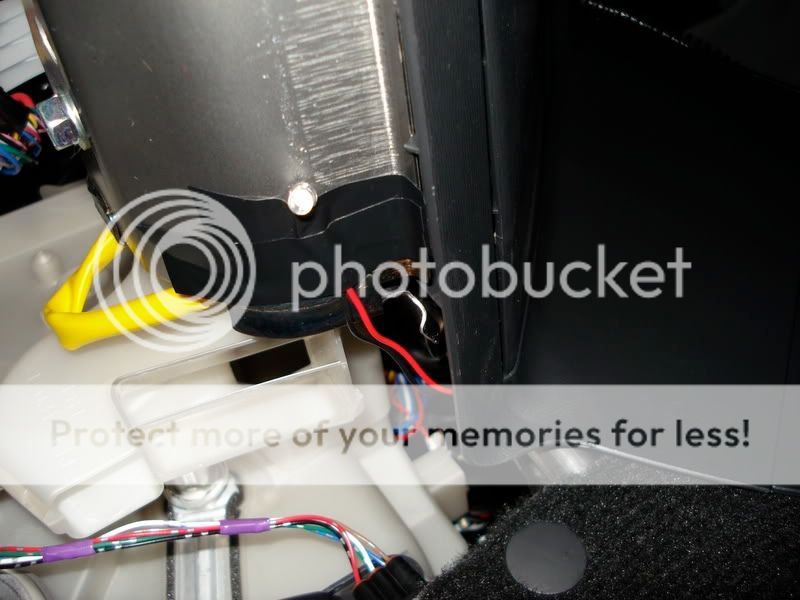
The insertion of the cubby bulb.
Mounting of the passenger footwell bulb.

Finished product, right side.
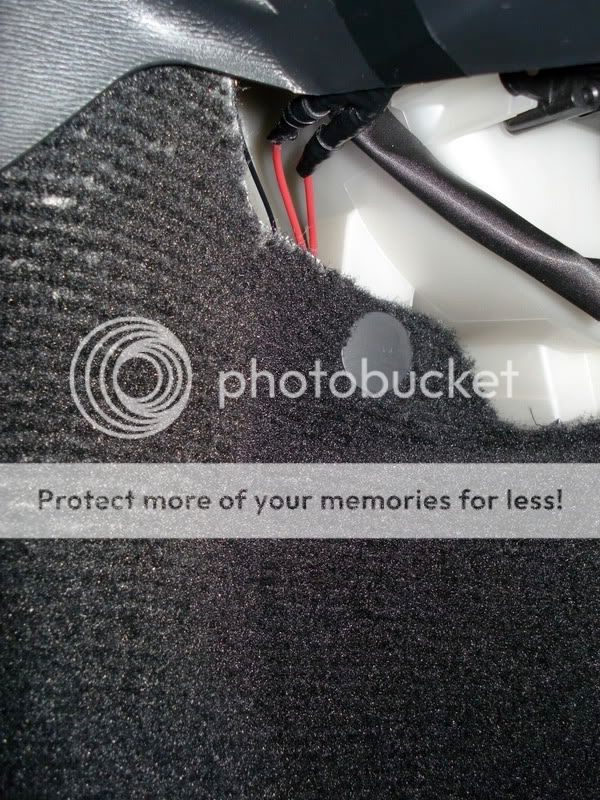
The carpet you must pull up.
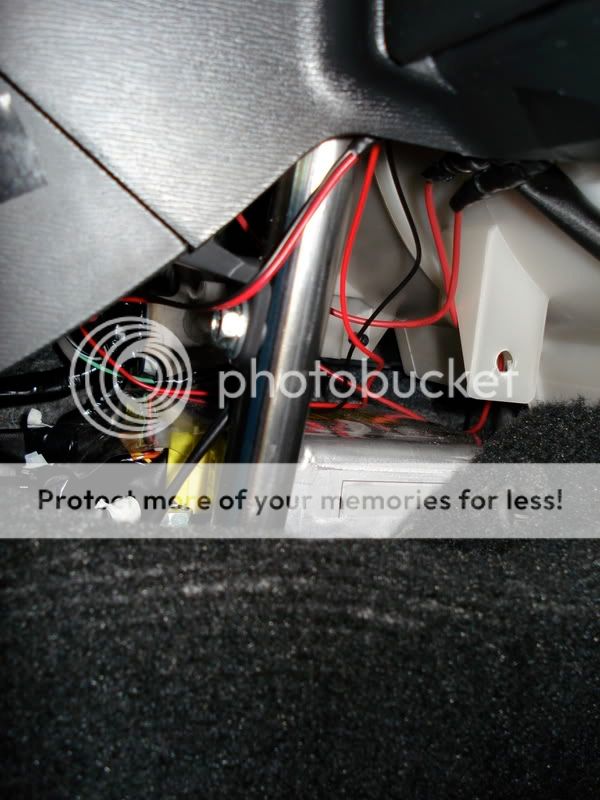
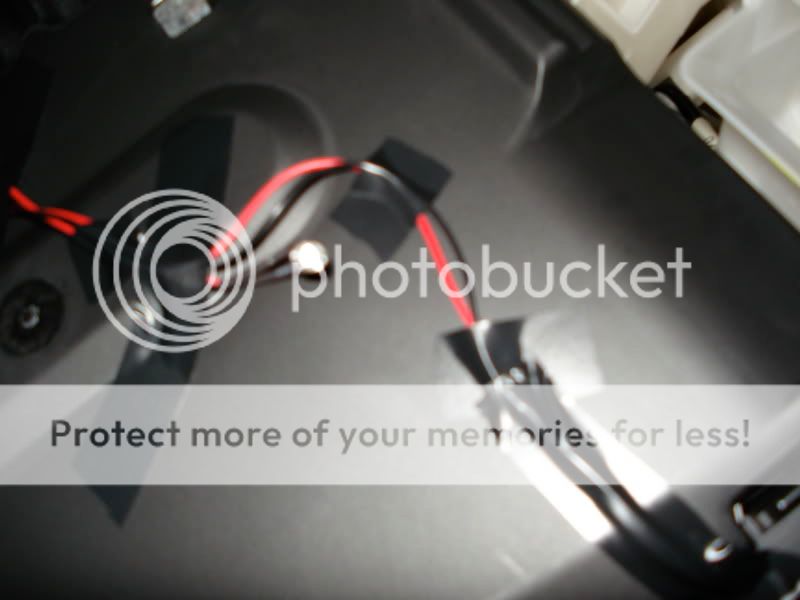
Inside the beast.
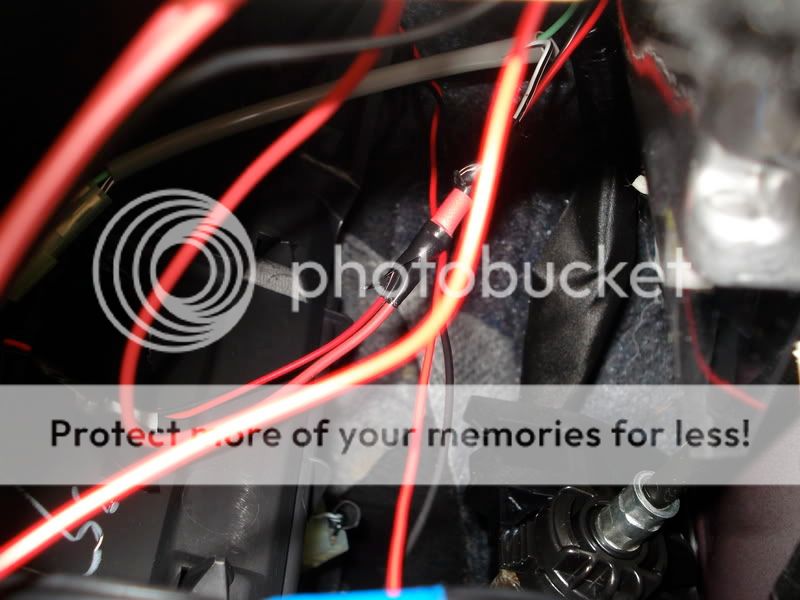
At the upper right you see the gray covering of the wire cut away, and the spliced wire. To the lower left you see where the wire is mounted. Literally the only way to really show you this is for you to open up your carpet here and do it by feel. You can't go wrong if you feel around for the socket with your left hand touching the bulb inside the cubby from the other side as a guide.
The driver's side is even easier, just open the carpet on both sides and pass the wire through.
02-12-2007, 01:58 AM
#13
Member
SL Member
Thread Starter
Join Date: Jan 2007
Posts: 80
I'll see if i can take some good quality 480p video with a DV cam tomorrow, stills have trouble capturing it. The light is plenty bright but not too bright. The other benefit of this mod is that you can easily remove it and then splice the old bulb/socket back on if need be and nobody would know. Also, you have a lot of choice as to how you point the bulbs, although you can't go wrong with where you put them (although LEDs really fire way more out of the tip than the sides).


 02-12-2007, 02:57 AM
#19
Member
SL Member
Thread Starter
Join Date: Jan 2007
Posts: 80
I know cathodes are better, but they can overheat, they suck electricity, and I really only want a small amount of dim light down there, not a super well lit footwell. To me that much light is gaudy. I can always head for the Vato Zone if i want to swap in cathodes, which, followers of this thread can guess, can simply be spliced on later in place of the LEDs using the original wiring.