Sound Deadening Doors (Mini Walkthrough)
 09-15-2006, 03:03 AM
#1
Senior Member

ScionERA
SL Member
Thread Starter

Join Date: Apr 2005
Location: Back in AZ!!
Posts: 3,400
I started to sound deaden my car today. I only had time to finish one door. I used Raamat and Ensolite (Great Stuff). Some of the pictures suck because my camera sucks. I will be doing the other door and the trunk tomorrow so I can take more pictures if needed (just let me know what you wanna see)
1. Door stock (w/ panel removed)

2. After removing plastic liner (you can trash this liner if you plan to completely deaden the doors)

3. Next I coverred the outter skin. (You can see the raamat through the holes in the door. (After applying the raamat, I added a layer of Ensolite but I forgot to take a pic)

4. This is just a close up of the last pic. You can see that all of the outter skin is covered.

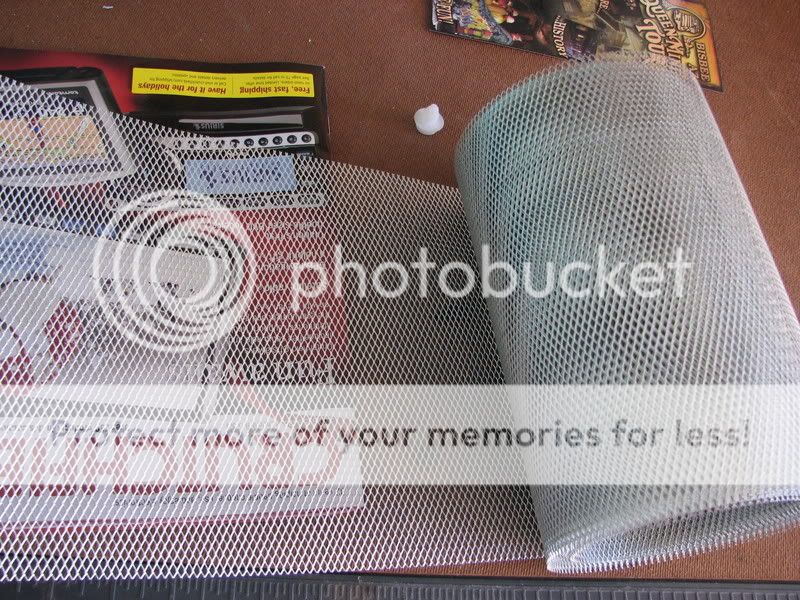
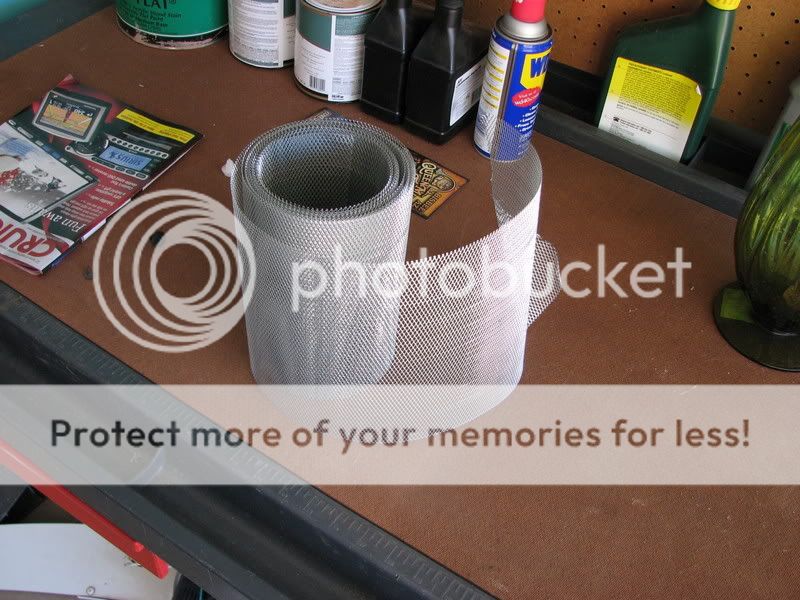
5. When you start on the inner skin you want to cover all the holes in the door. I bought some aluminum to cover the holes. This just gives the raamat something to stick to.

6. Next I covered the inner skin (The part of the door just beneath the door panel)

7. And finally I added another layer of Ensolite to the inner skin.

Like I said, I only had time to do one door. This gave me a chance to compare the before and after... WOW it is a huge difference. I can't wait until I'm finished with the other door!
1. Door stock (w/ panel removed)
2. After removing plastic liner (you can trash this liner if you plan to completely deaden the doors)
3. Next I coverred the outter skin. (You can see the raamat through the holes in the door. (After applying the raamat, I added a layer of Ensolite but I forgot to take a pic)
4. This is just a close up of the last pic. You can see that all of the outter skin is covered.
5. When you start on the inner skin you want to cover all the holes in the door. I bought some aluminum to cover the holes. This just gives the raamat something to stick to.
6. Next I covered the inner skin (The part of the door just beneath the door panel)
7. And finally I added another layer of Ensolite to the inner skin.
Like I said, I only had time to do one door. This gave me a chance to compare the before and after... WOW it is a huge difference. I can't wait until I'm finished with the other door!


 09-15-2006, 03:22 AM
#4
Senior Member
ScionERA
SL Member
Thread Starter
Join Date: Apr 2005
Location: Back in AZ!!
Posts: 3,400
Originally Posted by Neothin
estimated time to complete? amount of materials used? how does the ensolite attach?
I probablly used about 15-20 sq ft of raamat and maybe a yard of ensolite.
The ensolite attatches with spray on adhesive which you can order w/ the ensolite.
09-15-2006, 03:49 AM
#8
Member
SL Member
Join Date: May 2006
Location: Hoffman Estates, IL
Posts: 61
I wouldn't mind seeing the trunk. I haven't searched yet(until I do it myself) but if you could show one pic about taking off the liner of the trunk too, that would be great! But I would like to see the pics of a done trunk if you don't mind. Thanks!
By the way, looks good and I'm sure it was worth the time.
By the way, looks good and I'm sure it was worth the time.
09-15-2006, 03:57 AM
#9
Senior Member

Scikotics
SL Member

Join Date: Oct 2005
Location: Orlando, FL (UCF)
Posts: 7,514
https://www.scionlife.com/forums/vie...t=gut+interior
there's some pics at the bottom fo the first post that you^ might like to see
there's some pics at the bottom fo the first post that you^ might like to see
12-26-2006, 05:29 PM
#11
Member
SL Member

Join Date: Jun 2005
Location: Chandler, Az
Posts: 91
Originally Posted by tC_skier
subscribing
12-26-2006, 06:59 PM
#12
Senior Member
SL Member

Join Date: Jul 2006
Location: West Virginia, US
Posts: 1,616
Well, might as well ask here. I didn't know there was a liner on the door. Does removing that pose any danger to any of the components on the door?
And won't water get on the inside deadening?
And won't water get on the inside deadening?
12-26-2006, 07:04 PM
#13
Member
SL Member
Join Date: Jun 2005
Location: Chandler, Az
Posts: 91
Originally Posted by Zebman
Well, might as well ask here. I didn't know there was a liner on the door. Does removing that pose any danger to any of the components on the door?
And won't water get on the inside deadening?
And won't water get on the inside deadening?
2. Quality deadening material such as eDead and RaamMat, once stuck in place, is pretty much impervious to any moisture that might get on it.
12-26-2006, 07:22 PM
#15
Senior Member
ScionERA
SL Member
Thread Starter
Join Date: Apr 2005
Location: Back in AZ!!
Posts: 3,400
Wow, this post was brought back from the dead lol.
I picked up the aluminum at Home Depot. It is pretty much the same stuff that people use for grills. You just need something to cover the holes so the deadener has something to stick to.
I picked up the aluminum at Home Depot. It is pretty much the same stuff that people use for grills. You just need something to cover the holes so the deadener has something to stick to.