
headlight retrofit project!
 04-13-2008, 12:39 AM
#1
Junior Member
Thread Starter

Join Date: Dec 2006
Location: Chicago, IL
Posts: 18
Hey, well so i havent done ANYTHING to my 06 xa...lack of money and mostly time but this weekend im going to attempt  to retrofit the headlights using a pair of E46 Bixenon projectors and well all the other good stuff needed...
i know its going to be a pain but hopefully it works . So far everthing is tested and works great except for the circuit that moves the plate for the high beam.... cant get that to work...help?
so ill post some pics wen i can...
any tips or suggestions are welcomed
anyone know where i can get a diagram of the OEM headlights and wiring?!?!?
i know its going to be a pain but hopefully it works . So far everthing is tested and works great except for the circuit that moves the plate for the high beam....
so ill post some pics wen i can...
any tips or suggestions are welcomed
anyone know where i can get a diagram of the OEM headlights and wiring?!?!?
 04-13-2008, 01:09 AM
#2
Senior Member
SL Member

Join Date: Apr 2007
Location: Richmond, VA
Posts: 2,084
Wow, thats a great project, not sure it would be my first. Think my first was slipping on the quarter bra. Since I budgetted 200 bucks a month and now after a year have all the oem accessories, minus the wheels, ipod adapter and sat radio reciever. I do however have the center arm rest, pro sport ebiach springs, hos front and rear sway bars, custom led under grow for the dash and body and curtis hitch, yanika rack and bike carrier.
Sorry, I know nothing about the electrical system other than where the fuses are and battery goes.
Sorry, I know nothing about the electrical system other than where the fuses are and battery goes.
04-13-2008, 02:55 AM
#3
Junior Member
Thread Starter
Join Date: Dec 2006
Location: Chicago, IL
Posts: 18
nice!! i just thought something different would b nice but i wasnt to sure as well... had to do a lot of research and thinking and i got 2 guys helping so it should turn out nice. Future things i wanna do is def suspension! i think thats a must!
04-14-2008, 03:38 AM
#5
Senior Member
SL Member
Join Date: Apr 2007
Location: Richmond, VA
Posts: 2,084
Man, that stock lamp is such a work of art. I enjoy rubbing plastix on my lamps every month, 15 minutes each. Cant say I have any complaints or urges to change them. Just pop in some silver star bulbs and they are great.
04-14-2008, 04:10 AM
#6
Junior Member
Thread Starter
Join Date: Dec 2006
Location: Chicago, IL
Posts: 18
OK folks so heres what was done today.
Equipment:
Bosch E46 projectors (D2S bubls)
Bosch Ballast
Bosch Ignitors
Shrouds (i think they are from an audi or bmw)
wire harness (still working on it)
Soldering iron
Tape
Screwdrivers
small/med clamps
flexible sharp blade
and more common tools...
First: The Plan and background
So as you all now i added some bixenon projectors meaning it was both high and low beam in one headlight. I highly recommend having someone else with you to help. Makes the process easier. For some background info: i previously had purchased one of those cheap HID kits which was cool but blinded the heck out of ppl and had no high beams making it a "single xenon kit" For this project im attempting to adapt the wire harness from that kit into the retrofit. (Ill explain later on what needs to change in the harness. Not that hard).
heres the projectors:
Disassembly
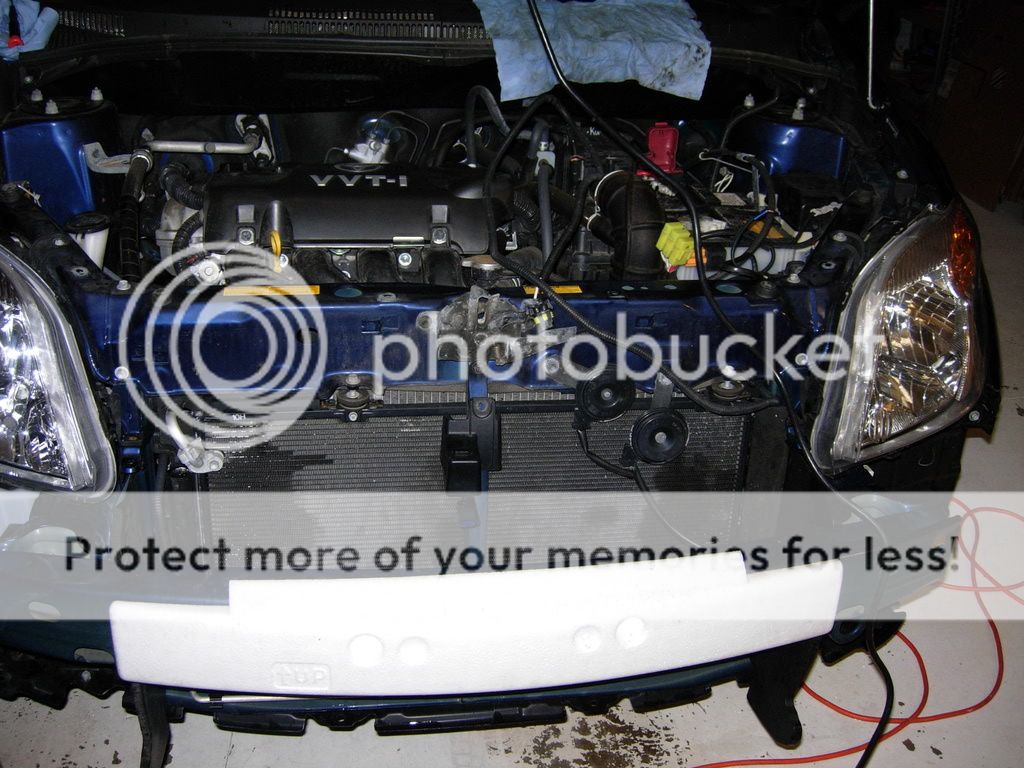
Remove the front grill and bumber. The grill has about 4 snap on screws (easy to take out) and the bumber is a little more challenging. You need to take out about 3 or 4 of the similar screws as the grill but located underneath the bumper itself and another 2 or 3 by the tire and fender. Be patient, have a lot of light and youll find them.
Here's a pic of the end result :
Removing the headlight
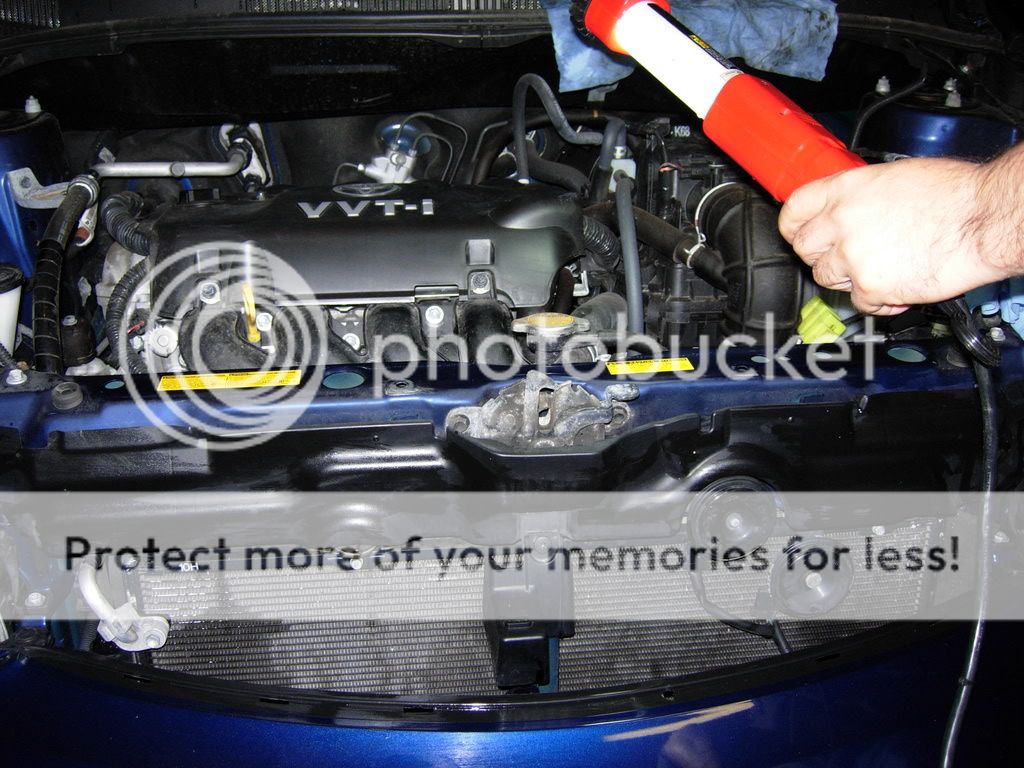
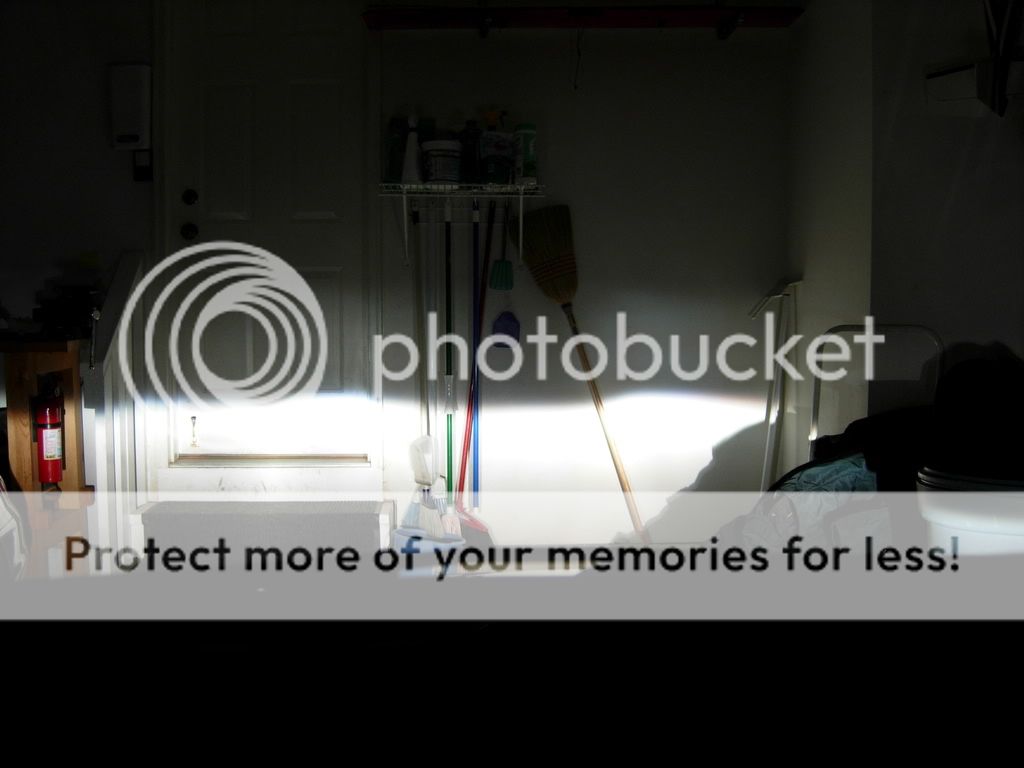
Ok so the reason for removing the bumper is to get access to the headlights. It has about 4 or 5 bolts that need to be removed. Cool, so for the headlights.... i recommend starting with the passenger side and only take this one out its easier and will make the other one nice and easy. Take them out and the headlight slides towards the front and a little bit up. BE CAREFUL WITH ALL THE CABLES. Make sure you disconnect the lights. Should be a total of three. (buddy help comes in handy) you can put the bulbs in a clean area mayb some plastics zip bags or somewhere they wont get touched or damaged
sorry i didnt take a close up pic for this but should end like this
Taking apart the proj
This isnt bad at all, if you have some plastic bags grab some and same for rubber gloves (eh just a precation so you dont scratch anything). On these projs theres a total of 4 screws that hold the whole thing together. Simply remove them and you will see how it assembles i recommend keeping the two rear parts together so you measure very well. At this point preheat your oven. I did 250 degrees F.
heres the pic of the disassembled proj:
Baking time!!
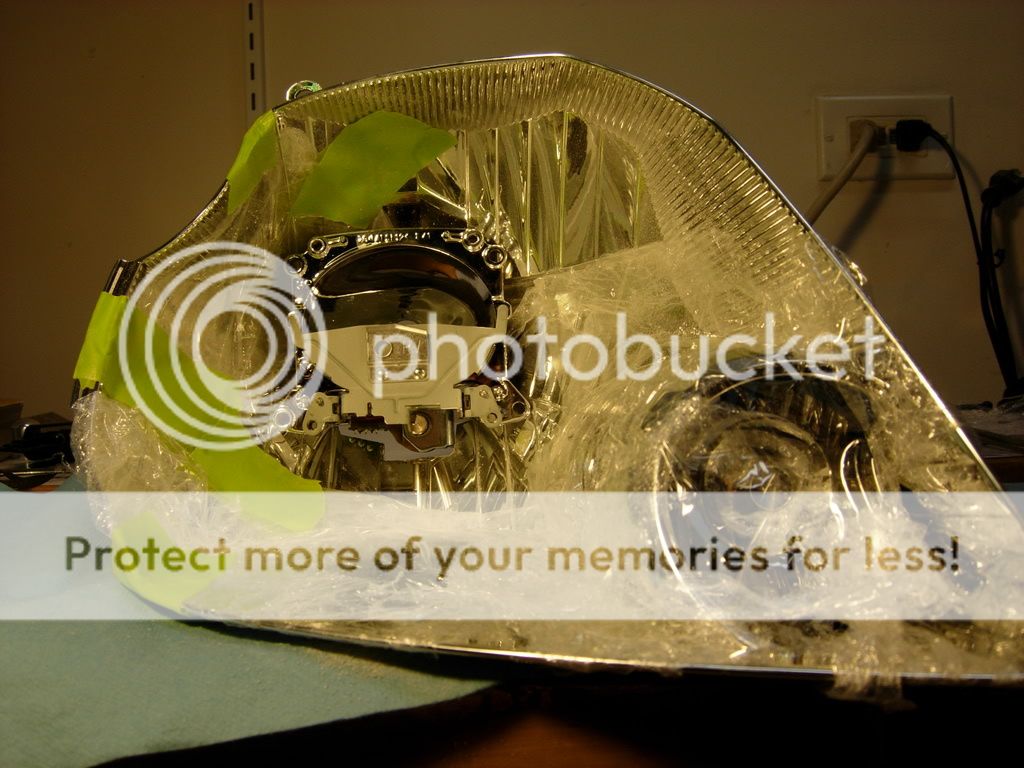
once the oven is preheated for 250 degrees put the headlight in for 10 to 15 min... i put mine for 12 and was perfect. This is to soften the glue holding the housing and the headlight apart. Keep in mind that once its ready to be taken apart its going to be hot (its not terrible so dont worry) but the faster you do it, the easier it pops out. Use some screw drivers to help you with this process and again if your buddy is there its easier and faster. Once the headlight is into to parts try to "clean" the glue...DONT remove it but try to put it back as it was so when you put it back together it will be A LOT!!! EASIER.
Here's the best pics i got of the parts. My apologies, like i said the faster the better so i didnt take that many pics during this process.
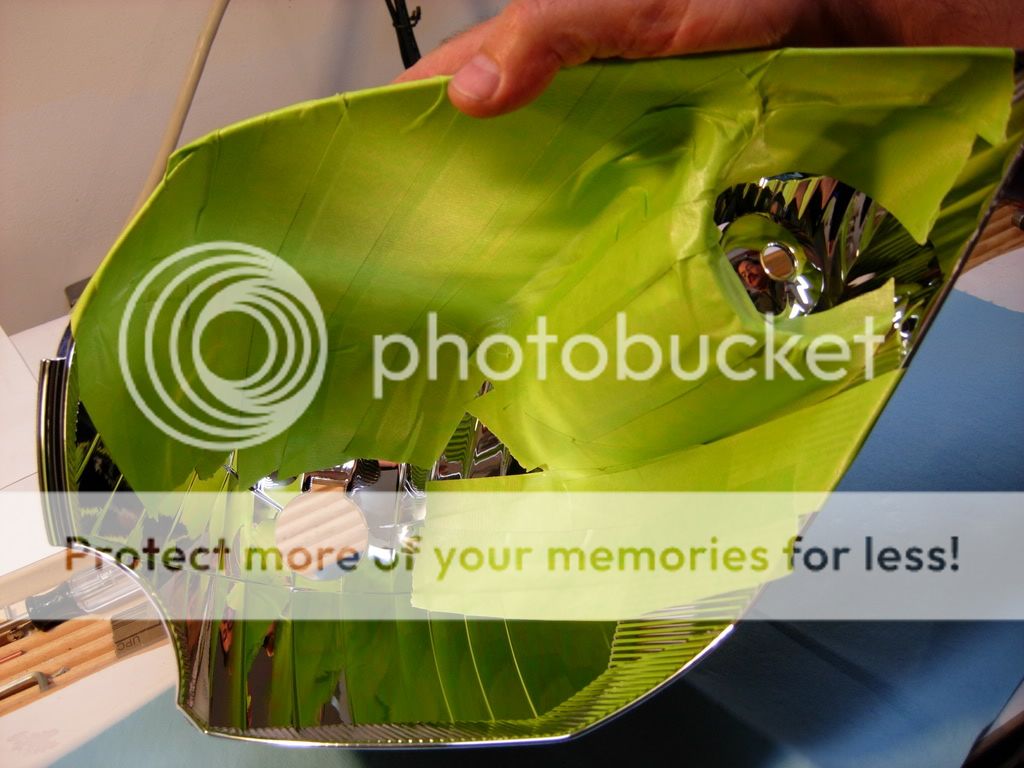
On this one the chrome housing is prepared to be worked on... on the first one i tried just plastic and tape.....didnt work so well...it left scratches but on the second one i just used tape and worked a lot better. Also for removing the chrome part its 2 parts. I called the eyebrow the starship... thats where the turn signal is at and hey...Looks like a ship! lol some ppl might consider painting the chrome...i didnt... at all... i personally like the chrome and although will cause more glare, this is personal preference. Keep in mind if you do paint this area, the process wil be taking a little bit longer as well as more $$. Use high temp primers and paints.
MOVING ON!
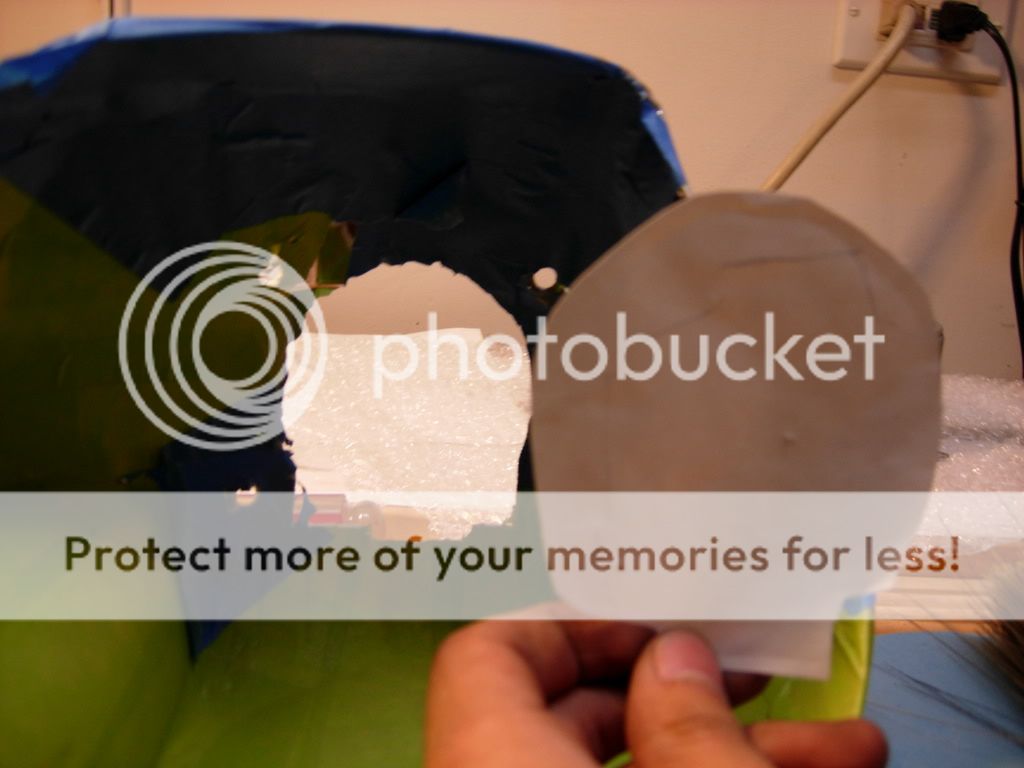
The cutting and mounting
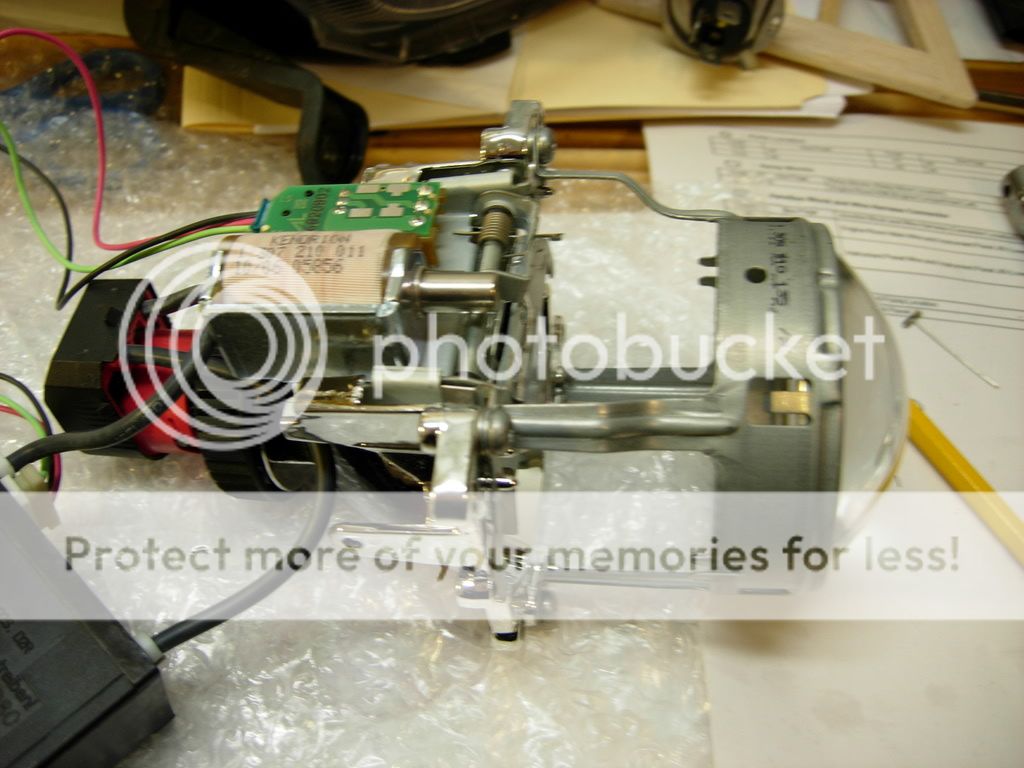
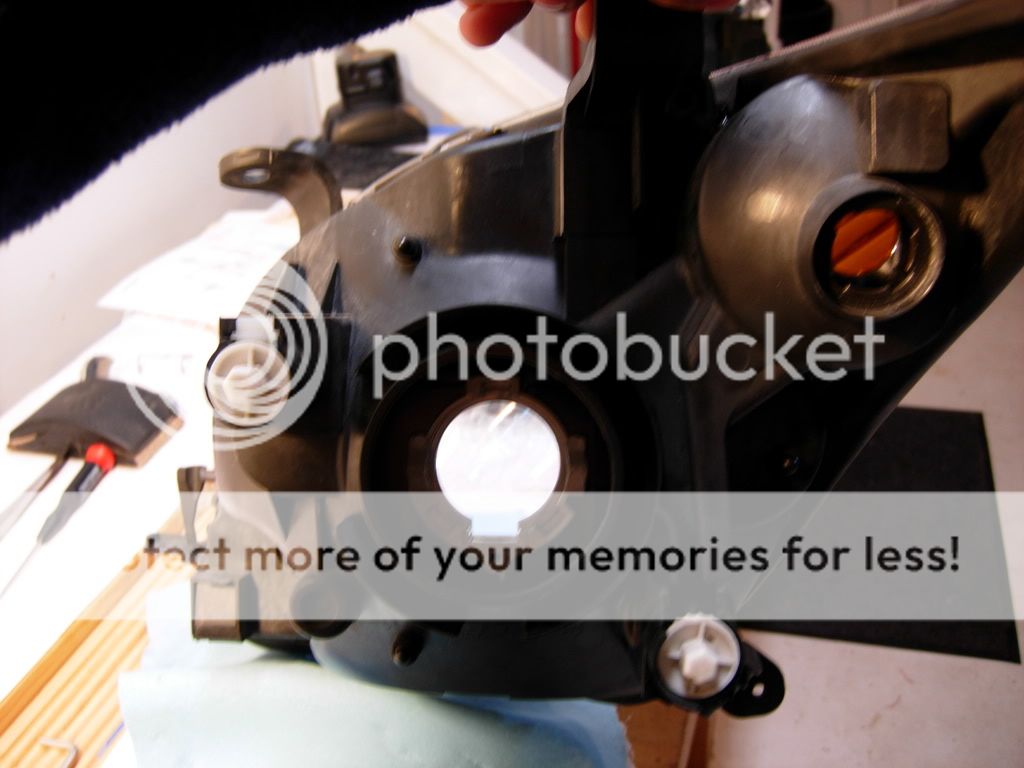
Yes its tough but not that bad. if you look at your chrome section on the rear side where the main bulb goes, you will see the outline of a circle... its about 2 inches in radius from the center where the bulb goes... now both my headlights had this...i hope yours do too because its a great reference, if not its about a 2 inch circle you want to achieve. If you are using diff projs, the dimensions will differ but do small changes as you are cutting... with the projs i used, the biggest thing was to get the solenoid (part that moves metal plate for high/low) through the housing. Heres what it looks like:
its a circle with a rectangle at the bottom.....sort of.... If you can, this will help you a lot on the next headlight, MAKE A TEMPLATE OF THE NEW SHAPE i used aluminum tape and work great. On the second headlight you simply paste it and cut the patter!!
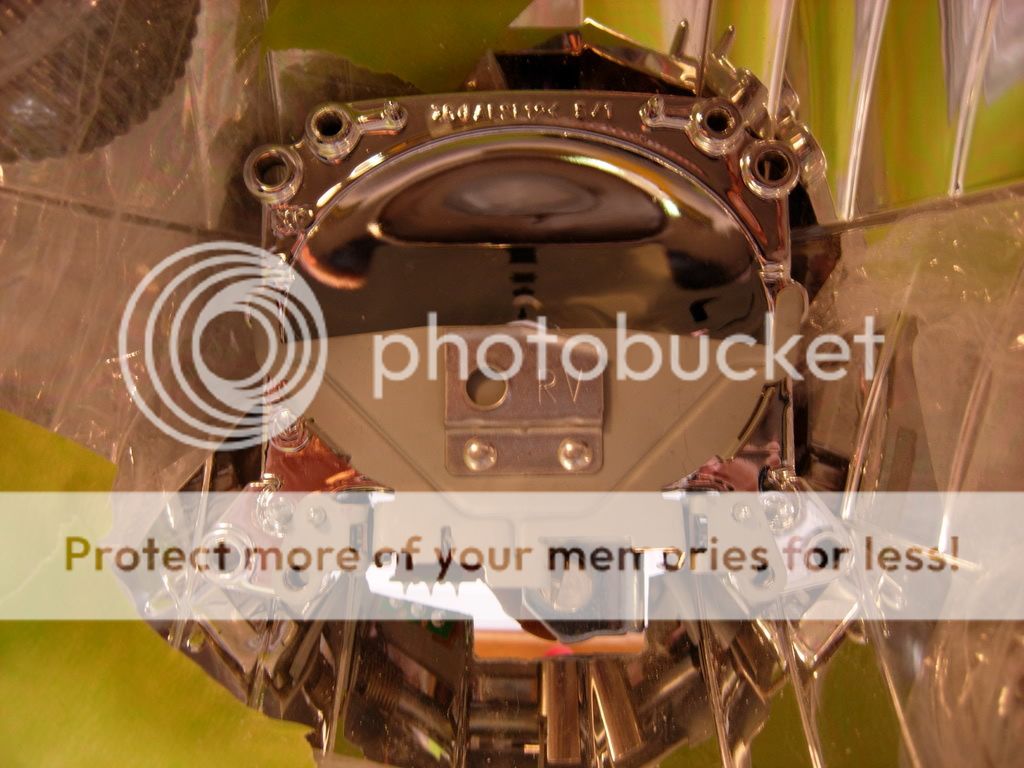
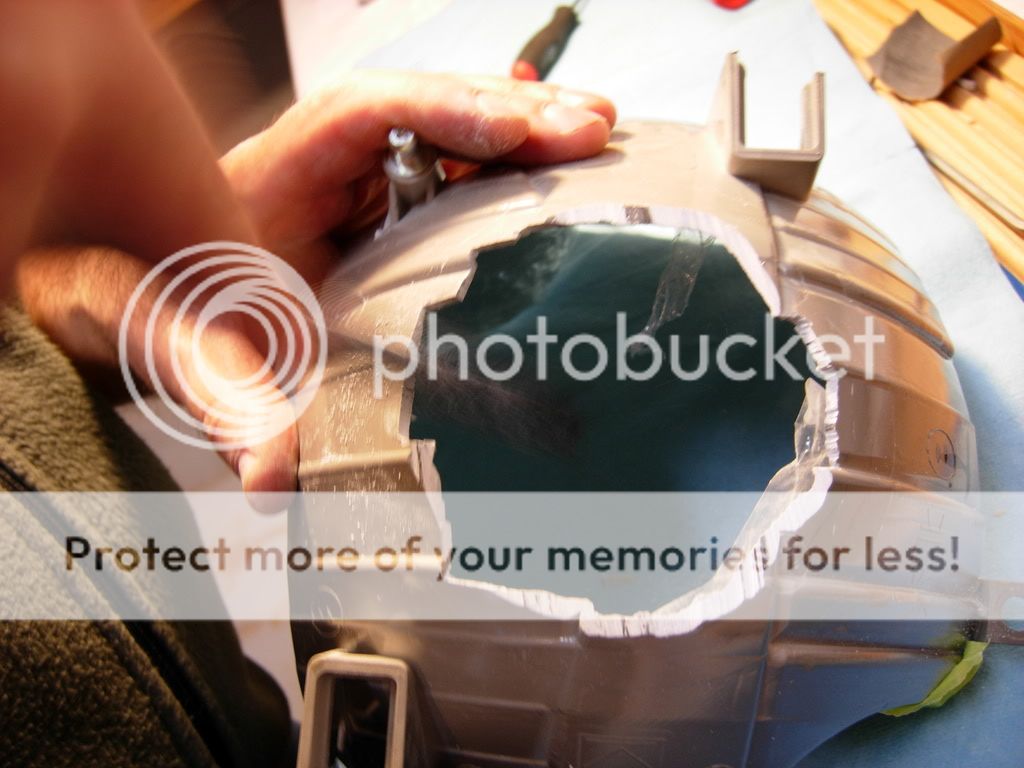
When inserting the rear part of the projector and went from the front towards to rear and screwed it using.... 3/16 screws. try to level everything
Here is a rear view of it mounted
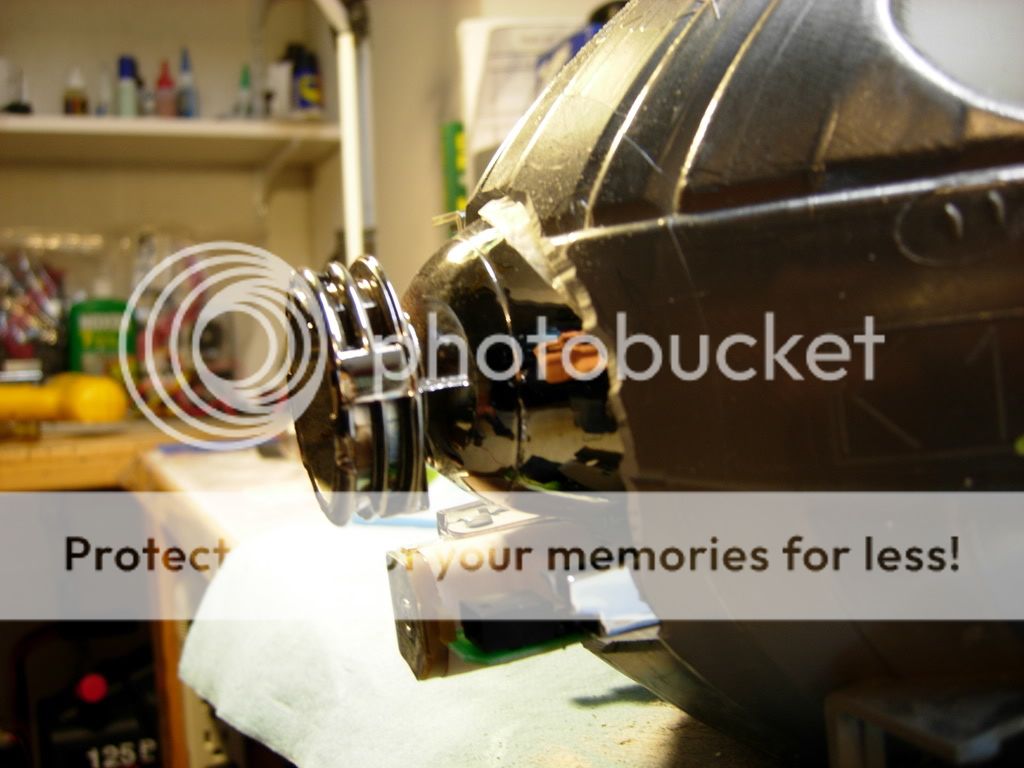
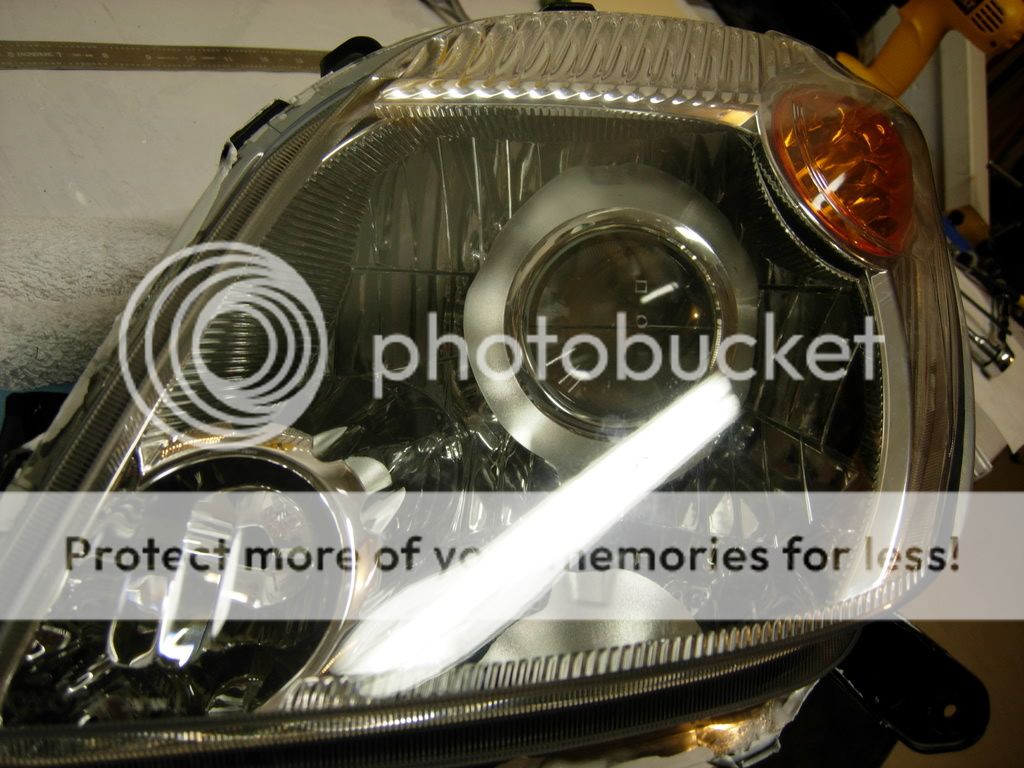
Reassemble/testing
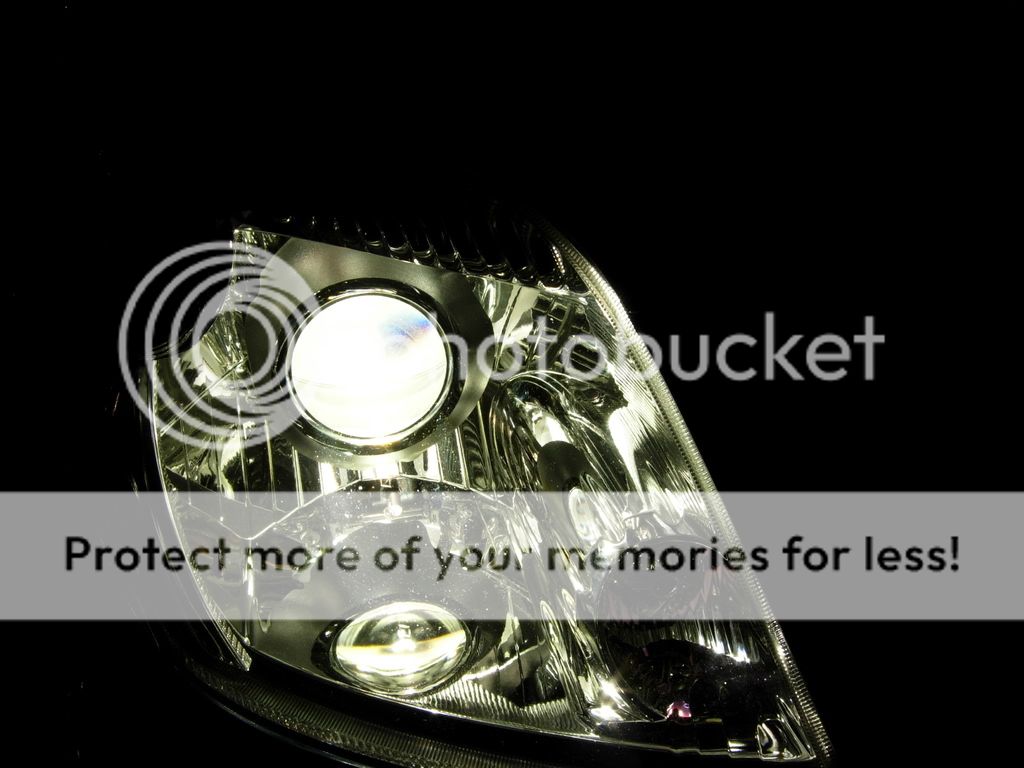
Keep everything nice and clean so you avoid scratches on the housing and components. Put the proj together so you can test it and do some mods if you wish. I wont go to much in detail on how to mod them... i just read a few forums and got an idea of what to do. You pretty much want to adjust one screw that gives you a sharper cutoff but will reduce the color you get. And/or you can actually bend the metal plate towards the read of the proj looking at it from the front with some pliers if not your own fingers keep in mind its a MINIMUM bend. BE CAREFUL!! read more about this!!!! heres my tested proj.
halfway!...eh not really but almost there :D
this is the proj as it came, to me its more white in the middle and a little blue... not the best cut off but from the research i did, apparently these projs dont give you that great z shape cut off....eh its all good to me
This was my result... a little more colors and a less sharper cut off... now thats my choice you guys/gals do as you wish
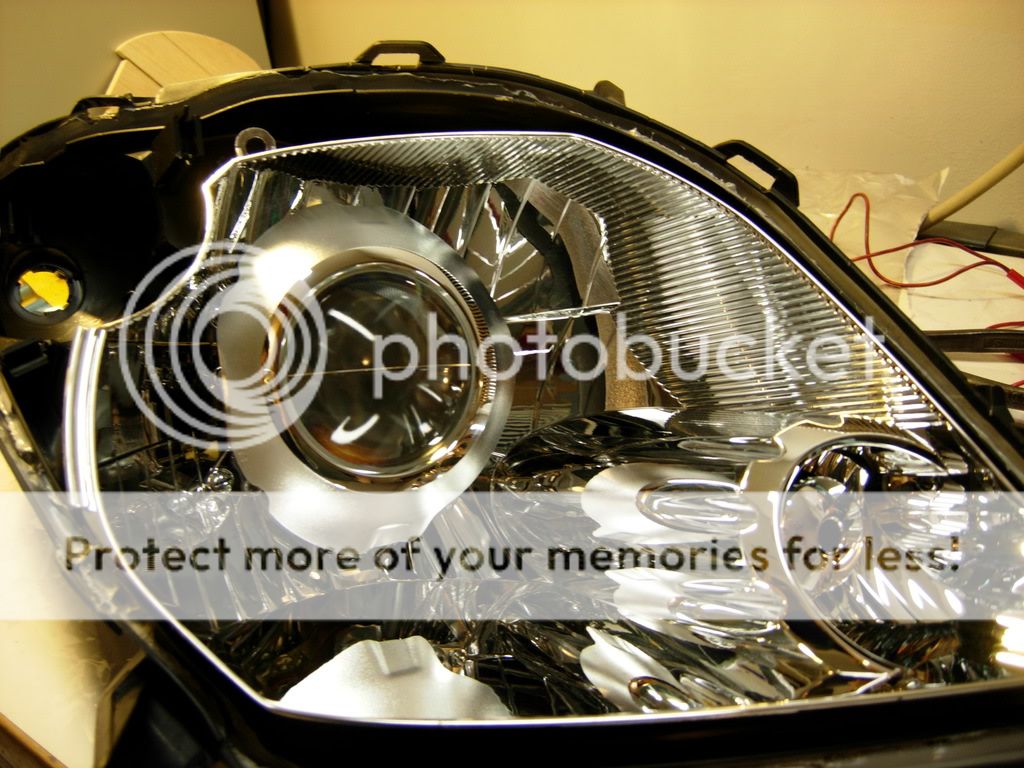
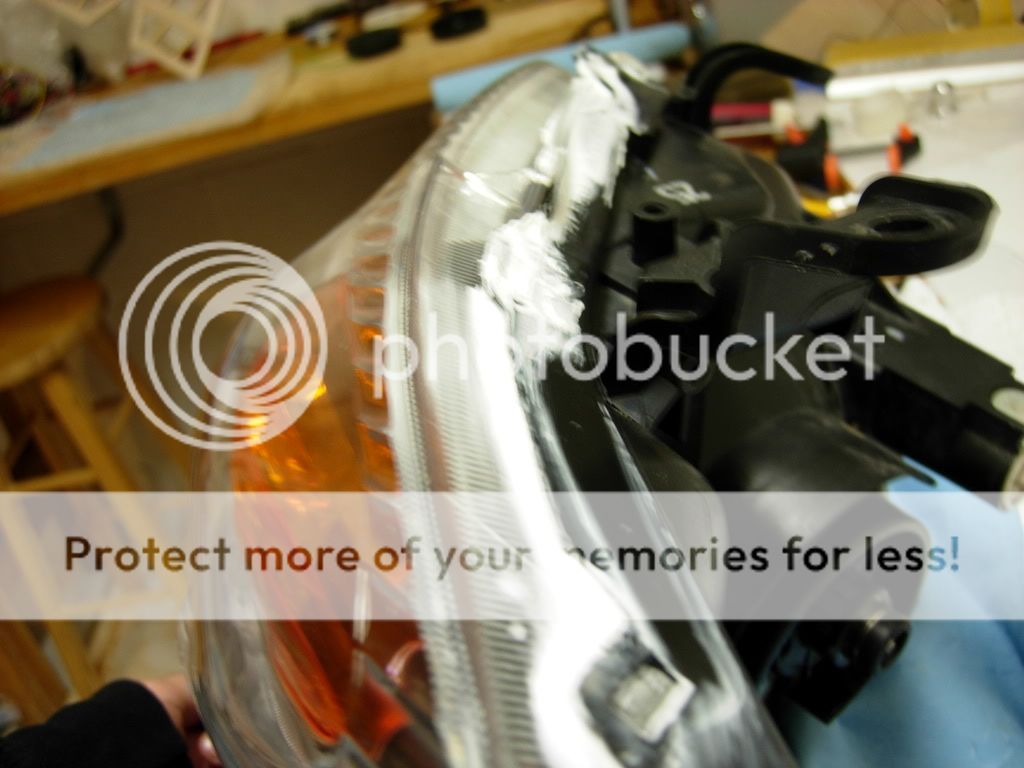
Final steps
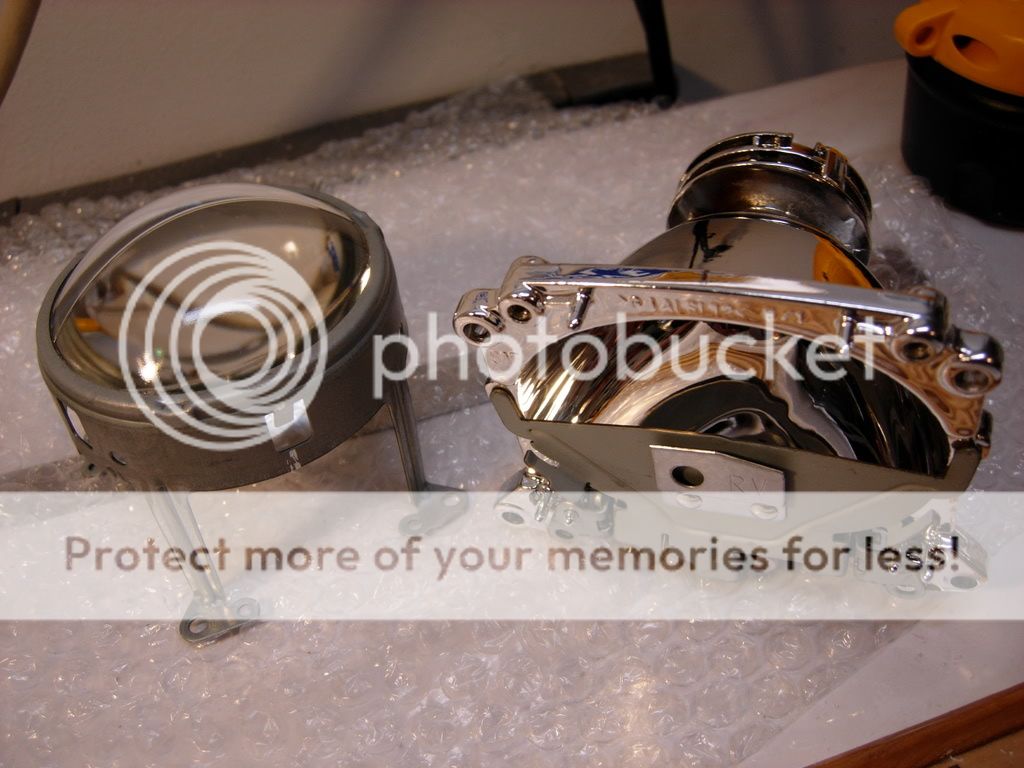
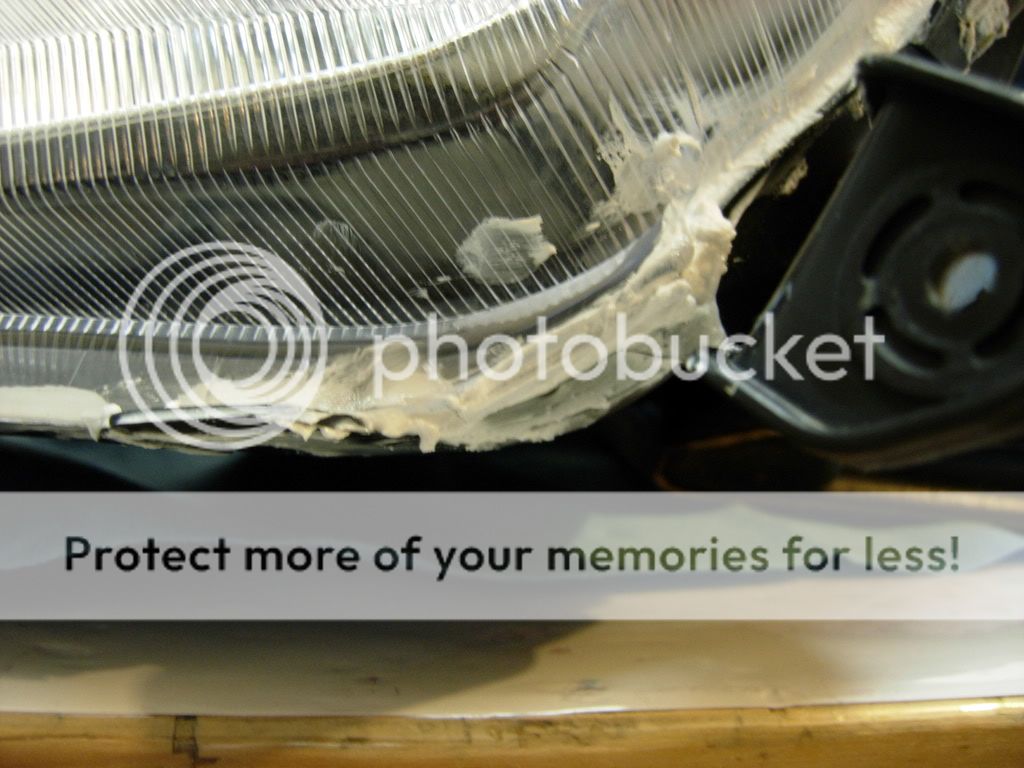
Remove the tape (should have done so by now) and clean everything up. A micro fiber cloth used for plasma or lcd tvs are great for this chrome cleaning....dont use alchol will take the chrome off and honestly dont use a brush you will scratch the housing. Aim your chrome housing into the main black part of the headlight and and make sure the two adjusting screws line up. Take your time here! dont rush so you dont snap anything and have to remove it. Try to screw both screws at the same time.
when ready to bake again do the same thing 250 degrees but this time i did 5 min and the reason for that was because you should try to line up the clear part of the headlight to the second part (chrome part mounted to the black part) Heres why if you pushed the glue back when it was hot, you should be able to snap in a couple of the security notches on the lamp. Help yourself with some clamps but if you cant get all of them in its ok!! just approximate them so its easier.
Put the lamp in the oven for the 5 min and when its ready move quikly and make sure its put back together correctly. the tighter it is the better insulated. Once its done you should be good. I added some silicone to the junction of the headlight to better insulate it.
AND there it is, if you guys have any question feel free to ask. Ill answer as quickly as i can. Also, i will try and make an electric diag of the harnes... i just havent done the wiring completely so the car is still in overhaul. Ill update you soon.
some final pics: enjoy
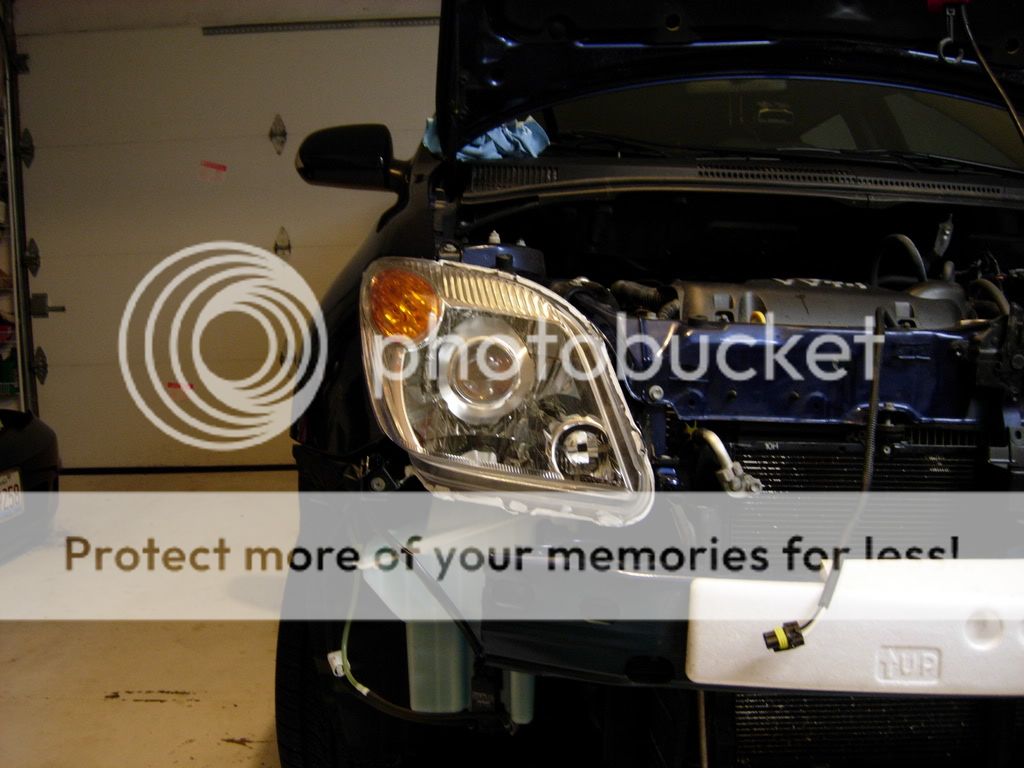
no flash on cam
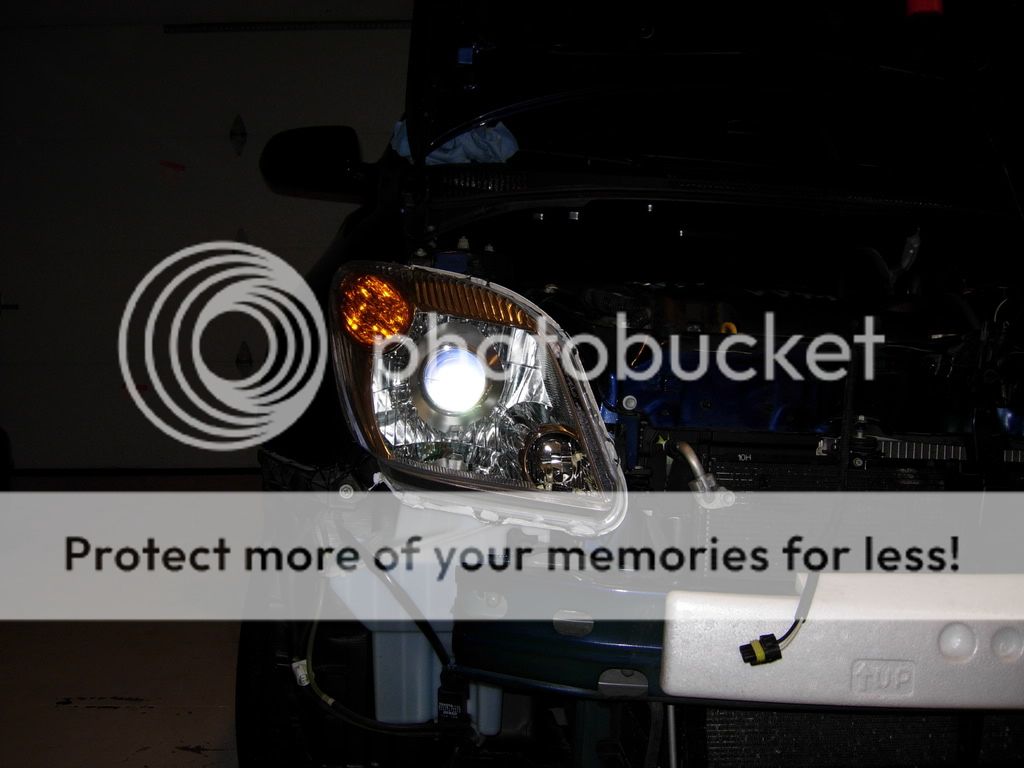
flash
Equipment:
Bosch E46 projectors (D2S bubls)
Bosch Ballast
Bosch Ignitors
Shrouds (i think they are from an audi or bmw)
wire harness (still working on it)
Soldering iron
Tape
Screwdrivers
small/med clamps
flexible sharp blade
and more common tools...
First: The Plan and background
So as you all now i added some bixenon projectors meaning it was both high and low beam in one headlight. I highly recommend having someone else with you to help. Makes the process easier. For some background info: i previously had purchased one of those cheap HID kits which was cool but blinded the heck out of ppl and had no high beams
heres the projectors:
Disassembly
Remove the front grill and bumber. The grill has about 4 snap on screws (easy to take out) and the bumber is a little more challenging. You need to take out about 3 or 4 of the similar screws as the grill but located underneath the bumper itself and another 2 or 3 by the tire and fender. Be patient, have a lot of light and youll find them.
Here's a pic of the end result :
Removing the headlight
Ok so the reason for removing the bumper is to get access to the headlights. It has about 4 or 5 bolts that need to be removed. Cool, so for the headlights.... i recommend starting with the passenger side and only take this one out its easier and will make the other one nice and easy. Take them out and the headlight slides towards the front and a little bit up. BE CAREFUL WITH ALL THE CABLES. Make sure you disconnect the lights. Should be a total of three. (buddy help comes in handy) you can put the bulbs in a clean area mayb some plastics zip bags or somewhere they wont get touched or damaged
sorry i didnt take a close up pic for this but should end like this
Taking apart the proj
This isnt bad at all, if you have some plastic bags grab some and same for rubber gloves (eh just a precation so you dont scratch anything). On these projs theres a total of 4 screws that hold the whole thing together. Simply remove them and you will see how it assembles i recommend keeping the two rear parts together so you measure very well. At this point preheat your oven. I did 250 degrees F.
heres the pic of the disassembled proj:
Baking time!!
once the oven is preheated for 250 degrees put the headlight in for 10 to 15 min... i put mine for 12 and was perfect. This is to soften the glue holding the housing and the headlight apart. Keep in mind that once its ready to be taken apart its going to be hot (its not terrible so dont worry) but the faster you do it, the easier it pops out. Use some screw drivers to help you with this process and again if your buddy is there its easier and faster. Once the headlight is into to parts try to "clean" the glue...DONT remove it but try to put it back as it was so when you put it back together it will be A LOT!!! EASIER.
Here's the best pics i got of the parts. My apologies, like i said the faster the better so i didnt take that many pics during this process.
On this one the chrome housing is prepared to be worked on... on the first one i tried just plastic and tape.....didnt work so well...it left scratches but on the second one i just used tape and worked a lot better. Also for removing the chrome part its 2 parts. I called the eyebrow the starship... thats where the turn signal is at and hey...Looks like a ship! lol some ppl might consider painting the chrome...i didnt... at all... i personally like the chrome and although will cause more glare, this is personal preference. Keep in mind if you do paint this area, the process wil be taking a little bit longer as well as more $$. Use high temp primers and paints.
MOVING ON!
The cutting and mounting
Yes its tough but not that bad. if you look at your chrome section on the rear side where the main bulb goes, you will see the outline of a circle... its about 2 inches in radius from the center where the bulb goes... now both my headlights had this...i hope yours do too because its a great reference, if not its about a 2 inch circle you want to achieve. If you are using diff projs, the dimensions will differ but do small changes as you are cutting... with the projs i used, the biggest thing was to get the solenoid (part that moves metal plate for high/low) through the housing. Heres what it looks like:
its a circle with a rectangle at the bottom.....sort of.... If you can, this will help you a lot on the next headlight, MAKE A TEMPLATE OF THE NEW SHAPE i used aluminum tape and work great. On the second headlight you simply paste it and cut the patter!!
When inserting the rear part of the projector and went from the front towards to rear and screwed it using.... 3/16 screws. try to level everything
Here is a rear view of it mounted
Reassemble/testing
Keep everything nice and clean so you avoid scratches on the housing and components. Put the proj together so you can test it and do some mods if you wish. I wont go to much in detail on how to mod them... i just read a few forums and got an idea of what to do. You pretty much want to adjust one screw that gives you a sharper cutoff but will reduce the color you get. And/or you can actually bend the metal plate towards the read of the proj looking at it from the front with some pliers if not your own fingers keep in mind its a MINIMUM bend. BE CAREFUL!! read more about this!!!! heres my tested proj.
halfway!...eh not really but almost there :D
this is the proj as it came, to me its more white in the middle and a little blue... not the best cut off but from the research i did, apparently these projs dont give you that great z shape cut off....eh its all good to me
This was my result... a little more colors and a less sharper cut off... now thats my choice you guys/gals do as you wish
Final steps
Remove the tape (should have done so by now) and clean everything up. A micro fiber cloth used for plasma or lcd tvs are great for this chrome cleaning....dont use alchol
when ready to bake again do the same thing 250 degrees but this time i did 5 min and the reason for that was because you should try to line up the clear part of the headlight to the second part (chrome part mounted to the black part) Heres why if you pushed the glue back when it was hot, you should be able to snap in a couple of the security notches on the lamp. Help yourself with some clamps but if you cant get all of them in its ok!! just approximate them so its easier.
Put the lamp in the oven for the 5 min and when its ready move quikly and make sure its put back together correctly. the tighter it is the better insulated. Once its done you should be good. I added some silicone to the junction of the headlight to better insulate it.
AND there it is, if you guys have any question feel free to ask. Ill answer as quickly as i can. Also, i will try and make an electric diag of the harnes... i just havent done the wiring completely so the car is still in overhaul. Ill update you soon.
some final pics: enjoy
no flash on cam
flash
04-14-2008, 05:02 AM
#7
Senior Member
SL Member
Team ScioNRG

Join Date: May 2005
Location: Rochester, NH
Posts: 812
That is about the most beautiful thing I have ever seen. I would be interested in seeing a shot of the car reassembled with the proj. headlights in when you have a chance to do that.
Great Work!!!
Great Work!!!

 04-15-2008, 03:12 AM
#10
Junior Member
Thread Starter
Join Date: Dec 2006
Location: Chicago, IL
Posts: 18
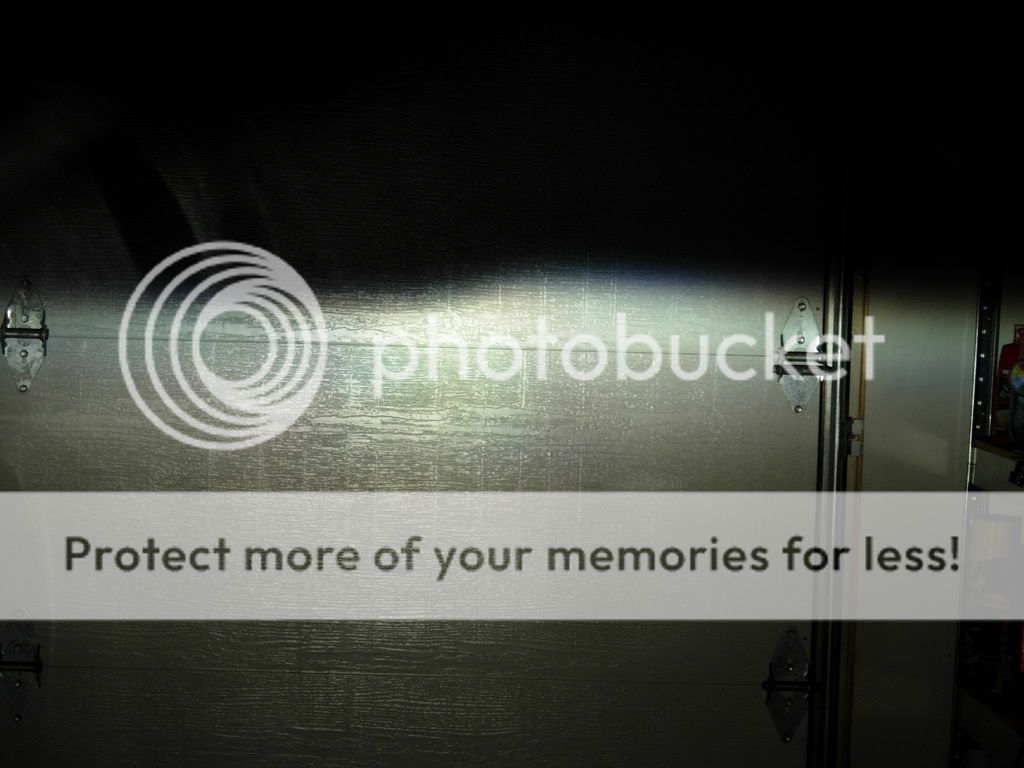
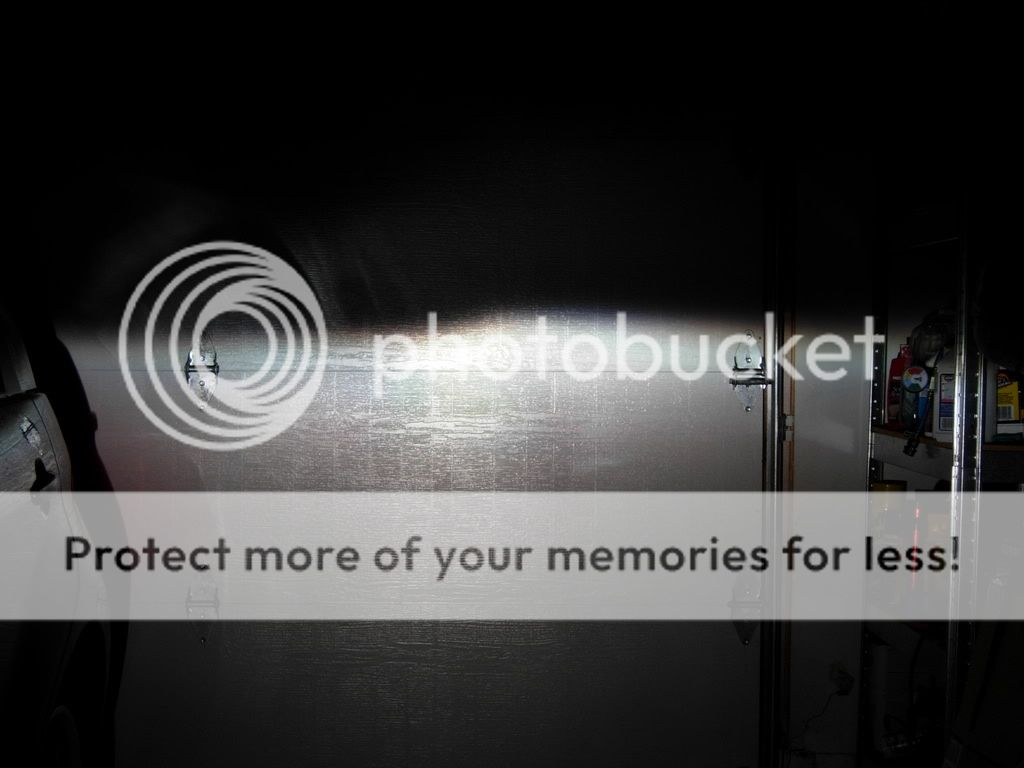
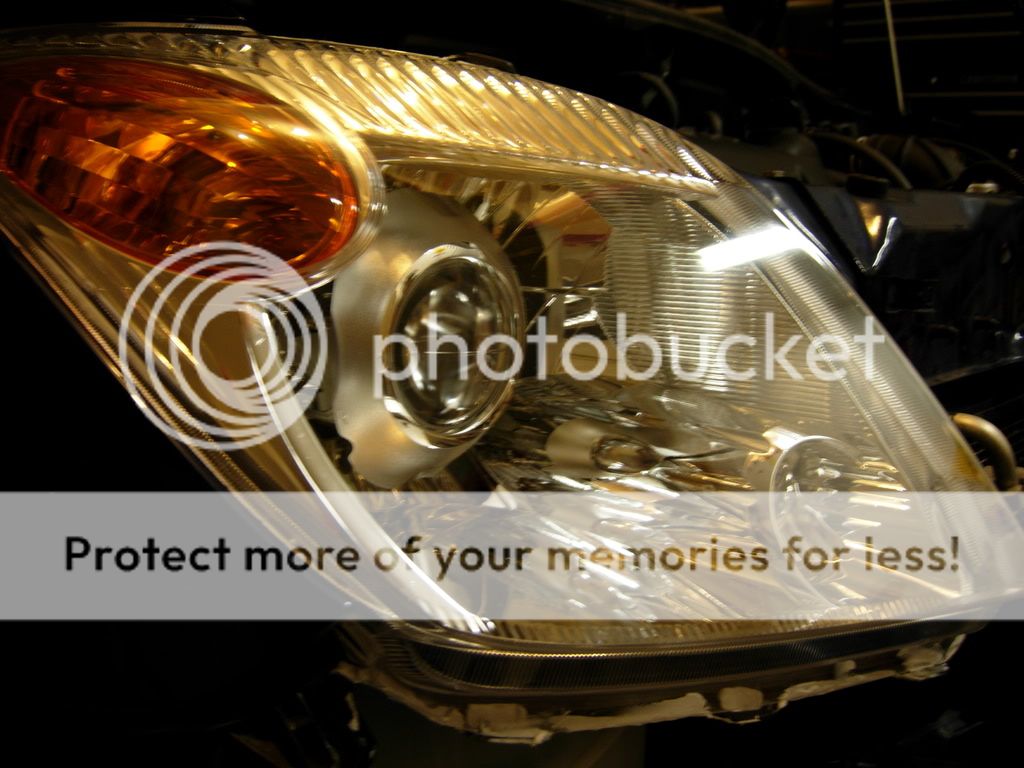
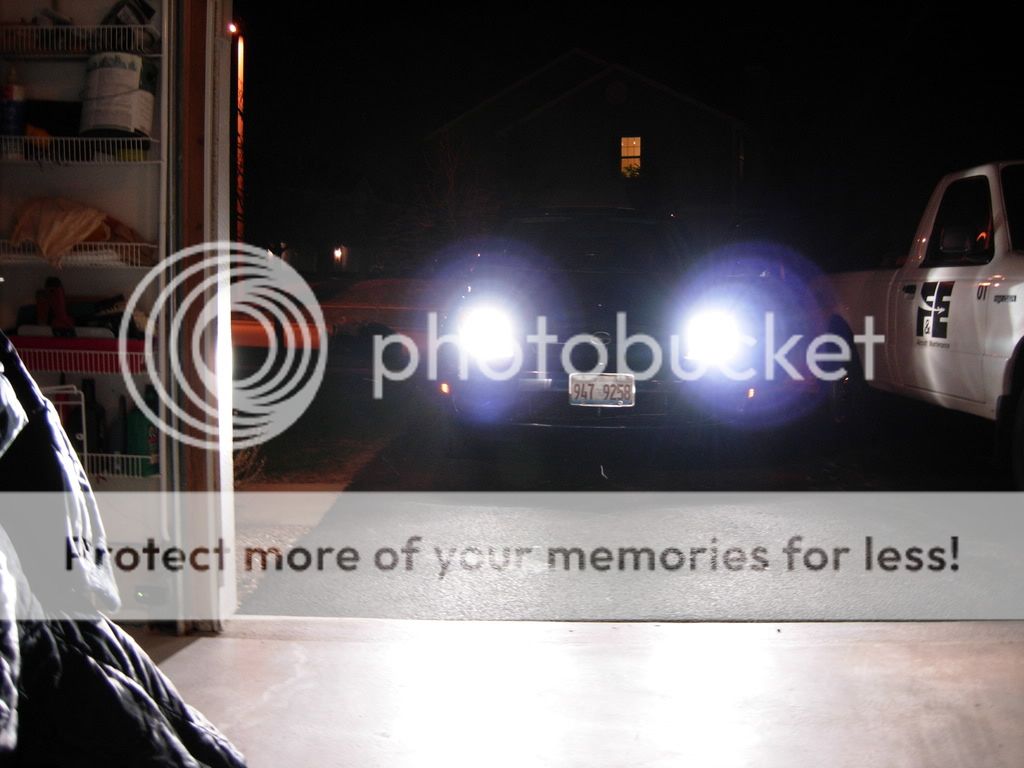
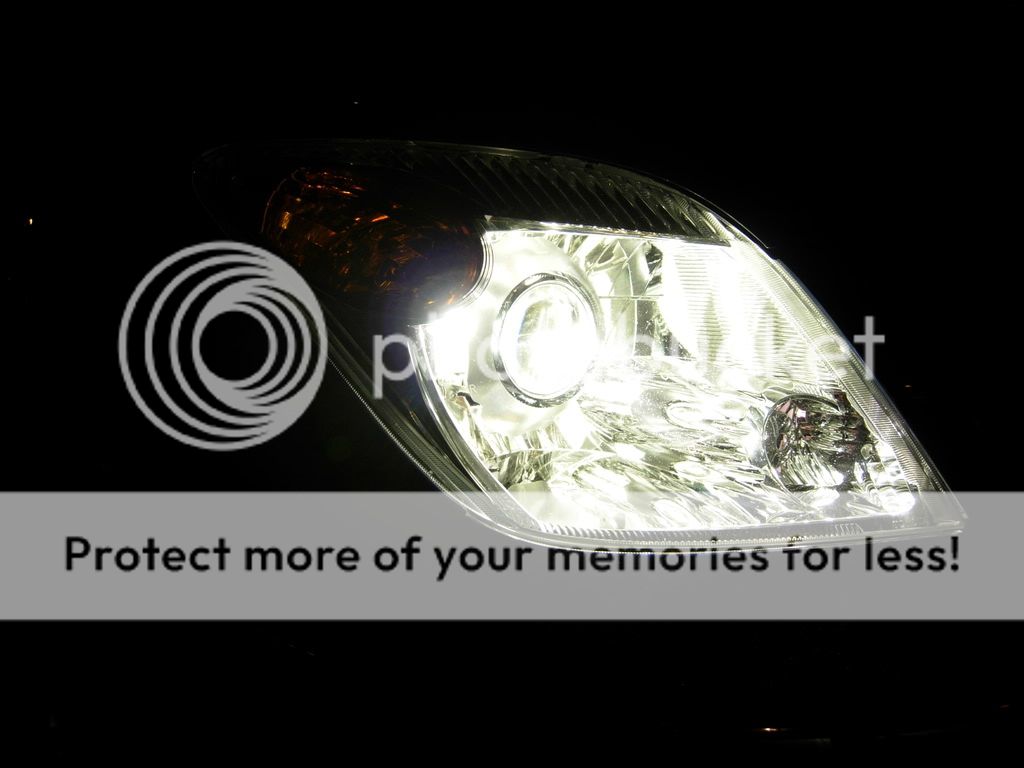
ok ladies n gents.... almost done, both headlights are functional except for the high beam. I didnt do the wiring for that cuz i only had half a day to work on them..(darn school!) but heres some pics at night. Ill get the day ones tomorrow. enjoy

 04-15-2008, 05:23 AM
#13
Senior Member
SL Member

Join Date: Mar 2005
Location: Santa Clarita, CA
Posts: 290
is the light visible around the sides of the projector? reason I ask is i have a pair of similar projectors and am wondering if/what I should cover up the sides with...and have you noticed any glare from the chrome reflector housing?
that does look freakin' sweet though!!!
that does look freakin' sweet though!!!
04-15-2008, 12:24 PM
#14
Junior Member
Thread Starter
Join Date: Dec 2006
Location: Chicago, IL
Posts: 18
For the pricing i would say its been about...$350-$400 more or less.... in regards to the housing what i noticed was that it does spread the light in diff directions but not glare, i aimed the headlights down to avoid the glare. When i went out for a test drive i got close to some cars but the cut off was well below their rear windshield so i think theyre fine, either way i still need to do some final adjustments once i get the high beam working....


