Echo Drawer Install. w/Pics...Lot of em!!
#1
Thanks Sid for the reply...which reminds of something I forgot to add. I don't know if this has been DIY'ed before and I dont claim to be the first to do this..just a note.
I guess we all want to have something a little different then the rest and I have read that the DB had this option but the Xb didnít. So letís say this is a way to get a little closer to DB. For me I needed a place to put my Dreamcast because having it on passenger side floor wasnít cutting it.
Tools needed;
-Socket wrench
-Drill (makes it go a lot faster)
-Flat head screwdriver
-Needle nose pliers
Optional:
-Dremel (to lazy to go out and buy mounting brackets so I cut them out!!)
-A vice. (For bending)
-Wife _____in in your ear about dinner!
-Very helpful Son that brings you all the wrong
Tools but you love him so who cares what tools he brings!!
I rate this on a scale of 1 to 5, 5 being the hardest and 3. Only because if you do have a contact or friend to spot weld the frame into place, the way I did it can be a little time consuming and a real pain!!
Start to finish took about 2 hours.
Ok so I try and make a trip to my local auto wreckers every weekend. Love finding the little gold nuggets, I have been wanting to find the matrix wiper arm for the variable speeds, but as usual it looked like I wasnít going to find anything. I started checking out the echo's they had on the lot and sure enough I saw the drawer. Now I was lucky enough to find the seat was already unbolted which save a lot of time. But the wire frame the drawer hangs from is spot welded into the seat. So not having the tools with me at the time to remove it I sat there for about 10 mines trying to break the welds. Eventually I just did the old school method of bending back and fourth, back and fourth. Let me tell ya pain in the azz!!
Fast forward to my trip home (it cost 25 bucks and several cuts to my hand and wrist!!!)
Fig 1.0
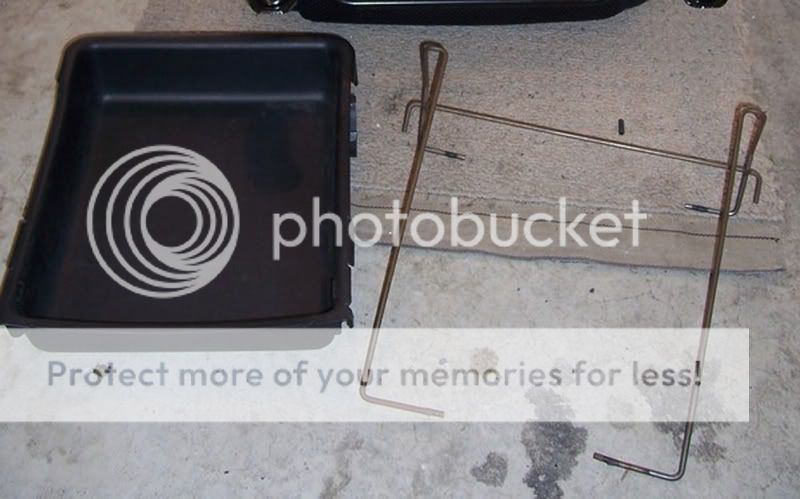
First you need to remove the seat:
Fig 1.1
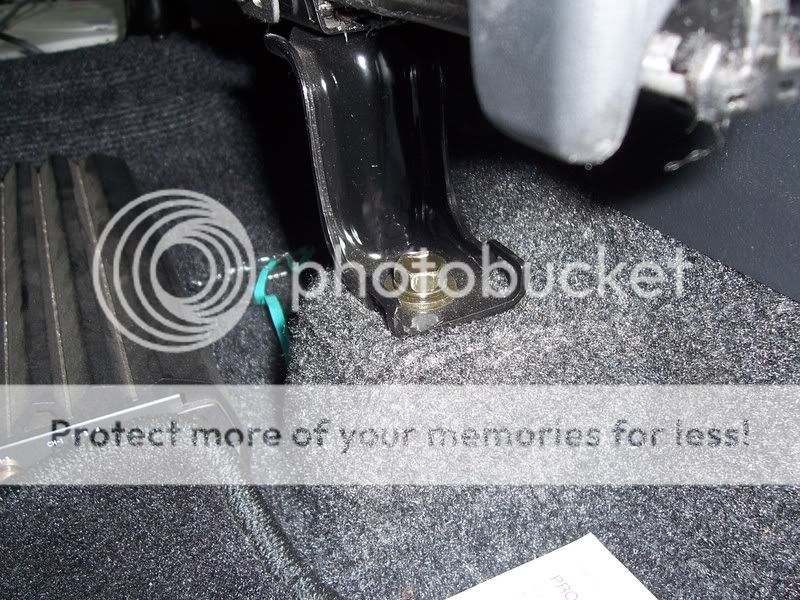
The passenger side seat has five bolts, 2 in the front 3 in the back as seen here
Fig 1.2
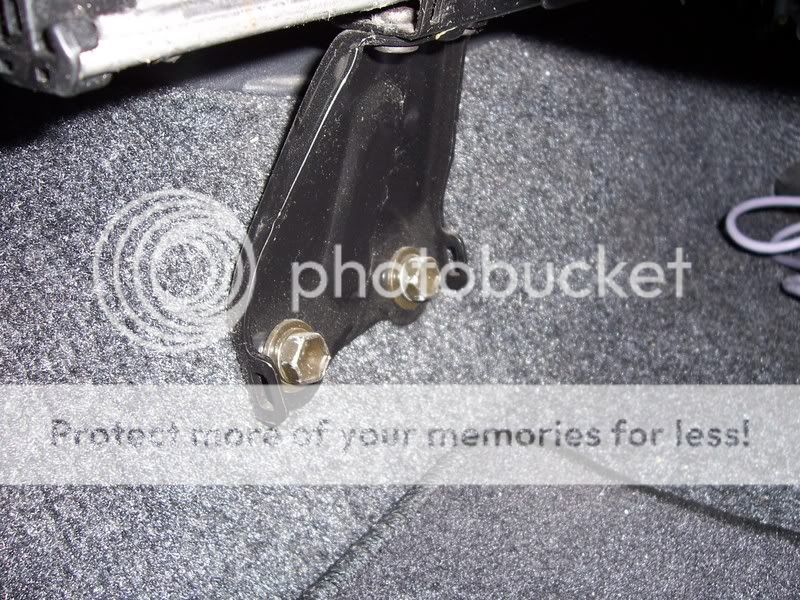
Now I am not claiming this DIY as law just a helpful guide to do this. If you have other tools and or items to aid in your quest for the Db drawer please by all means add it to this DIY
Ok so time to unplug this item. Itís under the seat closer to the right side. I can only assume itís for the seat belts and air back because strangely enough I didnít plug it in right away and the airbag light came on the next time I started the box back up!!
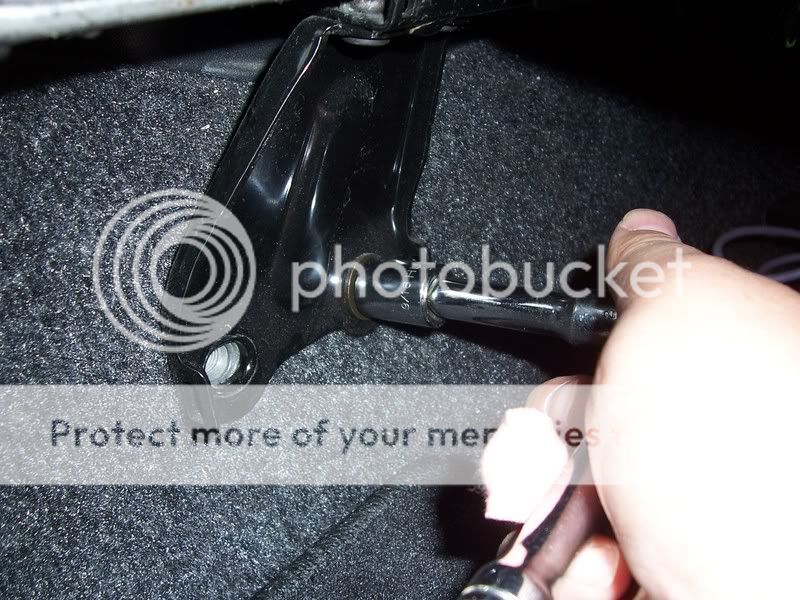
Fig 1.3

Then grab your socket wrench and begin to remove the bolts holding the seat into place (I went front to back as the seat sits on an angle and will fall possibly ruining your carpet if you do the back first).
Fig 1.4
So now you have the seat out and are ready for the timely task of mounting the bracket to the seat. So this is what you should have:
Fig 1.5
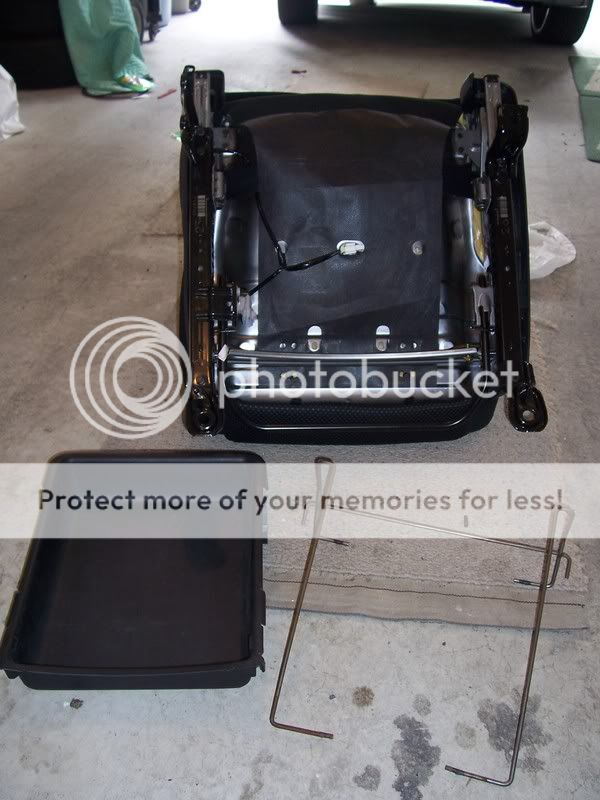
First we need to remove the black cloth from the underside of the seat:
Simply remove the C-clips seen here with the pliers. There are 2 and are not hard to miss.
Fig 1.6
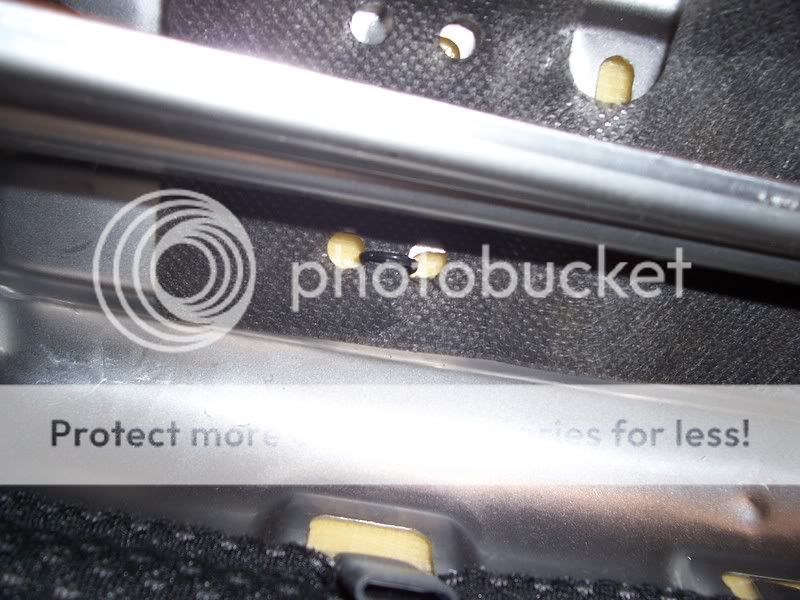
Once the underside bare frame is exposed be sure to remove the plugs from their mounting position. Flat head screwdriver help out here. There is one plug I didnít get a pic of that is right in the middle on the seat. Very hard to miss. I have marked all areas that have connections and plugs that need removing in Fig 1.9
Fig 1.7
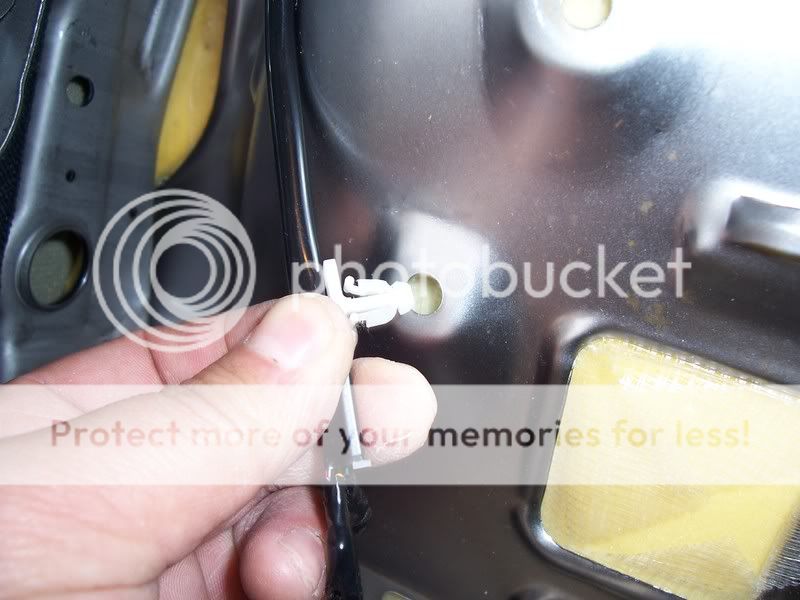
Fig 1.8
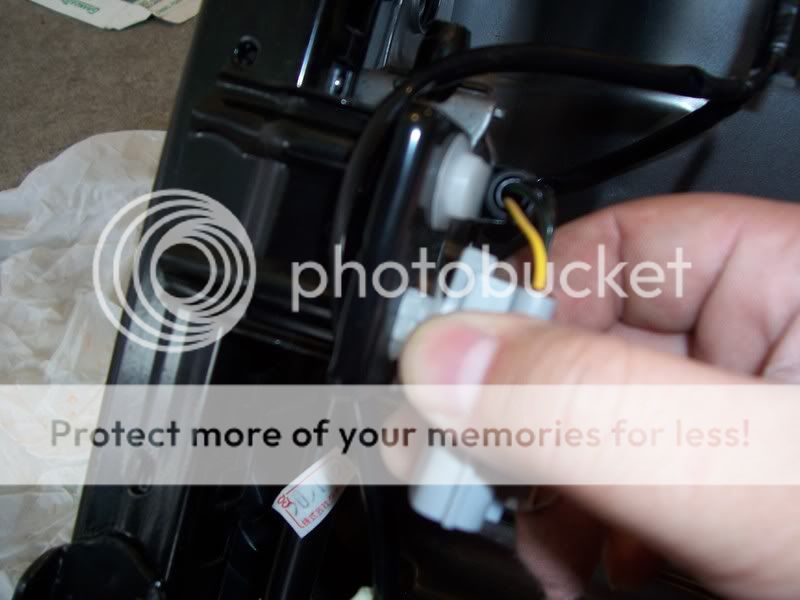
Fig 1.9
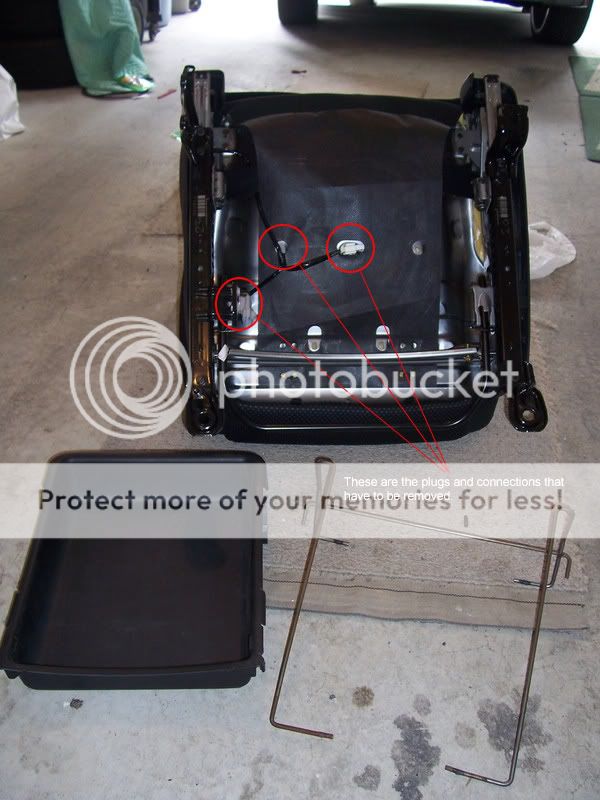
Ok so we have moved the black material and removed all the wire mount plugs and wired connections and this is what we now have:
Fig 2.0
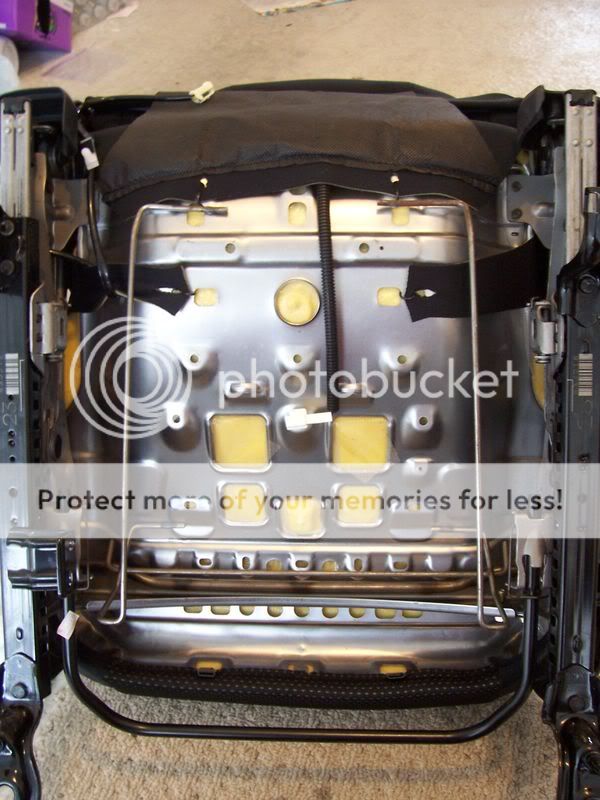
As you can see the drawer frame fits nicely under the seat and I would recommend you space it out and square it up then mark it to be sure. Just helps when drilling the holes and lining up the brackets.
Now this is where the DIY turns into do it how you see fit. I didnít have the option to get the frame welded in and after 9 hours on the job that day my brain shut down. However if you see a better way to attach this badboy on go hard this is just the way I did it.....low tech style!!
First the underside of the echo seat is a little different then the Xb so you will need to compensate for that by modding the frame so the drawer will be level and not on an angle. The way the frame appears in Fig 2.1 is the way it will fit into the seat (if you and the seat are facing the way it appears in Fig 2.0). You need to bend the L part as seen above away from you or towards the bottom of the seat. I used my Vice for this.
Fig 2.1
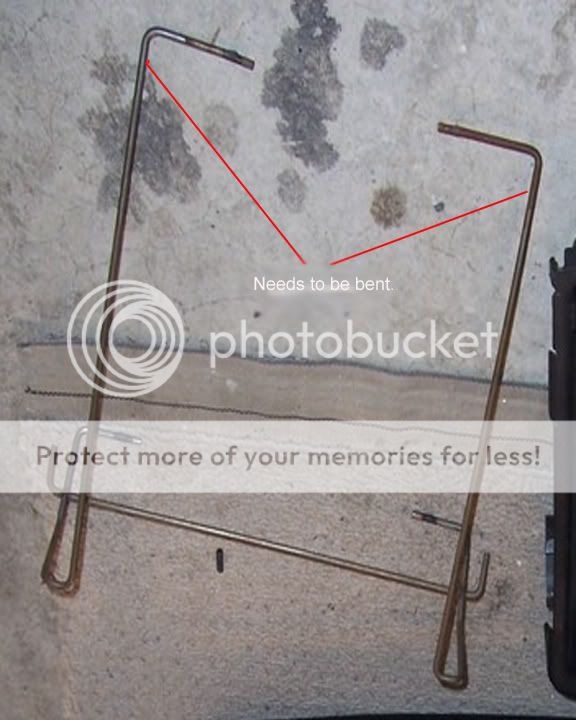
This is what it should look like when done. Remember away from you! I made the mistake already!!
Fig 2.2

Trust me if you have gotten this far you will know which way to bend. It has to be done, if not the drawer will not fit all the way and will stick out of the seat.
Ok so now we are ready to bolt the frame down. Areas to be bolted as per Fig 2.3
Fig 2.3
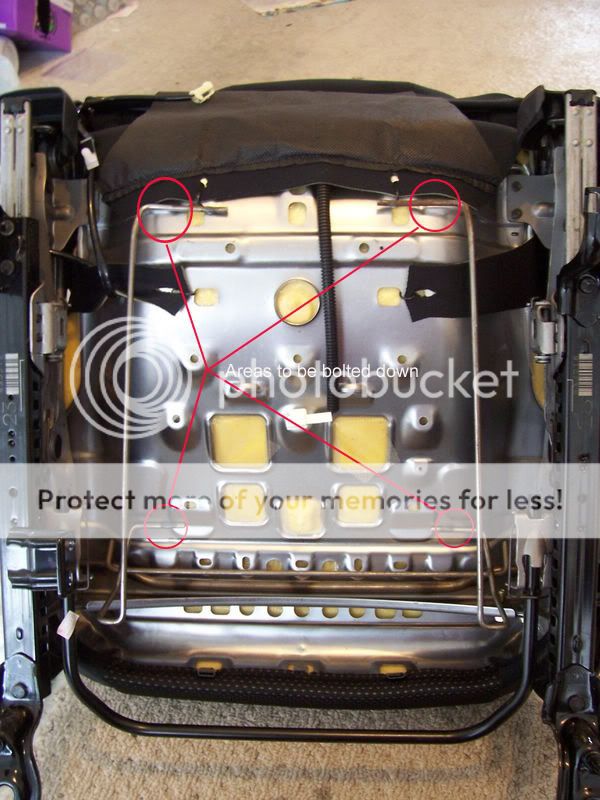
Now this is where we turn the suck meter to its highest setting. you cant really drive a screw through the bottom side of the seat without any of your passengers getting a nice little surprise in the butt the next time they sit down so what I did put the screw from the inside out. This is the part of the DIY where it could turn and you can come up with a better method then I did ....But this is how it goes:
Again because I was lazy and too tired to go out again I just cut these plates with a Dremel. Then I drilled the holes into the seat. Being careful I use the plate as a guide for each set of holes I drilled fours sets in total. Then what I did is fished the bolt in behind the seat and as seen in Fig 2.5. Basically I pushed back the foam with metal rod to Maneuver in behind to place the screw. I used the needle nose pliers again, love the needle nose!!
Fig 2.4
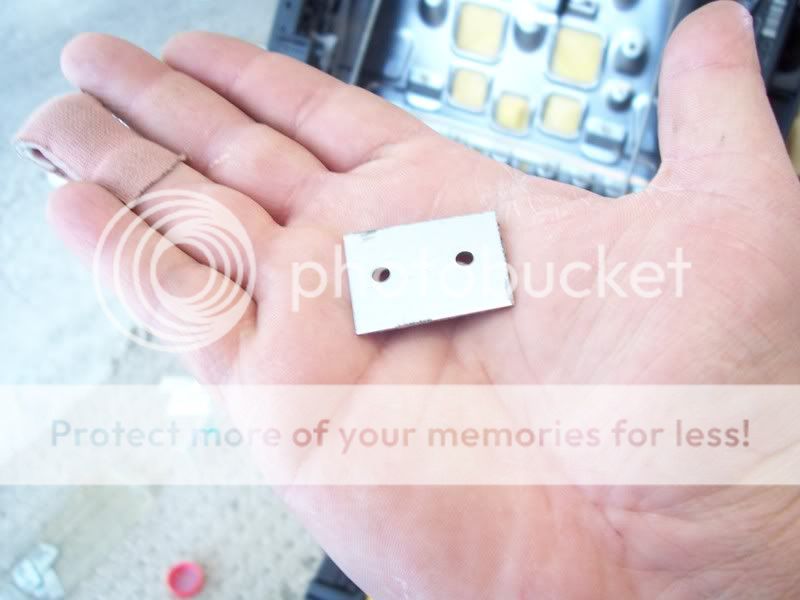
Fig 2.5

Now the bolts for the bottom. Becuase the distance between the hole and the opening is to far for the needle nose I had to use the fishing line technique. We have all used the Fishing line at one time or another!! As per Fig 2.6
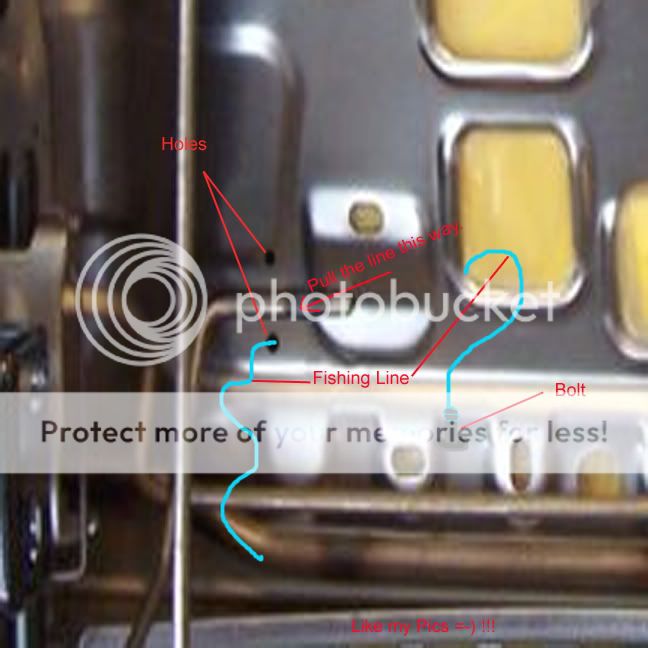
Ok after 2 hours trouble shooting issues that came up (I did not mention as not get laughed at here!!) messing around with the drawer frame, fishing for bolts and getting realty ____ed off I finally was able to get all the bolts on and the plates tied off but not all the way tighten.
Now with any mod like this itís all about being sure itís positioned correctly and before tightening all the way. I wonít trouble you all with what happens when you tighten without positioning. Once you are happy with the placement tie off all the bolts tight. Also forgot to add just to be sure the bolts donít rattle lose use Lock washers or maybe even a little silicon.
I don't have many pics left but there isnt much left to say. you might find the wire drawer bracket may need some adjusting to ensure the drawer slides nicely and evenly. That took about five mins and with the help of a hammer. Be sure that your seat brackets are lined upas mine were not and putting the seat back in was...well lets not go there!!
but the finished product.....................!
Echo Drawer Installed...Little closer to DB

Yaw! My DC has a home and isnt on the fu3kin floor anymore.
This is my First DIY for an XB install so please be kind. if spelling is your issue well whatever. If there is anything and I mean anything that i can explain better or help you with please feel free to contact me at:
exo_kutioner@hotmail.com
my windows messenger is always on so hit me up with a PM if you need help!
Thanks all for reading and enjoy your install!!
I guess we all want to have something a little different then the rest and I have read that the DB had this option but the Xb didnít. So letís say this is a way to get a little closer to DB. For me I needed a place to put my Dreamcast because having it on passenger side floor wasnít cutting it.
Tools needed;
-Socket wrench
-Drill (makes it go a lot faster)
-Flat head screwdriver
-Needle nose pliers
Optional:
-Dremel (to lazy to go out and buy mounting brackets so I cut them out!!)
-A vice. (For bending)
-Wife _____in in your ear about dinner!
-Very helpful Son that brings you all the wrong
Tools but you love him so who cares what tools he brings!!
I rate this on a scale of 1 to 5, 5 being the hardest and 3. Only because if you do have a contact or friend to spot weld the frame into place, the way I did it can be a little time consuming and a real pain!!
Start to finish took about 2 hours.
Ok so I try and make a trip to my local auto wreckers every weekend. Love finding the little gold nuggets, I have been wanting to find the matrix wiper arm for the variable speeds, but as usual it looked like I wasnít going to find anything. I started checking out the echo's they had on the lot and sure enough I saw the drawer. Now I was lucky enough to find the seat was already unbolted which save a lot of time. But the wire frame the drawer hangs from is spot welded into the seat. So not having the tools with me at the time to remove it I sat there for about 10 mines trying to break the welds. Eventually I just did the old school method of bending back and fourth, back and fourth. Let me tell ya pain in the azz!!
Fast forward to my trip home (it cost 25 bucks and several cuts to my hand and wrist!!!)
Fig 1.0

First you need to remove the seat:
Fig 1.1

The passenger side seat has five bolts, 2 in the front 3 in the back as seen here
Fig 1.2

Now I am not claiming this DIY as law just a helpful guide to do this. If you have other tools and or items to aid in your quest for the Db drawer please by all means add it to this DIY
Ok so time to unplug this item. Itís under the seat closer to the right side. I can only assume itís for the seat belts and air back because strangely enough I didnít plug it in right away and the airbag light came on the next time I started the box back up!!
Fig 1.3

Then grab your socket wrench and begin to remove the bolts holding the seat into place (I went front to back as the seat sits on an angle and will fall possibly ruining your carpet if you do the back first).
Fig 1.4

So now you have the seat out and are ready for the timely task of mounting the bracket to the seat. So this is what you should have:
Fig 1.5

First we need to remove the black cloth from the underside of the seat:
Simply remove the C-clips seen here with the pliers. There are 2 and are not hard to miss.
Fig 1.6

Once the underside bare frame is exposed be sure to remove the plugs from their mounting position. Flat head screwdriver help out here. There is one plug I didnít get a pic of that is right in the middle on the seat. Very hard to miss. I have marked all areas that have connections and plugs that need removing in Fig 1.9
Fig 1.7

Fig 1.8

Fig 1.9

Ok so we have moved the black material and removed all the wire mount plugs and wired connections and this is what we now have:
Fig 2.0

As you can see the drawer frame fits nicely under the seat and I would recommend you space it out and square it up then mark it to be sure. Just helps when drilling the holes and lining up the brackets.
Now this is where the DIY turns into do it how you see fit. I didnít have the option to get the frame welded in and after 9 hours on the job that day my brain shut down. However if you see a better way to attach this badboy on go hard this is just the way I did it.....low tech style!!
First the underside of the echo seat is a little different then the Xb so you will need to compensate for that by modding the frame so the drawer will be level and not on an angle. The way the frame appears in Fig 2.1 is the way it will fit into the seat (if you and the seat are facing the way it appears in Fig 2.0). You need to bend the L part as seen above away from you or towards the bottom of the seat. I used my Vice for this.
Fig 2.1

This is what it should look like when done. Remember away from you! I made the mistake already!!
Fig 2.2

Trust me if you have gotten this far you will know which way to bend. It has to be done, if not the drawer will not fit all the way and will stick out of the seat.
Ok so now we are ready to bolt the frame down. Areas to be bolted as per Fig 2.3
Fig 2.3

Now this is where we turn the suck meter to its highest setting. you cant really drive a screw through the bottom side of the seat without any of your passengers getting a nice little surprise in the butt the next time they sit down so what I did put the screw from the inside out. This is the part of the DIY where it could turn and you can come up with a better method then I did ....But this is how it goes:
Again because I was lazy and too tired to go out again I just cut these plates with a Dremel. Then I drilled the holes into the seat. Being careful I use the plate as a guide for each set of holes I drilled fours sets in total. Then what I did is fished the bolt in behind the seat and as seen in Fig 2.5. Basically I pushed back the foam with metal rod to Maneuver in behind to place the screw. I used the needle nose pliers again, love the needle nose!!
Fig 2.4

Fig 2.5

Now the bolts for the bottom. Becuase the distance between the hole and the opening is to far for the needle nose I had to use the fishing line technique. We have all used the Fishing line at one time or another!! As per Fig 2.6

Ok after 2 hours trouble shooting issues that came up (I did not mention as not get laughed at here!!) messing around with the drawer frame, fishing for bolts and getting realty ____ed off I finally was able to get all the bolts on and the plates tied off but not all the way tighten.
Now with any mod like this itís all about being sure itís positioned correctly and before tightening all the way. I wonít trouble you all with what happens when you tighten without positioning. Once you are happy with the placement tie off all the bolts tight. Also forgot to add just to be sure the bolts donít rattle lose use Lock washers or maybe even a little silicon.
I don't have many pics left but there isnt much left to say. you might find the wire drawer bracket may need some adjusting to ensure the drawer slides nicely and evenly. That took about five mins and with the help of a hammer. Be sure that your seat brackets are lined upas mine were not and putting the seat back in was...well lets not go there!!
but the finished product.....................!
Echo Drawer Installed...Little closer to DB

Yaw! My DC has a home and isnt on the fu3kin floor anymore.
This is my First DIY for an XB install so please be kind. if spelling is your issue well whatever. If there is anything and I mean anything that i can explain better or help you with please feel free to contact me at:
exo_kutioner@hotmail.com
my windows messenger is always on so hit me up with a PM if you need help!
Thanks all for reading and enjoy your install!!
#5
Awesome job Exo, nice write up, I will have to check it out at the next M&G,or sooner. You banged that one you pretty quick, handy with the modding, if you still want help with the wiring projects just let me know, I am going to be changing up my system next week and putting mine into my wifes truck, so If you want to drop by and work or watch , you are more than welcome. Once I get all the equipment in I will see if I have room one of of these too!!!!
#6
Originally Posted by CanxB
Awesome job Exo, nice write up, I will have to check it out at the next M&G,or sooner. You banged that one you pretty quick, handy with the modding, if you still want help with the wiring projects just let me know, I am going to be changing up my system next week and putting mine into my wifes truck, so If you want to drop by and work or watch , you are more than welcome. Once I get all the equipment in I will see if I have room one of of these too!!!!
Are you doing this stuff this weekend? if you are we will have to get together.
I will PM you!
#7
I Just did it for my install I bent the front of the metal bar to sit in front of the brace 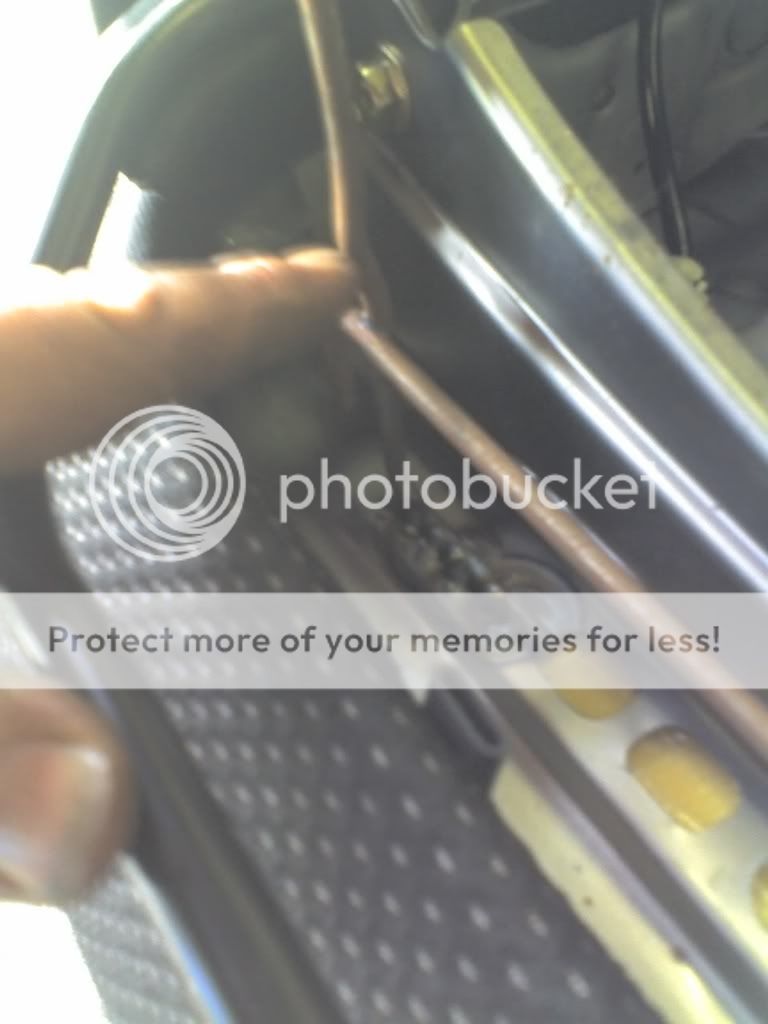
brace in behind front of seat lower left side finger pointing to bend that needed to be removed
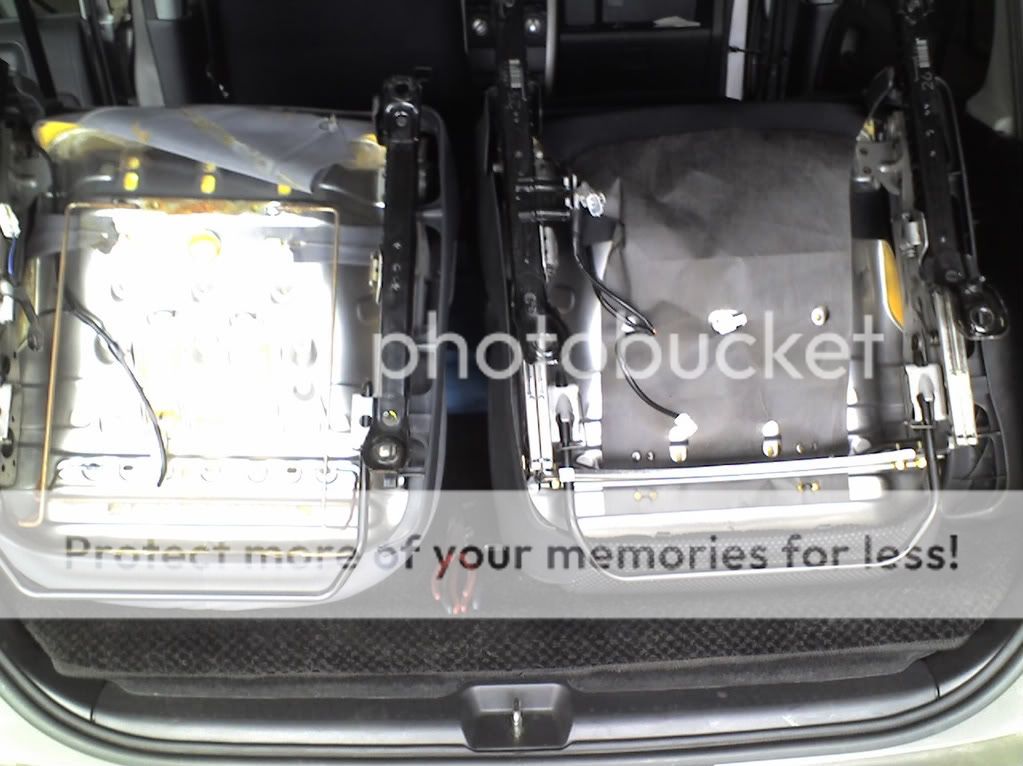
the scion and echo seat as removed from cars
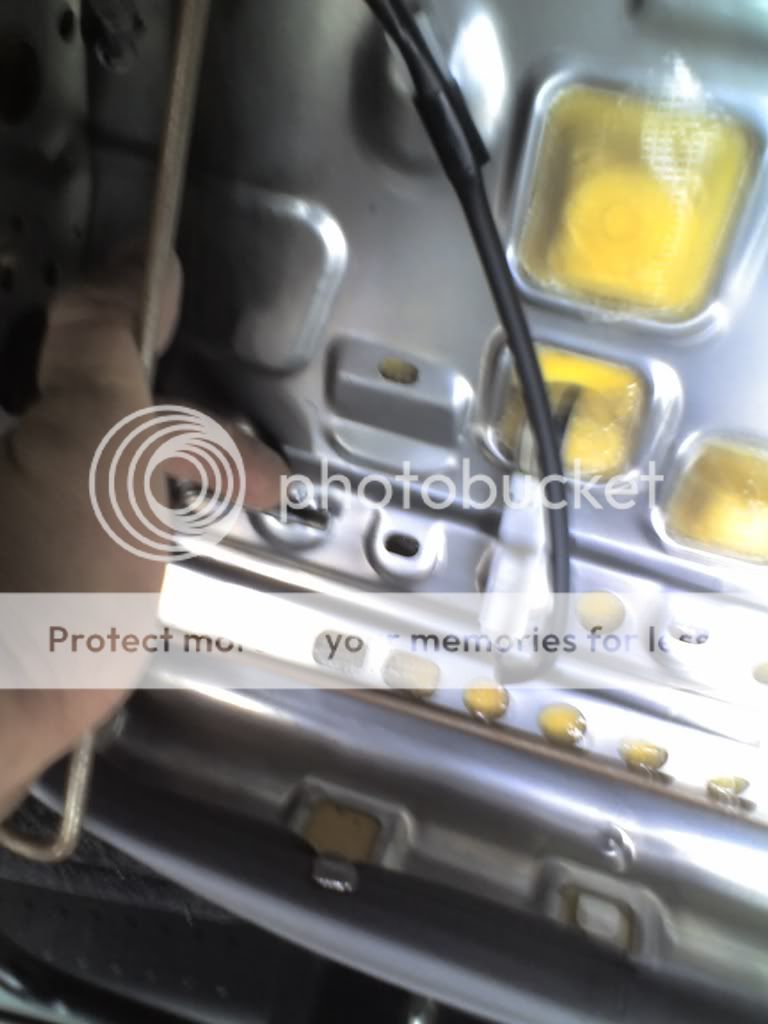
orig position on echo front
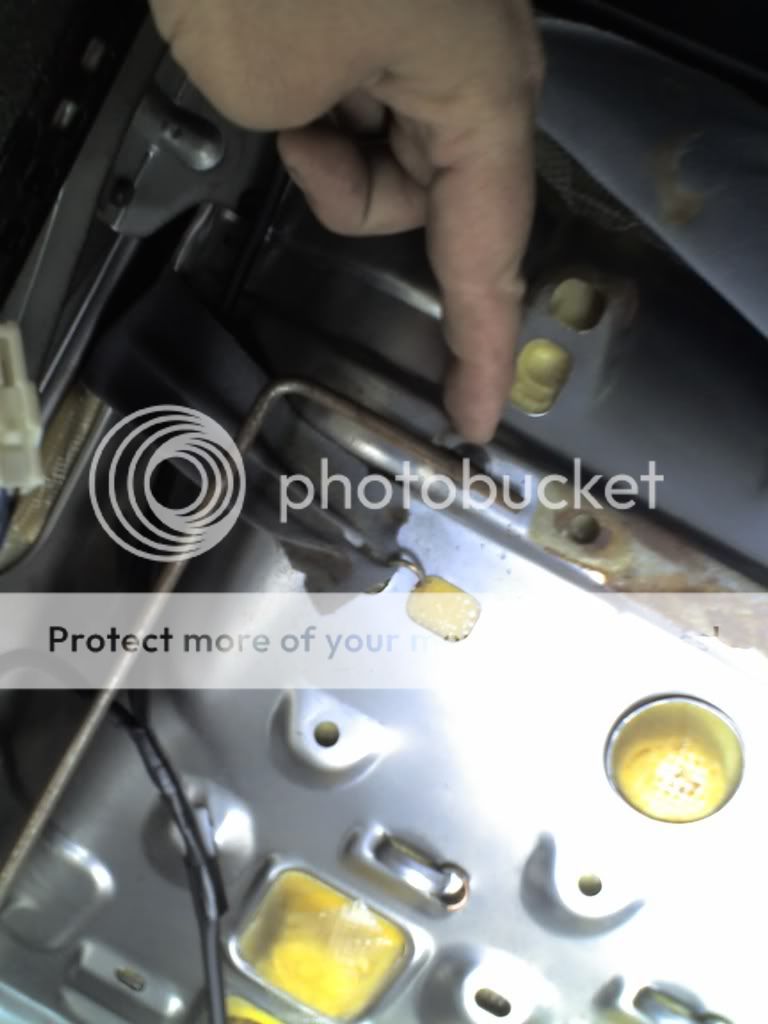
rear

brace in behind front of seat lower left side finger pointing to bend that needed to be removed

the scion and echo seat as removed from cars

orig position on echo front

rear
#8
So, what do you guys think about this? Real BB stuff.
Right hand drive.
http://cgi.ebay.com/ebaymotors/JDM-T...Q5fAccessories
Right hand drive.
http://cgi.ebay.com/ebaymotors/JDM-T...Q5fAccessories
Thread
Thread Starter
Forum
Replies
Last Post
Fisqual
Scion xA/xB 1st-Gen Drivetrain & Power
3
09-22-2015 06:51 AM


