
eDi speakers install in front doors of xB
 12-04-2005, 10:01 PM
#1
Senior Member
SL Member
Thread Starter

Join Date: Nov 2005
Location: SoCal
Posts: 1,281
Anyone installed these?
Yup, I will need a spacer, as they are 2.8" mount depth. Anyone know about approximate thickness for the spacer? I did see the eu700s (3.6" depth) in the door thread. I do not want to cut the grilles. I do know that that flange on the backside of the door panel gotta go.
Anyone know the mount depth of the 6500s? Info not available on eD site. I have ordered a Nine.4 and would rather go with them if they will fit!
Thanks!

 12-05-2005, 03:42 PM
#4
Former Sponsor

SL Member
Scinergy

Join Date: Jan 2005
Location: Newton, IA
Posts: 2,205
http://edesignaudio.com/product.php?...=Specs&cur=USD
I knew they were on there somewhere...under the specifications section.
2.8" deep, 3/4" spacer should do you just fine.
I knew they were on there somewhere...under the specifications section.
2.8" deep, 3/4" spacer should do you just fine.
12-18-2005, 03:29 AM
#5
Senior Member
SL Member
Thread Starter
Join Date: Nov 2005
Location: SoCal
Posts: 1,281
So I finally installed my eDi 6000s/amps/x-overs today.
Been making parts all week during lunch at work. Fabbed amp mounting straps, tweet mount plates and spacers for the door. Not really a step by step guide, but I hope it shows enough for anyone else considering the eDi comps. They do sound great! I still need to do more tuning, as I finished up late today. My sub box is carpeted. Where are them 11kv.2s??
Stock door speakers...awesome!

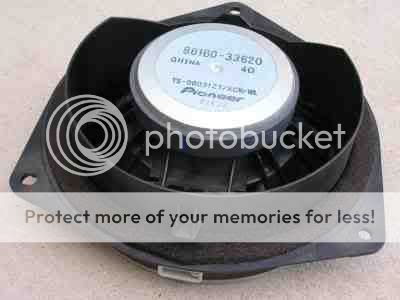
Use a sharp 1/4" drill bit. Secret is to not get the rivet spinning. Theres nothing to grab hold of if they do. Use light pressure and just scrape away until the flange falls off. Remove speaker and then use a Dremel cutoff tool to face off the rivet as flush as possible. Then knock out with a punch. Be sure to get the rivet...don't want any rattles or buzzing!

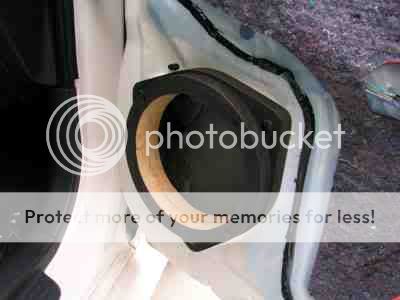
Ring inside of door panel gotta go.

Used pliers like a "can opener" to remove ring.


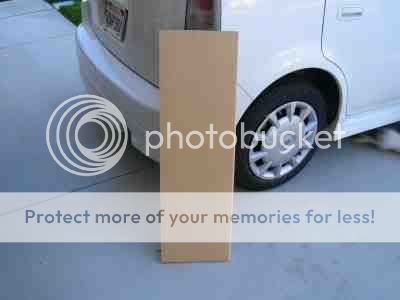
A Home Depot 1' x 3' MDF shelf ($1.99) works perfectly for the spacers.
I have CAD drawings of the spacers/rings, if anyone needs them. You too, Mandos!


CNC machined PETG plates for the tweets. Yup, CAD drawings available also.

Fabbed alum straps for amp mounts. Uses factory holes and screws.


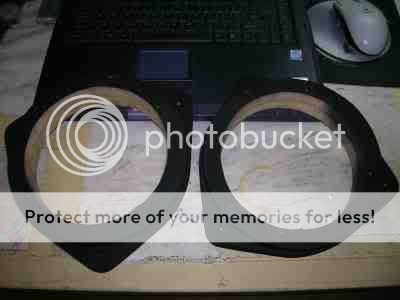
Spacers mounted using 10-24 x 1-1/4" screws into stock holes. No drilling.
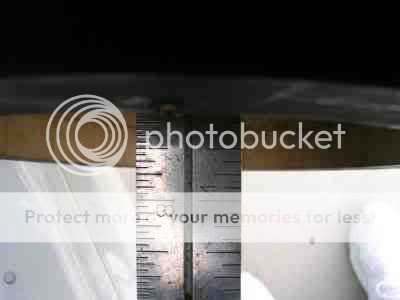
About 3-1/4" depth clearance. Needed 2-7/8"
Pulled the rubber conduit out. Theres a spot to pass the wire. I made a puller to help. Come in from the inside of the door with the puller. You will need to unfasten the plastic clip and straighten the conduit as much as possible. My trick is to spray WD-40 on a rag and lightly wipe the speaker wire before pulling. No lube, no go. Hook the wire and lightly tape over. Don't force! Drivers side a little harder, more wires. This was the worst part of the whole deal!


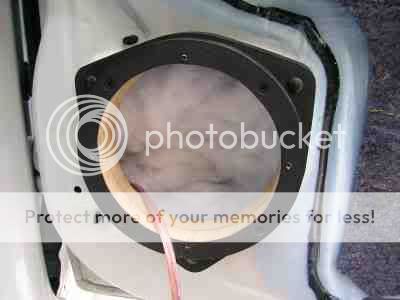
A little poly fill added, then mount the mids. Mmmm new speakers!


9.2x and 9.4 under passenger seat area. X-overs on rail under front of seat.


My cat helped out with the seat!

Tweets in place.

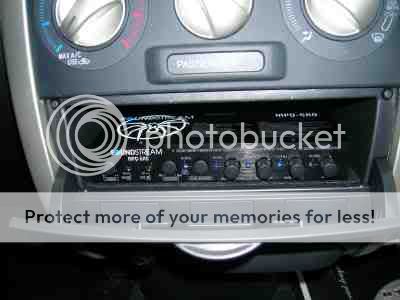
Soundstream MPQ-5x0 crossover/PEQ

Been making parts all week during lunch at work. Fabbed amp mounting straps, tweet mount plates and spacers for the door. Not really a step by step guide, but I hope it shows enough for anyone else considering the eDi comps. They do sound great! I still need to do more tuning, as I finished up late today. My sub box is carpeted. Where are them 11kv.2s??
Stock door speakers...awesome!
Use a sharp 1/4" drill bit. Secret is to not get the rivet spinning. Theres nothing to grab hold of if they do. Use light pressure and just scrape away until the flange falls off. Remove speaker and then use a Dremel cutoff tool to face off the rivet as flush as possible. Then knock out with a punch. Be sure to get the rivet...don't want any rattles or buzzing!
Ring inside of door panel gotta go.
Used pliers like a "can opener" to remove ring.
A Home Depot 1' x 3' MDF shelf ($1.99) works perfectly for the spacers.
I have CAD drawings of the spacers/rings, if anyone needs them. You too, Mandos!
CNC machined PETG plates for the tweets. Yup, CAD drawings available also.
Fabbed alum straps for amp mounts. Uses factory holes and screws.
Spacers mounted using 10-24 x 1-1/4" screws into stock holes. No drilling.
About 3-1/4" depth clearance. Needed 2-7/8"
Pulled the rubber conduit out. Theres a spot to pass the wire. I made a puller to help. Come in from the inside of the door with the puller. You will need to unfasten the plastic clip and straighten the conduit as much as possible. My trick is to spray WD-40 on a rag and lightly wipe the speaker wire before pulling. No lube, no go. Hook the wire and lightly tape over. Don't force! Drivers side a little harder, more wires. This was the worst part of the whole deal!
A little poly fill added, then mount the mids. Mmmm new speakers!
9.2x and 9.4 under passenger seat area. X-overs on rail under front of seat.
My cat helped out with the seat!
Tweets in place.
Soundstream MPQ-5x0 crossover/PEQ
12-18-2005, 05:04 PM
#6
Member
SL Member

Join Date: Oct 2005
Location: Nowhere
Posts: 61
I would love to have the cad drawings for the speakers rings if that is still up for grabs. Also the amps that you are running are they a (4) channel & (2) channel? If you have a total parts list (Speakers,Amps) you could email me that would be a whole lot better for ordering.... Thanks again for the great write up looks awsome
12-18-2005, 08:44 PM
#7
Senior Member
SL Member
Thread Starter
Join Date: Nov 2005
Location: SoCal
Posts: 1,281
I am using Elemental Designs components. They are a sponsor here at ScionLife.
I have the 6000 comps with a nine.4 amp. Currently running off front channels (65W x 2) but am looking for the hook up pics that I saw somewhere here to run bridged 150W x2 @4ohm. Lots of headroom!
I have the nine.2x amp also and am waiting for my (2) 11kv.2/D4 subs. Will be run bridged @ 600W x1 @4ohm.
Check out their site. Solid, honest, quality and performance. There are links here on ScionLife. Chris @elemental is very helpful with info and guidance.
 12-18-2005, 11:37 PM
#9
Senior Member
SL Member
Thread Starter
Join Date: Nov 2005
Location: SoCal
Posts: 1,281
I am extremely satisfied with the eD equipment so far.
It is "old school" solid and strong. The eDi 6000 comps are very musical, sounds better than any set I have ever had. And like you stated, they are very well priced for the quality!
Go eD!!
It is "old school" solid and strong. The eDi 6000 comps are very musical, sounds better than any set I have ever had. And like you stated, they are very well priced for the quality!
Go eD!!

 12-20-2005, 05:27 AM
#13
Senior Member
SL Member
Thread Starter
Join Date: Nov 2005
Location: SoCal
Posts: 1,281
i'm going to be getting some ed 6000 within the next month ... you want to build me some tweeter mounts and spacers for the doors like yours?
They are very, very easy to make. Worst part is the templates and they are already done and tested.
I can send you the drawing files and shareware program to print full scale if you like.
 12-20-2005, 05:58 AM
#15
Senior Member
SL Member

Join Date: Dec 2003
Posts: 235
Originally Posted by tanakasan
i'm going to be getting some ed 6000 within the next month ... you want to build me some tweeter mounts and spacers for the doors like yours?
They are very, very easy to make. Worst part is the templates and they are already done and tested.
I can send you the drawing files and shareware program to print full scale if you like.
that would be awesome...thanks man. i'm going to start building some basic stuff like this. i'm in the process of designing a box for a 9kv.2 to fit in the storage area. send me what you can to derricklee@sbcglobal.net
 01-08-2006, 10:13 PM
#17
Senior Member
SL Member
Thread Starter
Join Date: Nov 2005
Location: SoCal
Posts: 1,281
Thanks!
Its a "ragdoll" breed, rescued from the street gutter system. Was just a kitten, fell in somewhere and could not get out. We had to unbolt the steel covers and the grates on the drains to try and coax it out. Put up signs, called the shelter and after a month, decided to keep it. Must have been someone's new pet because when we took it to the vet to spay, they said it was already done.
All fat and sassy now, shes a good cat.
06-12-2006, 01:37 AM
#19
Senior Member
SL Member
Thread Starter
Join Date: Nov 2005
Location: SoCal
Posts: 1,281
That is the original install of the eDi 6000's.
The poly fill was just lightly stuffed in the door behind the speaker. It has since gone bye-bye, replaced with eDead v1SE2 and a set of eDi 6500's.
PM your mailing address and I will print a set up for you! These work great for the eDi 6000s and 6500s. They have a bottom mount depth of 2.8".
edit:
Just noticed that you have an Echo...these templates are guaranteed to fit eDi 6000/6500's in an xB. For use in other vehicles or with other speakers, you might have to make adjustments!
06-12-2006, 02:45 AM
#20
Senior Member
SL Member

Join Date: Oct 2003
Location: Alberta, Canada
Posts: 197
Trurth be told, I have my doubts it can fit in the echo at all, but I plan to drill out my stock speakers and start getting some numbers to see what I have to play with. My fear is that I've only got 2 - 3/16 which significantly limits my options, but we'll see how it goes.