
Clear Corners Oven Method ... Removing Reflector ... PICS ..
 10-18-2006 | 07:49 AM
#1

Thread Starter
Senior Member
SL Member
Joined: May 2005
Posts: 701
From: L.A.,CA
After reading the different methods of clearing the corners (removing the orange reflector), I decided on the oven method for a nice clean finish. It was fairly easy, the hardest part was waiting 15 minutes for the glue to melt.
A couple things to be careful of:
First, the plastic is hot coming out of the oven, my hands got pretty toasty handling the hot light.
Second, the melted glue, it can get on the inside chrome pieces. Once it cools, its hard to take off.
Disclaimer: If you try this, it is at your own risk. Scionlife and myself are not responsible for any damage or injury.
Here is what I did:
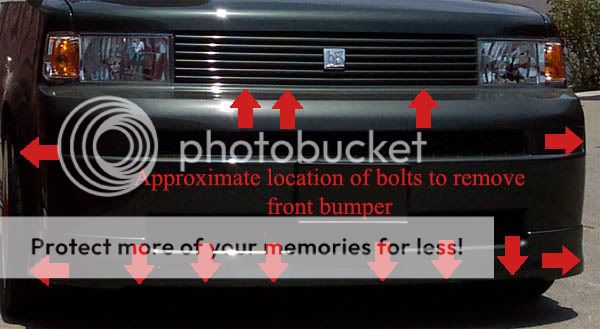
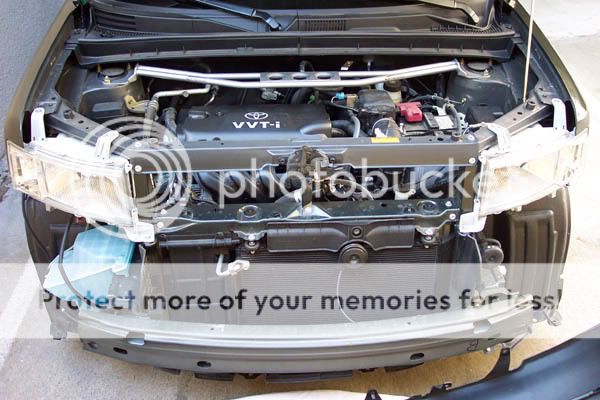
The first order of business was to remove the grill, then take off the bumper. Here are the bolts, screws, and one plastic stud that hold the bumper to the body.
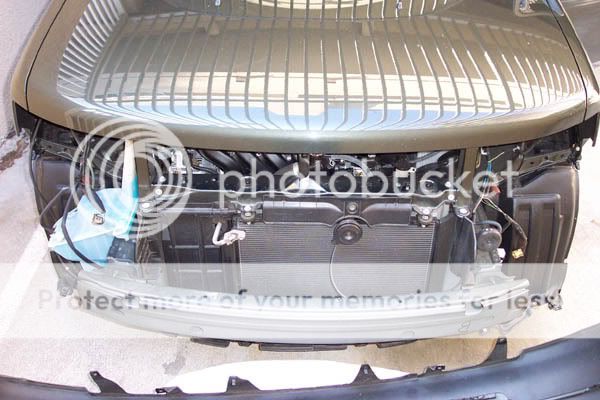
Here is the grill, bumper, and headlights taken off (poor xb )
)
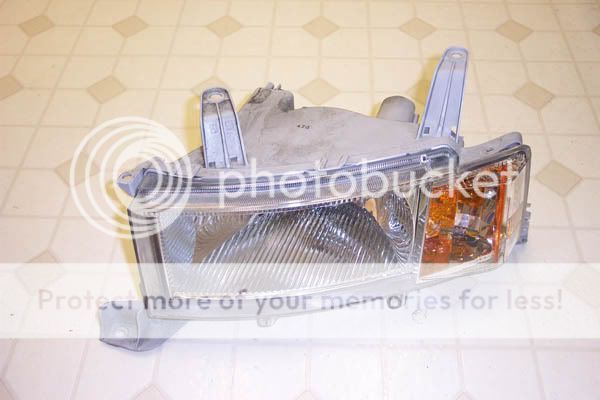
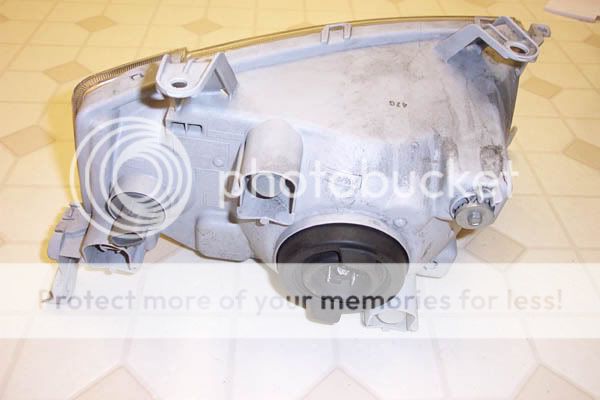
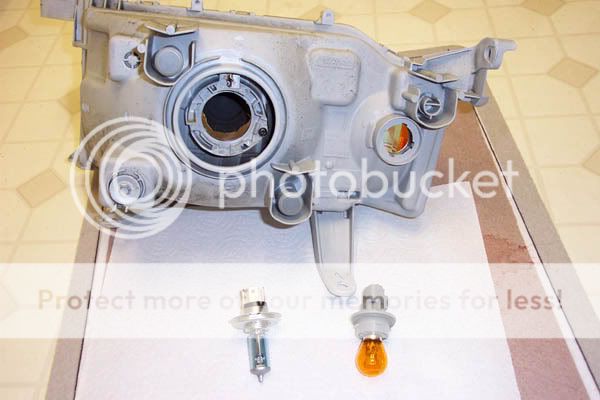
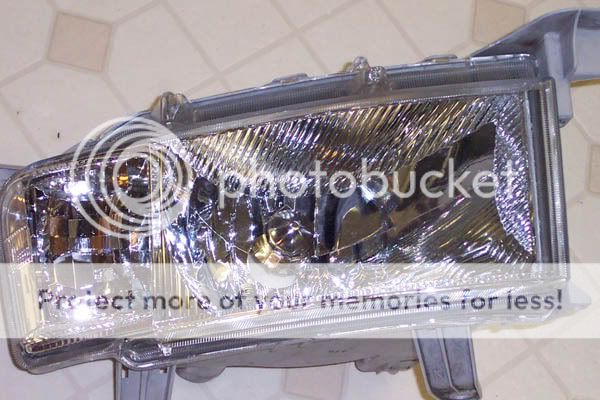
Here is one the the front light housings, front and back
Both bulbs taken out
Into the oven

There are clips that hold the lens and housing together. When the light housing was heated enough, I had to get the clips unhooked pretty quick and pull the lens off. If I took too long, the glue would start to get hard again. This happened to me on the first light.
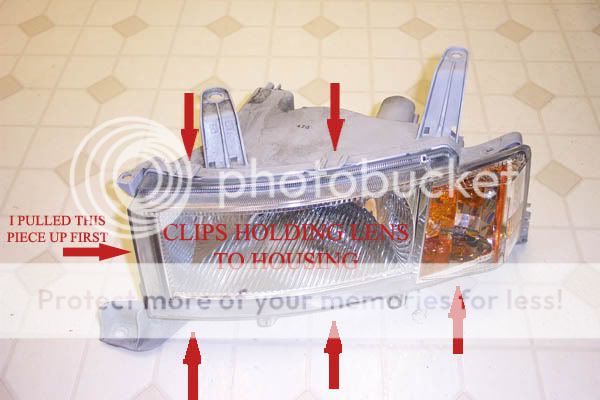
After about 15 minutes in the oven at 200F , the glue was melted enough for the lens to be seperated from the housing.

This is the reflector housing inside the lens. This screw needs to be taken out in order to pull the housing out.

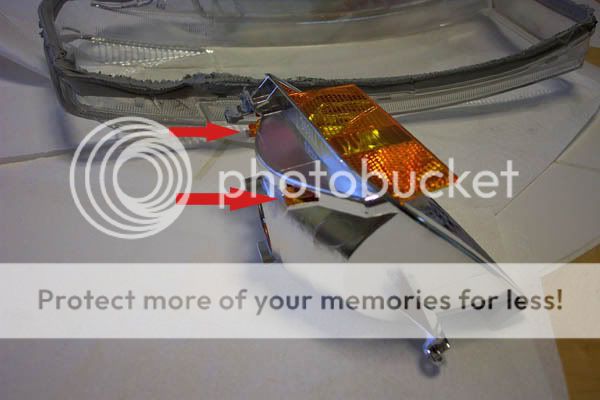
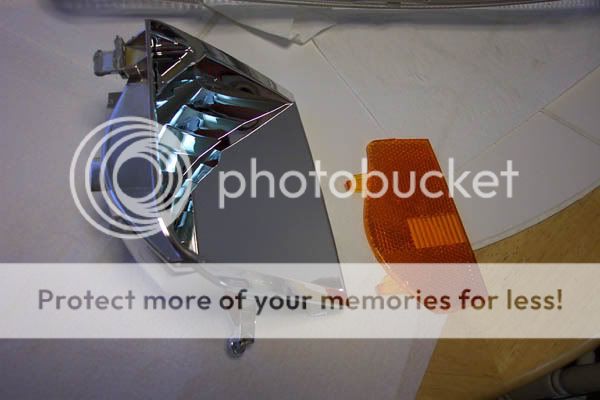
Once the reflector housing was removed, it was time to seperate the orange reflector from its housing. The orange reflector is simply held in place by these two clips. Unhooked the clips, and pushed the reflector out.
I put the lens and housing back together as much as I could. Threw it in the oven for another 15 minutes at 200F, and pushed it back together until the clips were hooked again.
Back at the car, I bolted the headlights back in (held in by 4 bolts). Replaced bumper and grill.
And...... Hurray!!! Finally done

A couple things to be careful of:
First, the plastic is hot coming out of the oven, my hands got pretty toasty handling the hot light.
Second, the melted glue, it can get on the inside chrome pieces. Once it cools, its hard to take off.
Disclaimer: If you try this, it is at your own risk. Scionlife and myself are not responsible for any damage or injury.
Here is what I did:
The first order of business was to remove the grill, then take off the bumper. Here are the bolts, screws, and one plastic stud that hold the bumper to the body.
Here is the grill, bumper, and headlights taken off (poor xb
Here is one the the front light housings, front and back
Both bulbs taken out
Into the oven
There are clips that hold the lens and housing together. When the light housing was heated enough, I had to get the clips unhooked pretty quick and pull the lens off. If I took too long, the glue would start to get hard again. This happened to me on the first light.
After about 15 minutes in the oven at 200F , the glue was melted enough for the lens to be seperated from the housing.
This is the reflector housing inside the lens. This screw needs to be taken out in order to pull the housing out.
Once the reflector housing was removed, it was time to seperate the orange reflector from its housing. The orange reflector is simply held in place by these two clips. Unhooked the clips, and pushed the reflector out.
I put the lens and housing back together as much as I could. Threw it in the oven for another 15 minutes at 200F, and pushed it back together until the clips were hooked again.
Back at the car, I bolted the headlights back in (held in by 4 bolts). Replaced bumper and grill.
And...... Hurray!!! Finally done
Last edited by 1epoXyBox; 03-25-2014 at 06:48 AM. Reason: New Title for easier searching
10-18-2006 | 07:41 PM
#8

Member
SL Member
Joined: May 2006
Posts: 50
From: Windsor - NorCal - 707
Looks good!
I was afraid at first, guys. But don't be TOO afraid. It's really not hard or dangerous for the housing. The only thing to worry about is whether or not you sealed it good enough when you were done.
10 min at 200 degrees, pop the tabs and pull the halves apart. Do your business, then put the lens on the headlight assembly again and push it on as much as you can before sticking it back in the oven. Wait 10 minutes @ 200 degrees, pull them out and squeeze the hell out of them, as hard as you can, and make sure you go along the whole seam.
It's nothing to be afraid of! I've done several. It sounds a lot worse than what it really is, don't let fear hold you back.
10-19-2006 | 01:00 AM
#9
Senior Member
SL Member
Team N.V.S.
Joined: Sep 2003
Posts: 350
From: Esparto/Sacramento, Ca
Originally Posted by dugzillaxb
when you go to put it back together you need to re-heat the halves and then press them back together with a lot of pressure using your hands, no clamps or presses.
And I think I will actually do it now. I just need to get the bulbs first.
Originally Posted by ScionitiS
Looks good!
I was afraid at first, guys. But don't be TOO afraid. It's really not hard or dangerous for the housing. The only thing to worry about is whether or not you sealed it good enough when you were done.
10 min at 200 degrees, pop the tabs and pull the halves apart. Do your business, then put the lens on the headlight assembly again and push it on as much as you can before sticking it back in the oven. Wait 10 minutes @ 200 degrees, pull them out and squeeze the hell out of them, as hard as you can, and make sure you go along the whole seam.
It's nothing to be afraid of! I've done several. It sounds a lot worse than what it really is, don't let fear hold you back.
I was afraid at first, guys. But don't be TOO afraid. It's really not hard or dangerous for the housing. The only thing to worry about is whether or not you sealed it good enough when you were done.
10 min at 200 degrees, pop the tabs and pull the halves apart. Do your business, then put the lens on the headlight assembly again and push it on as much as you can before sticking it back in the oven. Wait 10 minutes @ 200 degrees, pull them out and squeeze the hell out of them, as hard as you can, and make sure you go along the whole seam.
It's nothing to be afraid of! I've done several. It sounds a lot worse than what it really is, don't let fear hold you back.
10-19-2006 | 01:18 AM
#10

Senior Member
Club One

SL Member
Joined: Jul 2005
Posts: 4,629
there are lots of ways to screw it up, don't set the temp too high or you will melt your housing. be careful when you pull them apart, the sealant tends to stretch and if you are not careful it will get on your chrome housing and it doesn't come off easily. I have done this many times and found that if you set the headlight assembly on top of a bowl so that the mounting brackets are not supporting the weight you have less of a chance of the brackets bending or melting ( I had it happen the first time I did it.)
Just take your time and you will be fine.
Just take your time and you will be fine.


