DIY: Reverse Hood
#1
This is a DIY for a reverse hood on your Gen 1 xB
NOTICE!!!! Not responsible for ANY damage that occurs will trying to do this mod to your vehicle.
Oky doky!!!
Materials
4 foot stick of 1/4 x 1/2 x 1/2" Angle iron (Steel)
4 foot stick of 1/4 x 1/2 x 1/2" Angle iron ( Aluminum)
12, 5/16-18 X 1" soxket head cap screws
16, 5/16-18 Hex nuts
16 flat washers
4 flat washers, Nylon'
'
tools
Sawza, chop saw, hand saw, your gonna need somthin good to cut the steel
either a hex wrench or a hex bit on a rachet
wrenchs for the hex nuts
drill and drill bits for drilling holes
Hammer and punch
flathead screwdrivers
First, were gonna start with some simple drawings or each bracket (3 each)
1st ,bracket mounted on radiator support frame
2nd, bracket mounted on hood
3rd, hinge
NOTE!! all is mage from angle stock metal! and also keep in mind you have to make a left and right peice, so holes will be on differ sides.

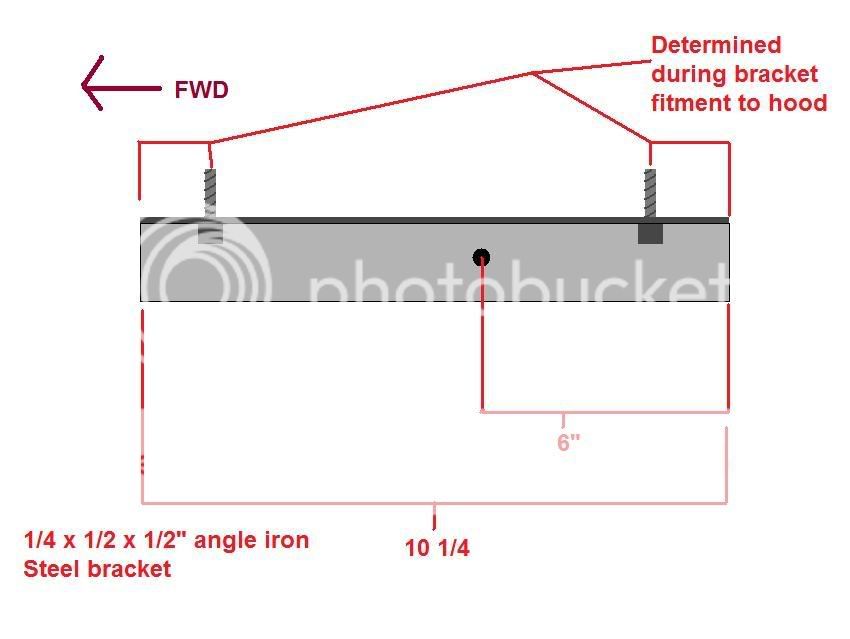
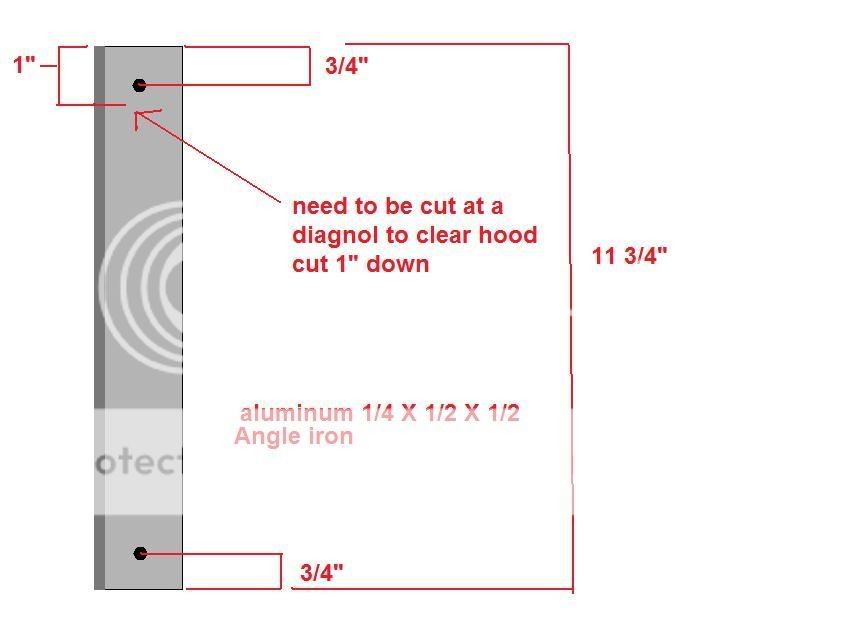
Youll need to go ahead and make the brackets now.
now did you make the brackets........
well....
OK, i see you made the brackets
Lets start with mounting the brackets to the radiator support frame.
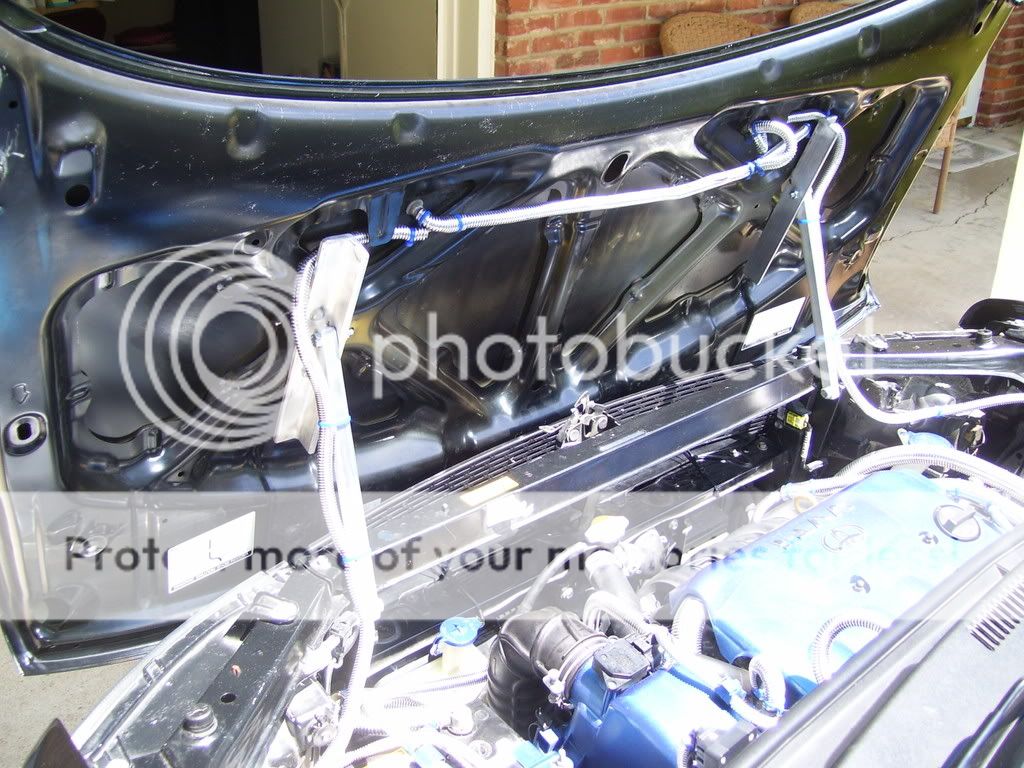
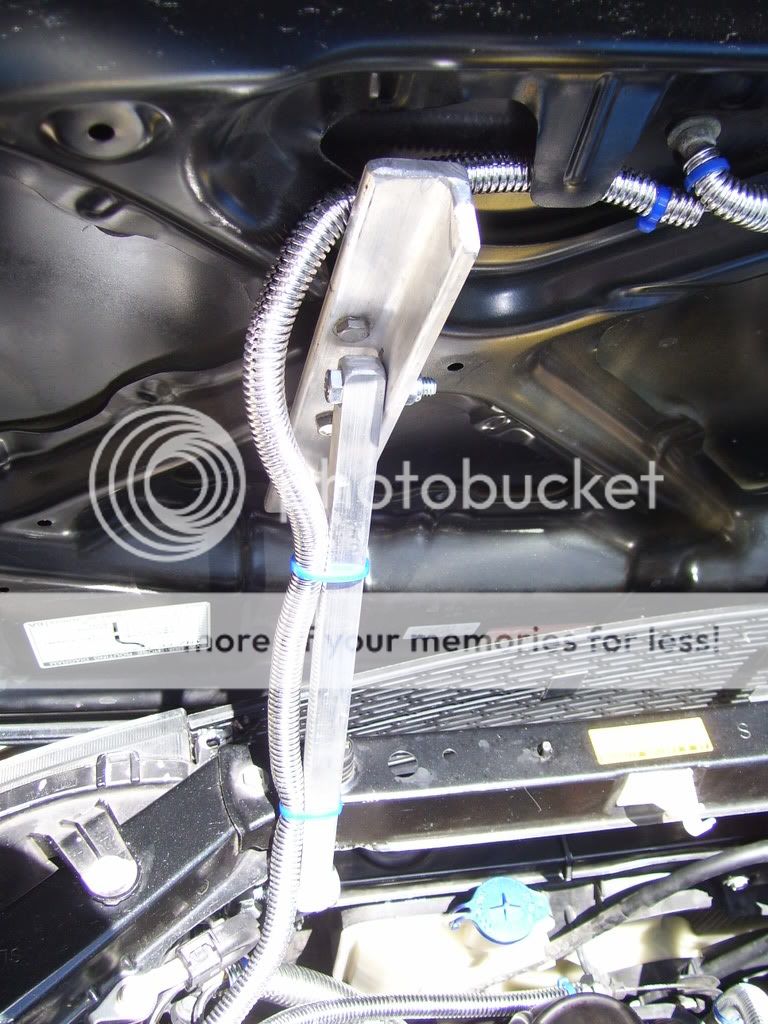
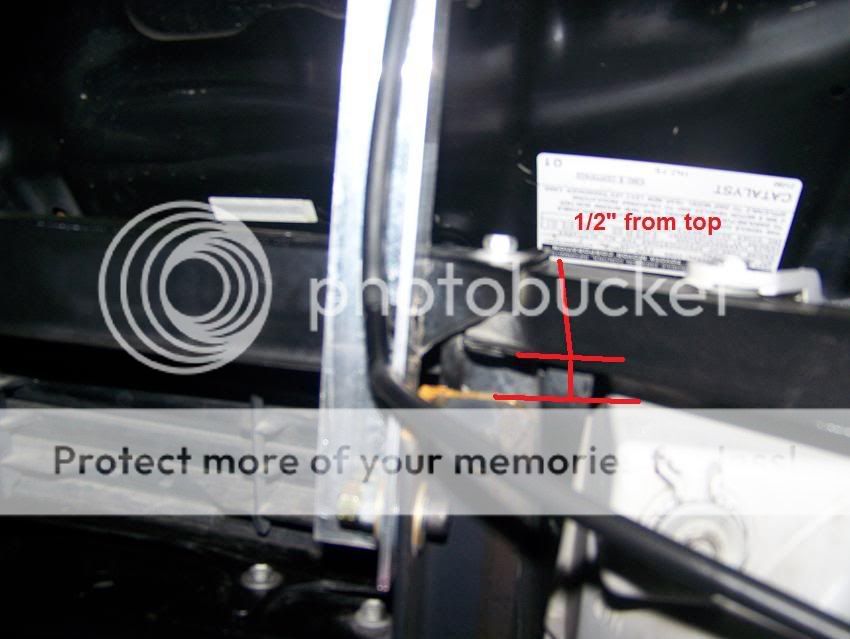
Youll need to mount it 1/2 inch down, as youll see in the pic. place the bracket on the support frame, use a pencil mark the holes to drill. now to drill the holes, youll need to remove the battery to fit the drill, and on the pass. side, the bracket on the shock tower that holds the A/C hose. Use a punch where your gonna drill the holes, makes life lot simpler. Drill your holes with the right size bit you pick if you decided on differ bolts. Once holes are drilled go ahead and mount the brackets, you may have to remove the headlights for the nuts, depends how good you are. now some pics of that bracket...
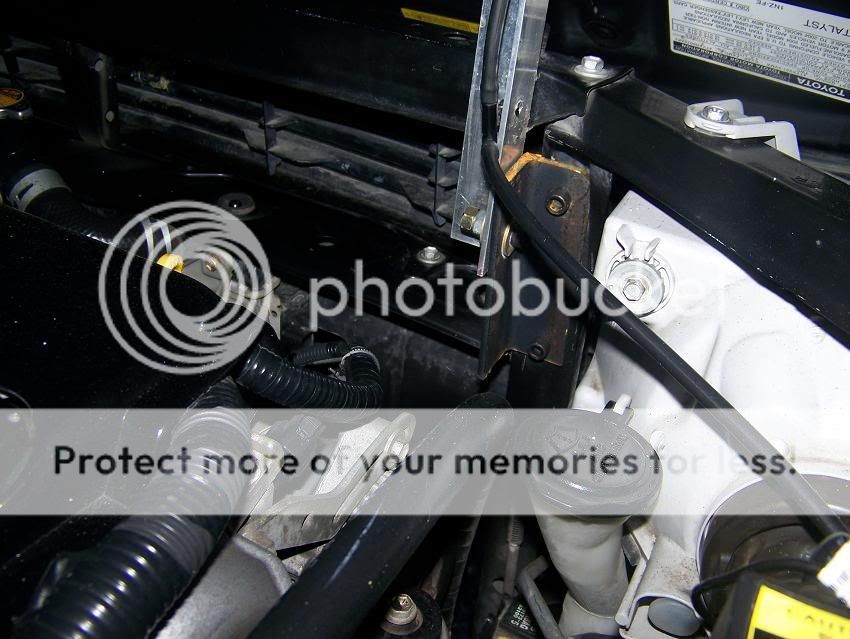
SO, you mounted the radiator support bracket. now time to add the center hinge peice, made from aluminum. your gonna use the nylon washers here. the nylon washers go between the steel and aluminum, and use washers on both sides, double nut the bolt as well. tighten them down nicly, but not super tight, you want to be able to move it, its a hinge. look at the pics above for a better idea.
same pics again


now the center peice in in place, your gonna mount the last peice to the end of the center bracket useing the same methods as above, pics for referance.
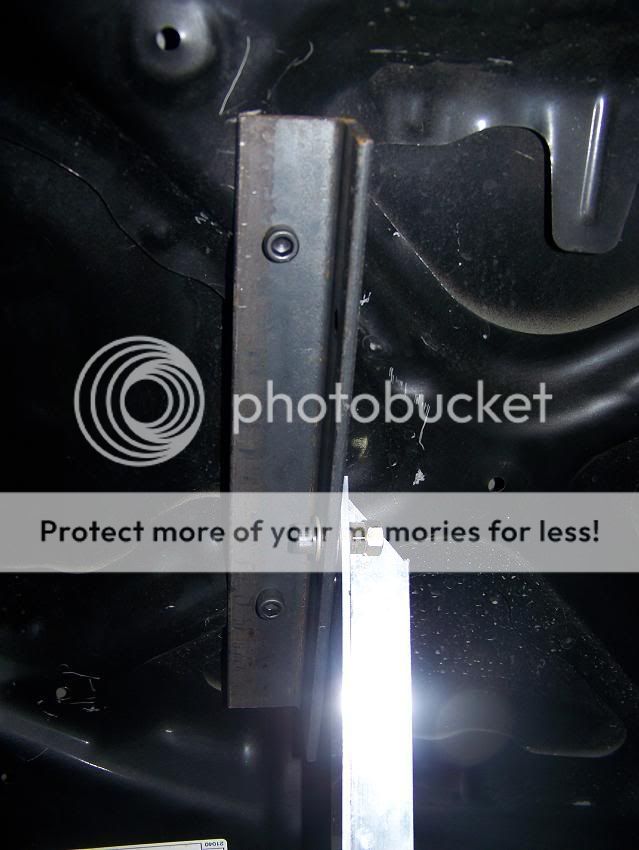
Now remove the grill with a flathead screwdriver. lower the hood, be sure not to hit the brackets! with the hood down and latched, make marks on the hood where the hood bracket meets up with the hood, kinda tight fit, but the best way i could do it.
Pop your hood, remove it, and remove the hood bracket from the center hinge part. This is where you drill the holes for the brackets. try to find a depth setter for your drill bit, you dont want it to pounch through the hood. This is a trickey area!!
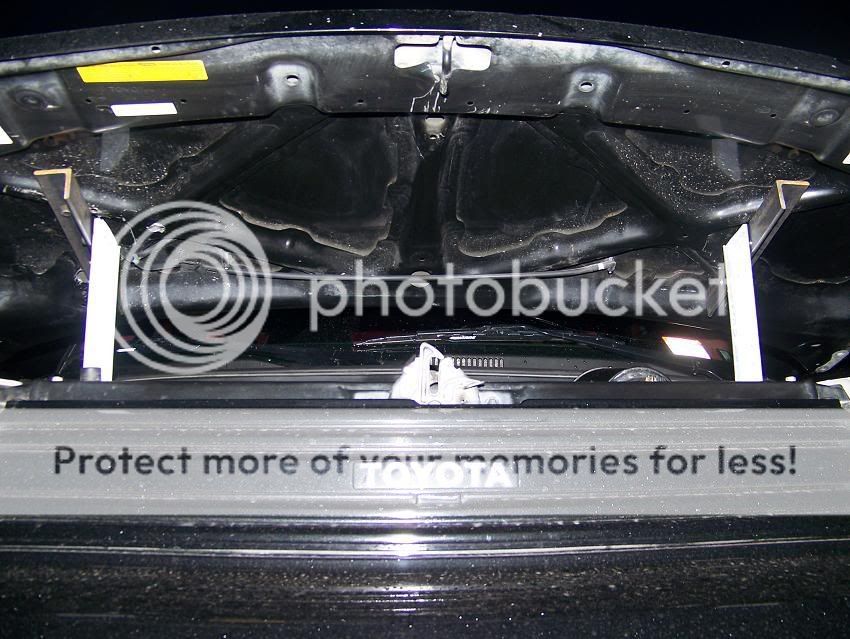
everything needs to be perfect with alighment., and your gonna have to use a LARGE drill bit to drill a hole big enough to fit a nut and a finger through to put the nut on the back side of the hood.
heres a simple pic
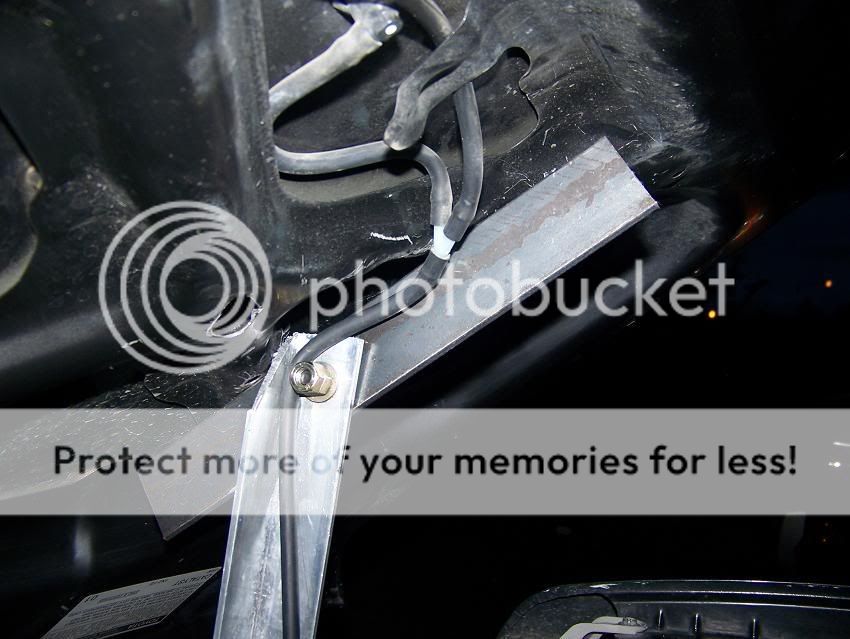
after you get the brackets mounted on the hood, youll need a freind to help hold teh hood up to the center hinge peice using the bolts, with nylon washers between and such as said above. tighten then down good, but not to tight, again, its a pivot point and needs to be agle to move.
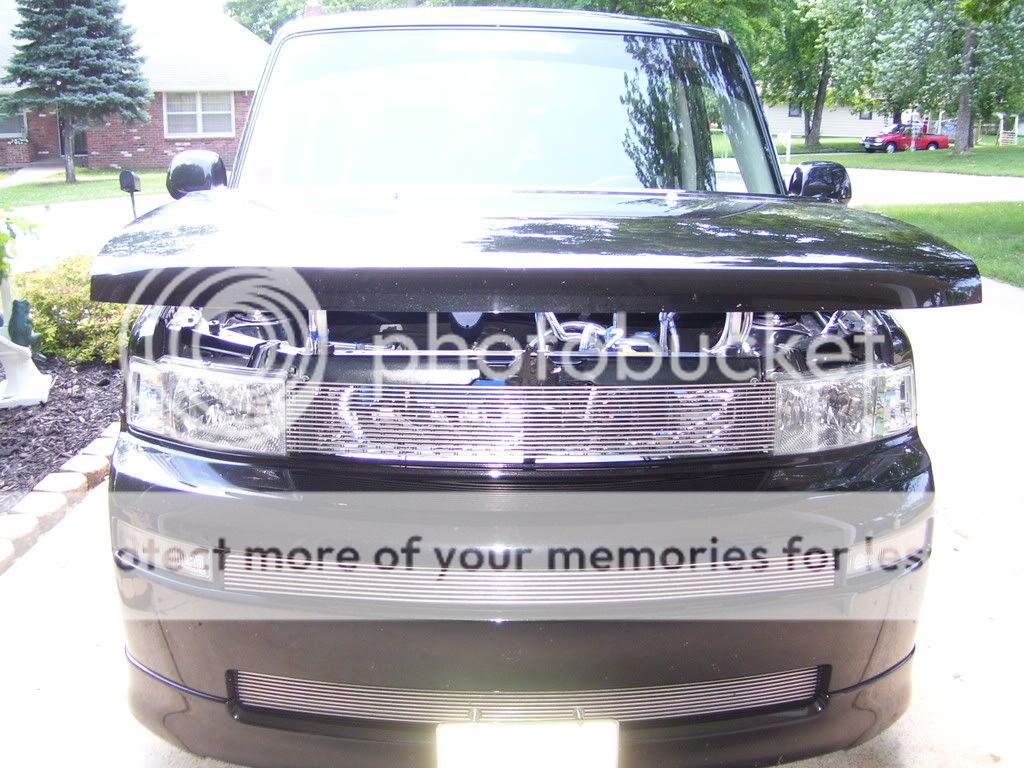
By this time its a reverse hood, i removed the rear hinges, but thats up to you, they dont need to be removed. close your hood, see if it lines up, HOPE TO GOD IT DOES!!! lol
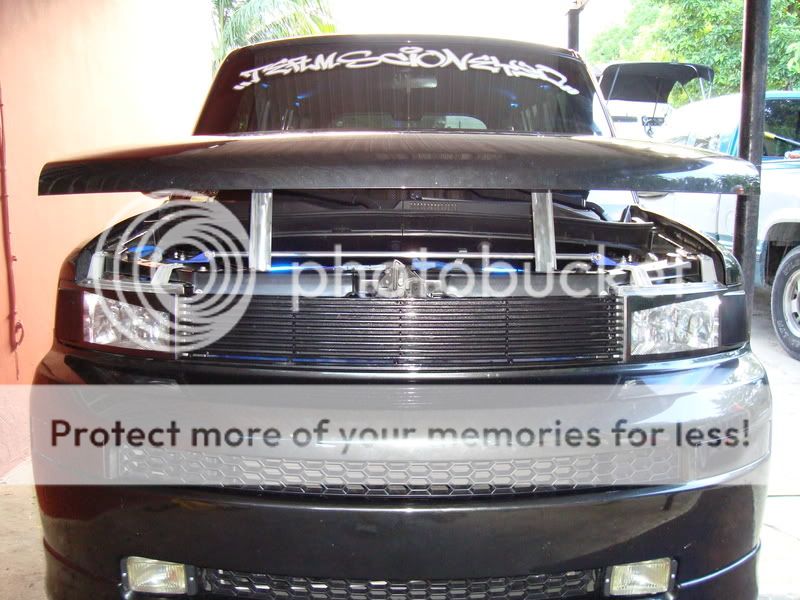
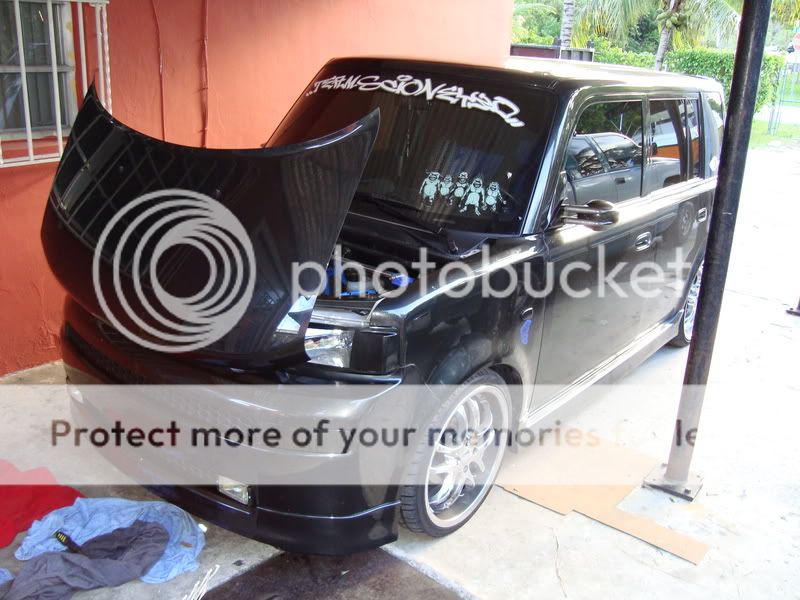
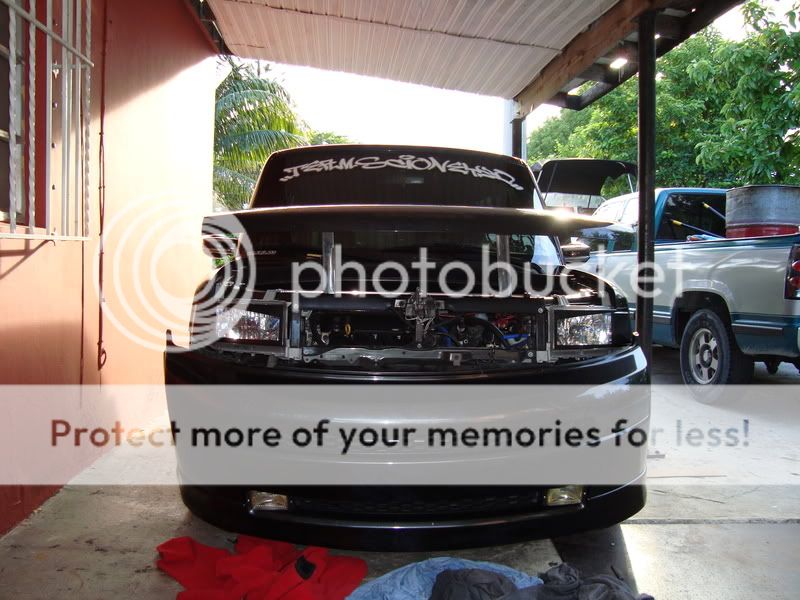
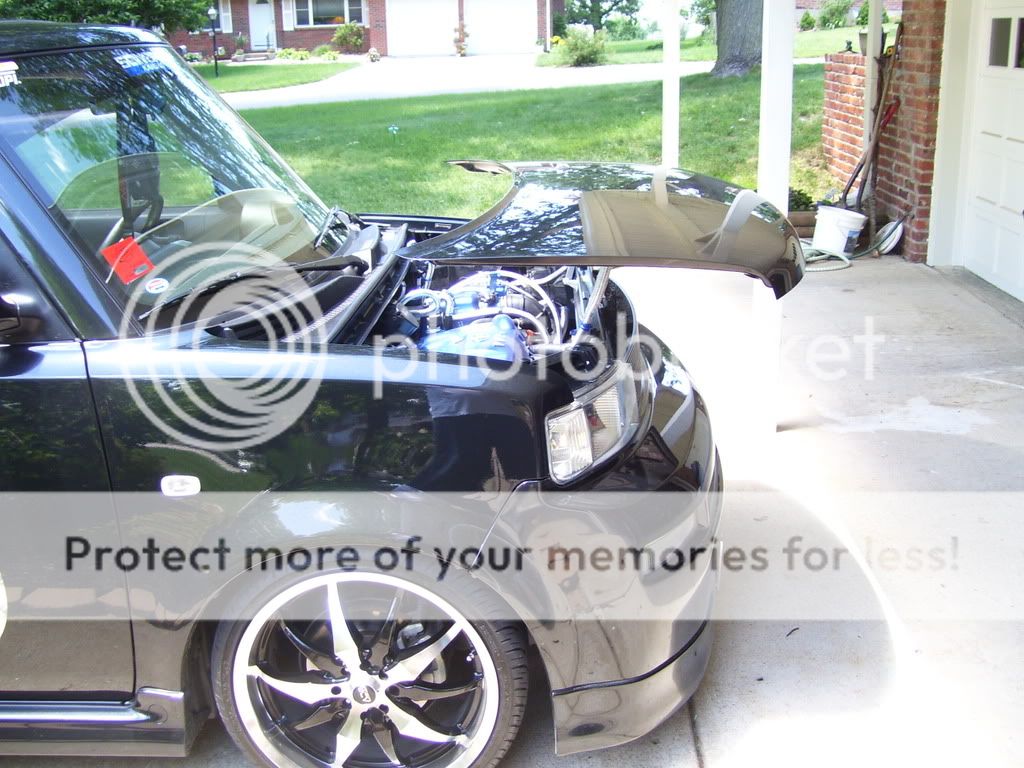
heres what you end with!!!
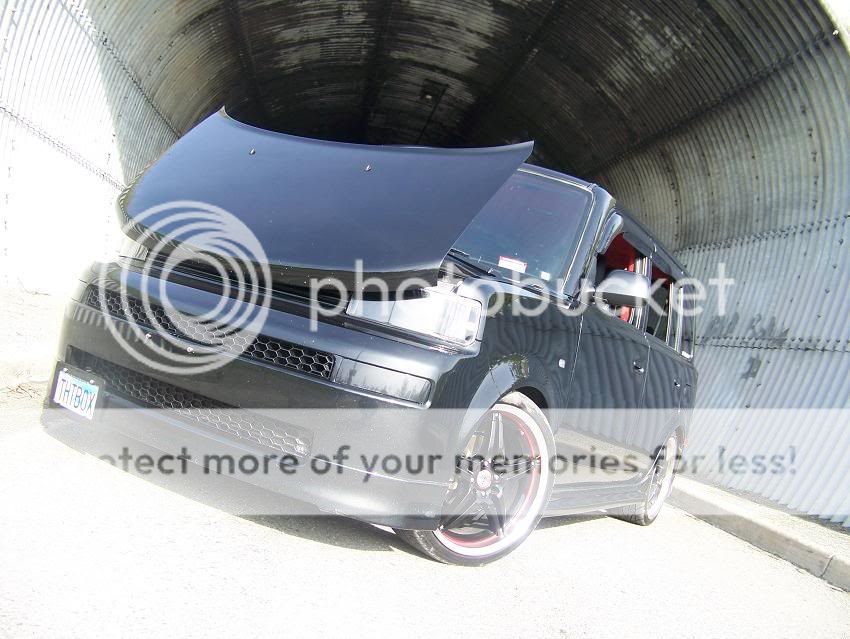
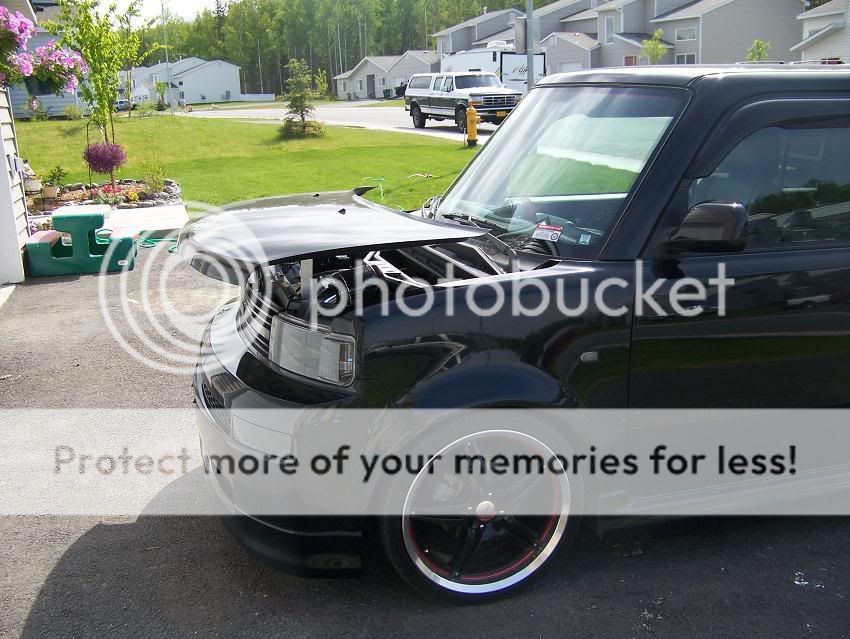
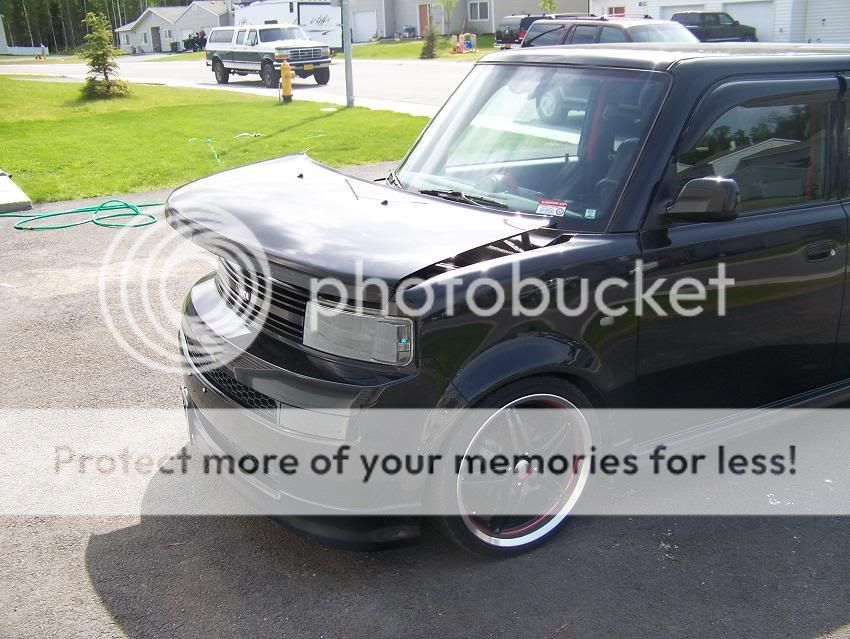
I hopes this help, gets a little difficult in the end, but its a sweet mod!!!
NOTICE!!!! Not responsible for ANY damage that occurs will trying to do this mod to your vehicle.
Oky doky!!!
Materials
4 foot stick of 1/4 x 1/2 x 1/2" Angle iron (Steel)
4 foot stick of 1/4 x 1/2 x 1/2" Angle iron ( Aluminum)
12, 5/16-18 X 1" soxket head cap screws
16, 5/16-18 Hex nuts
16 flat washers
4 flat washers, Nylon'
'
tools
Sawza, chop saw, hand saw, your gonna need somthin good to cut the steel
either a hex wrench or a hex bit on a rachet
wrenchs for the hex nuts
drill and drill bits for drilling holes
Hammer and punch
flathead screwdrivers
First, were gonna start with some simple drawings or each bracket (3 each)
1st ,bracket mounted on radiator support frame
2nd, bracket mounted on hood
3rd, hinge
NOTE!! all is mage from angle stock metal! and also keep in mind you have to make a left and right peice, so holes will be on differ sides.


Youll need to go ahead and make the brackets now.
now did you make the brackets........
well....
OK, i see you made the brackets
Lets start with mounting the brackets to the radiator support frame.
Youll need to mount it 1/2 inch down, as youll see in the pic. place the bracket on the support frame, use a pencil mark the holes to drill. now to drill the holes, youll need to remove the battery to fit the drill, and on the pass. side, the bracket on the shock tower that holds the A/C hose. Use a punch where your gonna drill the holes, makes life lot simpler. Drill your holes with the right size bit you pick if you decided on differ bolts. Once holes are drilled go ahead and mount the brackets, you may have to remove the headlights for the nuts, depends how good you are. now some pics of that bracket...


SO, you mounted the radiator support bracket. now time to add the center hinge peice, made from aluminum. your gonna use the nylon washers here. the nylon washers go between the steel and aluminum, and use washers on both sides, double nut the bolt as well. tighten them down nicly, but not super tight, you want to be able to move it, its a hinge. look at the pics above for a better idea.
same pics again


now the center peice in in place, your gonna mount the last peice to the end of the center bracket useing the same methods as above, pics for referance.

Now remove the grill with a flathead screwdriver. lower the hood, be sure not to hit the brackets! with the hood down and latched, make marks on the hood where the hood bracket meets up with the hood, kinda tight fit, but the best way i could do it.
Pop your hood, remove it, and remove the hood bracket from the center hinge part. This is where you drill the holes for the brackets. try to find a depth setter for your drill bit, you dont want it to pounch through the hood. This is a trickey area!!

everything needs to be perfect with alighment., and your gonna have to use a LARGE drill bit to drill a hole big enough to fit a nut and a finger through to put the nut on the back side of the hood.
heres a simple pic

after you get the brackets mounted on the hood, youll need a freind to help hold teh hood up to the center hinge peice using the bolts, with nylon washers between and such as said above. tighten then down good, but not to tight, again, its a pivot point and needs to be agle to move.
By this time its a reverse hood, i removed the rear hinges, but thats up to you, they dont need to be removed. close your hood, see if it lines up, HOPE TO GOD IT DOES!!! lol
heres what you end with!!!


I hopes this help, gets a little difficult in the end, but its a sweet mod!!!
#5
ya, i decided on aluminum for the center peicr only, the rest needed to be stronger, havent seen any problems yet from it. I may see about making the center peice longer so the hood goes more vertical, gonna be a busy weekend, so hard to tell.
#7
i suppose for better looks, square stock could be used. It s good for car shows, it needs to be cleaned up. since im still kinda working on mine, its not prefect yet, gonna paint it black.
#13
very nice
though you could use aluminum, but it needs to be a specific type of aluminum. the normal 6061 is too soft and will bend on you. 2024 and 7075 are the ones to use, 2024 is slightly weaker then 7075 but is nearly the strength of steel where as 7075 is or surpasses the strength of steel. neither 2024 or 7075 are weldable, so forget about trying to weld anything with those two but they are machinable.
you can find 2024 and 7075 aluminum amongst other types of metals here - www.onlinemetals.com
#16
That looks great!! I love how u used alumunum bar instead of angle iron!! I think i may have to do what you did!! Got to change my measurements to get my hood more verticle.
Looks great man!!
Looks great man!!


