
LED Tail Light Replacement..... PICS
 04-24-2006, 07:09 AM
#1
Senior Member
SL Member
Thread Starter

Join Date: May 2005
Location: L.A.,CA
Posts: 701
Well, I have been wanting to try out these leds for a while now, finally took the plunge. Installation was easy and fitment seems to be very good. Enjoy!
The tails came packaged individually, very nice!
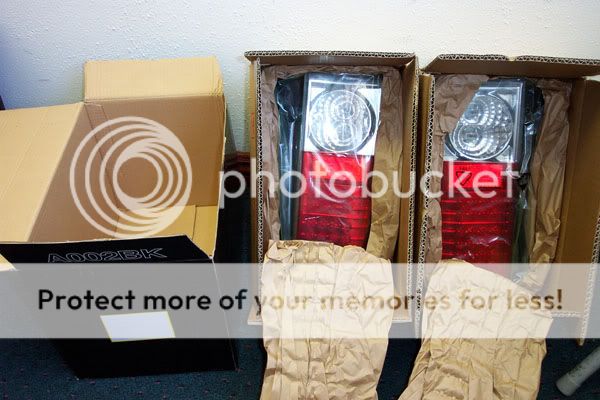
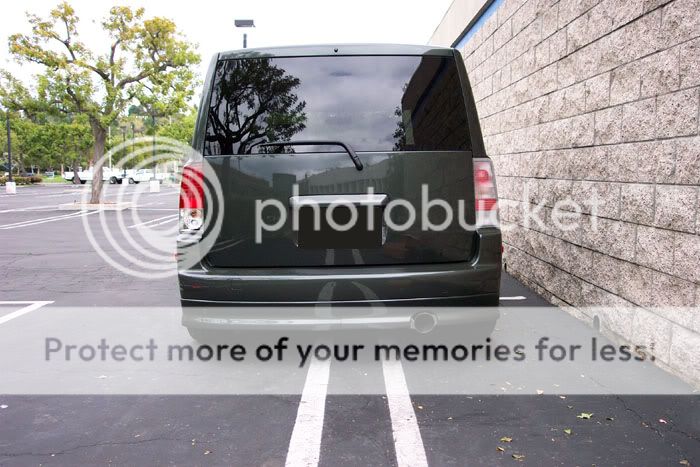
Here is the original tails.

Started by taking the cover off by lifting the two clips.

With cover off.
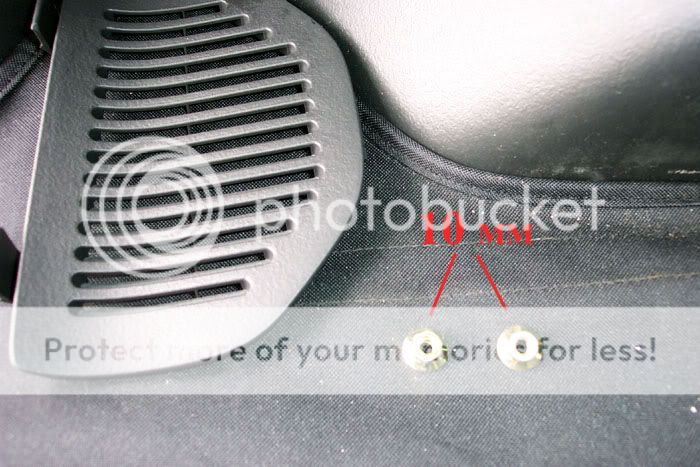
I used a small rachet with an extension and 10mm socket to loosen the two bolts holding the tail lights in.
Close up. Its best to loosen the bolts with the rachet, then take them off using your hands. Otherwise you might find yourself fishing for lost bolts on the bottom.
Here are the two 10mm bolts that come off.
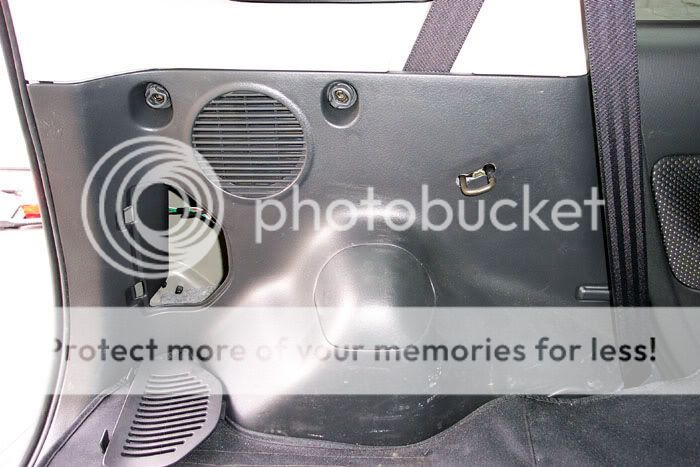
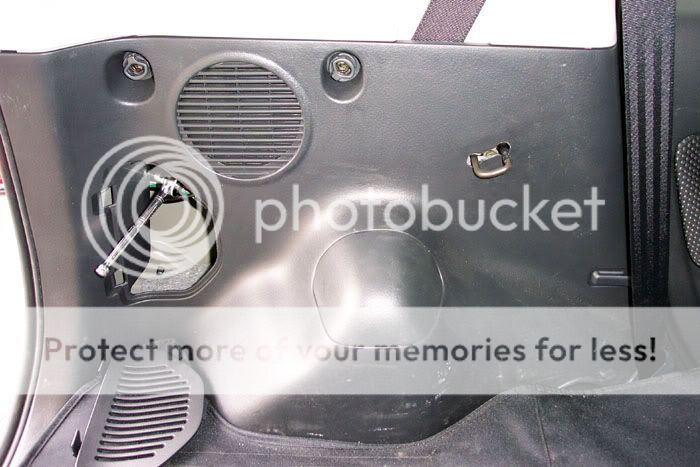
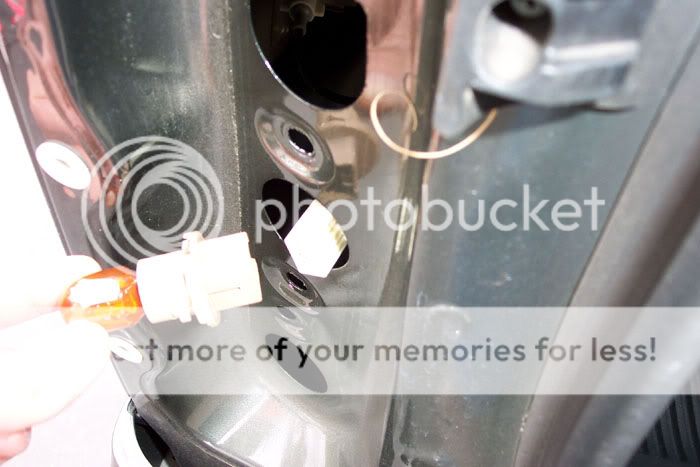
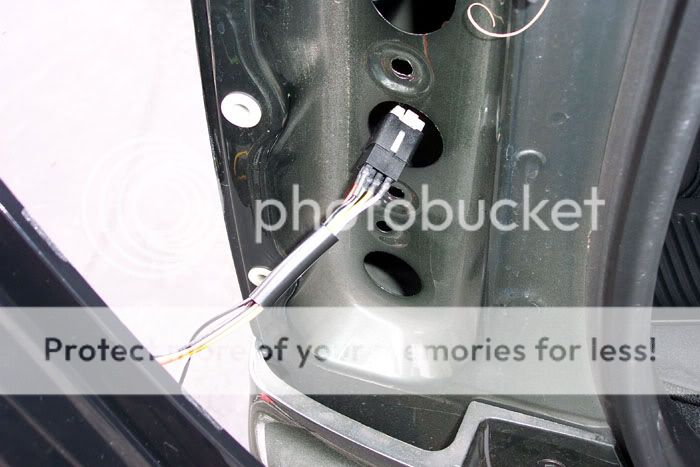
Now that the bolts are off, the only thing holding the housing in is the connected amber turn signal light. I had to turn it from the interior so that it would unlock from the housing.
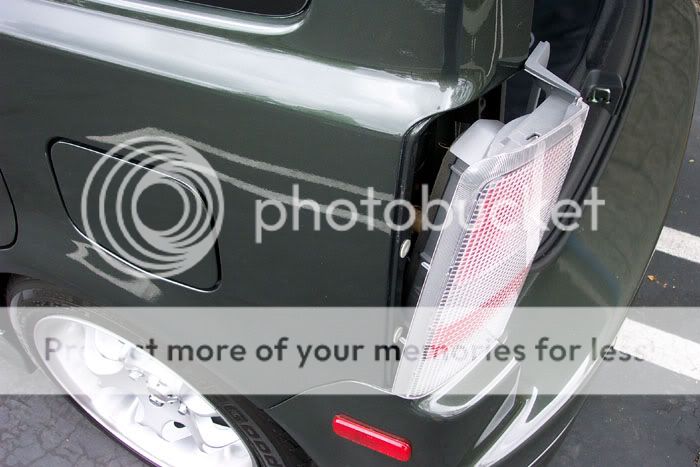
Now the housing comes right out.
Here is a comparison.
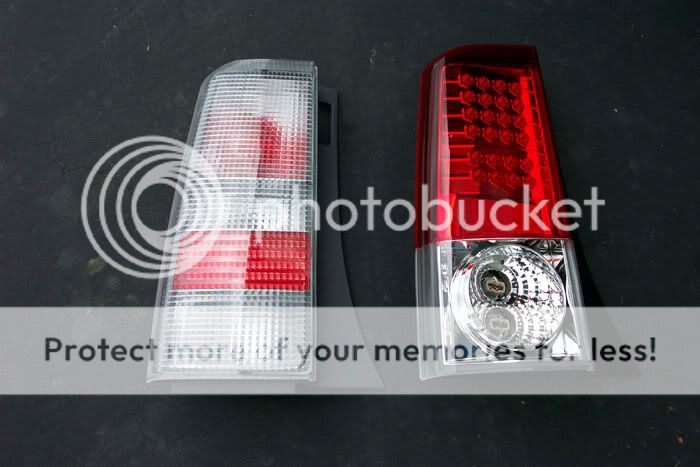
Another comparison of the backs.
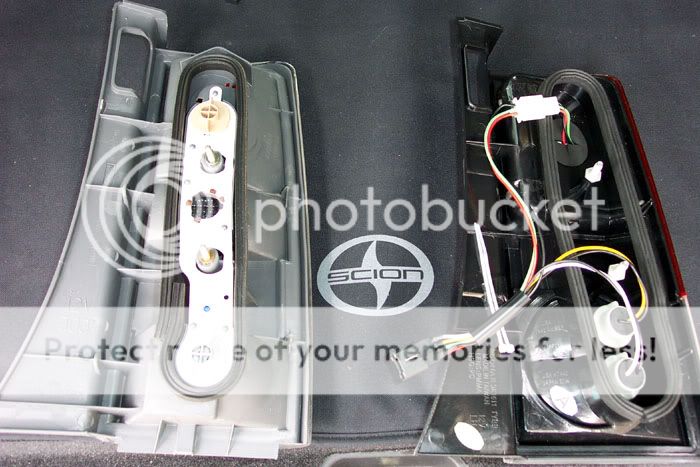
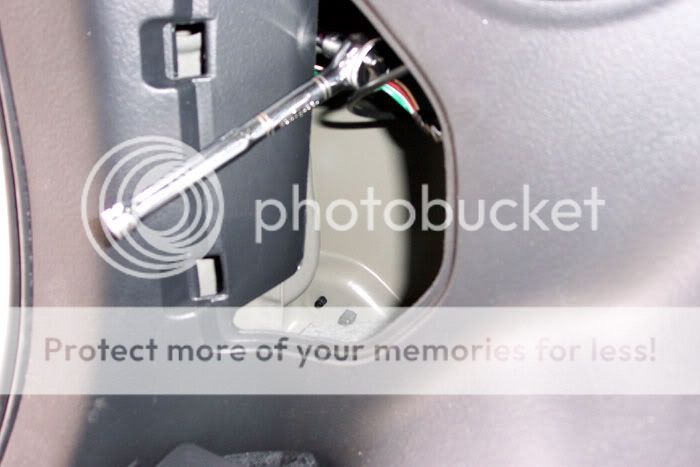
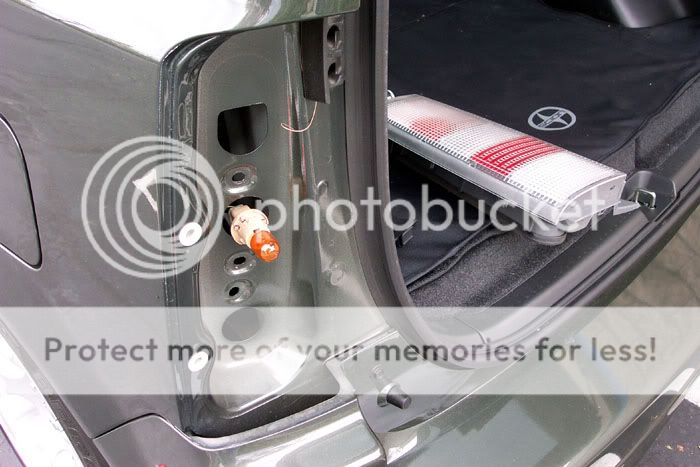
Now to take the amber bulb and socket out. There is a clip holding the bulb socket that needs to unhooked. Once done, it comes right off.
The new housing requires the use of the original turn and backup bulbs. All I had to do to detach them from the original socket was to pull the bulbs straight out.

Now to attach the original bulbs to the new housing.
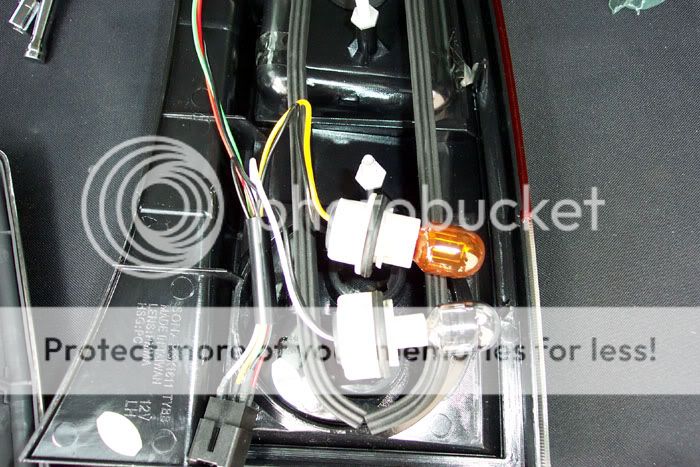
The new tail is plug and play. I just plugged it into the clip that the amber socket occupied. Now it has power connected.
Here is a comparison of new and old.
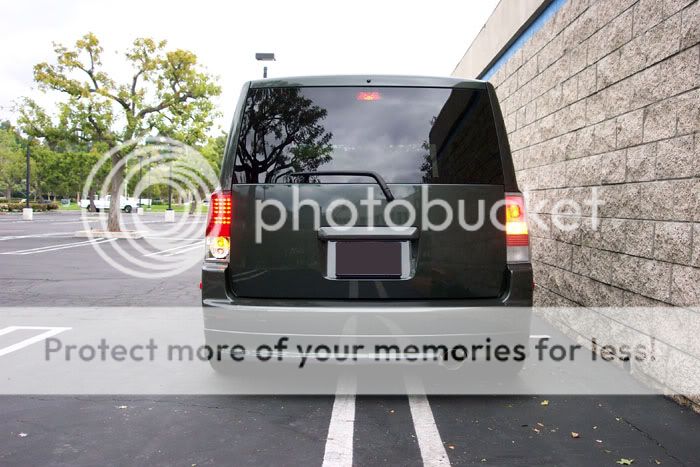
Now with brake and turn lights on.
Here is a close up. Nice fit and finish.

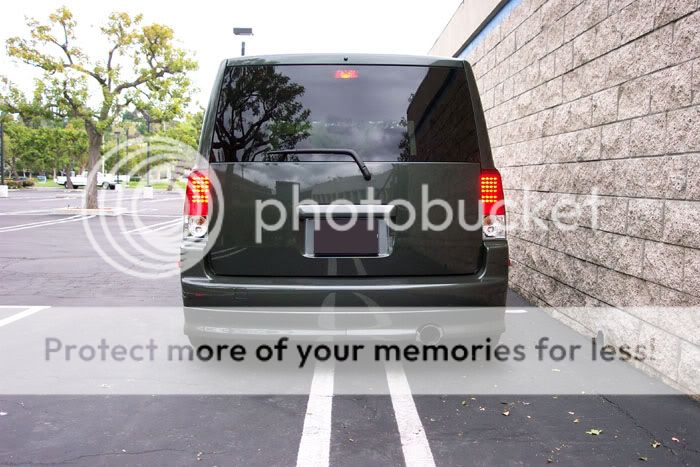
And finally both sides are in.
I never have seen anybody with these until a day after I installed them. Here is a Polar White guy with some.

Overall, I am very satisfied with fit, finish and looks. One thing I want to change is the amber bulb, I don't like the orange in there. I don't think they make Silverstars 7440, do they? If not, I will get an led for that someday. I also may want to throw a smoke overlay on there in the future and see how it looks.
The tails came packaged individually, very nice!
Here is the original tails.
Started by taking the cover off by lifting the two clips.
With cover off.
I used a small rachet with an extension and 10mm socket to loosen the two bolts holding the tail lights in.
Close up. Its best to loosen the bolts with the rachet, then take them off using your hands. Otherwise you might find yourself fishing for lost bolts on the bottom.
Here are the two 10mm bolts that come off.
Now that the bolts are off, the only thing holding the housing in is the connected amber turn signal light. I had to turn it from the interior so that it would unlock from the housing.
Now the housing comes right out.
Here is a comparison.
Another comparison of the backs.
Now to take the amber bulb and socket out. There is a clip holding the bulb socket that needs to unhooked. Once done, it comes right off.
The new housing requires the use of the original turn and backup bulbs. All I had to do to detach them from the original socket was to pull the bulbs straight out.
Now to attach the original bulbs to the new housing.
The new tail is plug and play. I just plugged it into the clip that the amber socket occupied. Now it has power connected.
Here is a comparison of new and old.
Now with brake and turn lights on.
Here is a close up. Nice fit and finish.
And finally both sides are in.
I never have seen anybody with these until a day after I installed them. Here is a Polar White guy with some.
Overall, I am very satisfied with fit, finish and looks. One thing I want to change is the amber bulb, I don't like the orange in there. I don't think they make Silverstars 7440, do they? If not, I will get an led for that someday. I also may want to throw a smoke overlay on there in the future and see how it looks.
 04-24-2006, 07:27 AM
#2
Senior Member
Music City Scions
SL Member

Join Date: May 2004
Location: West TN - Land of twisty roads
Posts: 11,808
I've been wanting some too but am waiting for the prices to come down a bit. May I ask how much the set you back shipped and where did you get them from? Thanks.
04-24-2006, 07:30 AM
#3

no they dont make silverstars 7440 but my LED bulbs from www.autolmination.com look very nice in my set. congrats on the new tails!
the price cant get any lower than it is. i got mine from m1preformance on ebay. i think it totaled 165 and some change shipped.
its worth it. and looks good on BCP. once the pollen goes away and i take a stripe off the car, ill take pics.
the price cant get any lower than it is. i got mine from m1preformance on ebay. i think it totaled 165 and some change shipped.
its worth it. and looks good on BCP. once the pollen goes away and i take a stripe off the car, ill take pics.
04-24-2006, 07:38 AM
#4
Senior Member
Music City Scions
SL Member
Join Date: May 2004
Location: West TN - Land of twisty roads
Posts: 11,808
Oh, That pollin crap sucks bigtime. I'm ready to get a carcover. I'm even getting it inside the garage.
$165 is a good price. I've only been seeing them in the 220 plus range. I must see pics on the BCP Please.
$165 is a good price. I've only been seeing them in the 220 plus range. I must see pics on the BCP Please.
04-24-2006, 04:27 PM
#5
Senior Member
SL Member
Thread Starter
Join Date: May 2005
Location: L.A.,CA
Posts: 701
Originally Posted by jethro_b
I've been wanting some too but am waiting for the prices to come down a bit. May I ask how much the set you back shipped and where did you get them from? Thanks.
Fire, did you just stick the led in there, or did you need a a load resistor installed as well? Thanks.


 04-24-2006, 11:42 PM
#14
yeah i use resistors but im only using two. and their pluged into the front. hotbox05 didnt use resistors and he told me he didnt have a fast blinker. i dunno
contact the link i gave y'all. y'all will be very happy
contact the link i gave y'all. y'all will be very happy
04-25-2006, 11:20 PM
#15
Senior Member
SL Member
Thread Starter
Join Date: May 2005
Location: L.A.,CA
Posts: 701
Thanks for the link Firesquare, they actually have amber 7440's that are chrome. I'm going to try it without resistors and see what happens. www.superbrightleds.com seems to have good pricing as well.


