DIY: Install Rumion Mudflaps! (56k Widowmaker!)
#1
I ordered these from newscionparts.com a while ago, and they have finally come in. There were some...problems. The parts looked great, but the instructions are in Kanji. I normally wouldn't care, but you need to drill holes in the car to install these things, and drilling precise holes into the exterior of my car was not something I wanted to figure out from some basic pictographs.
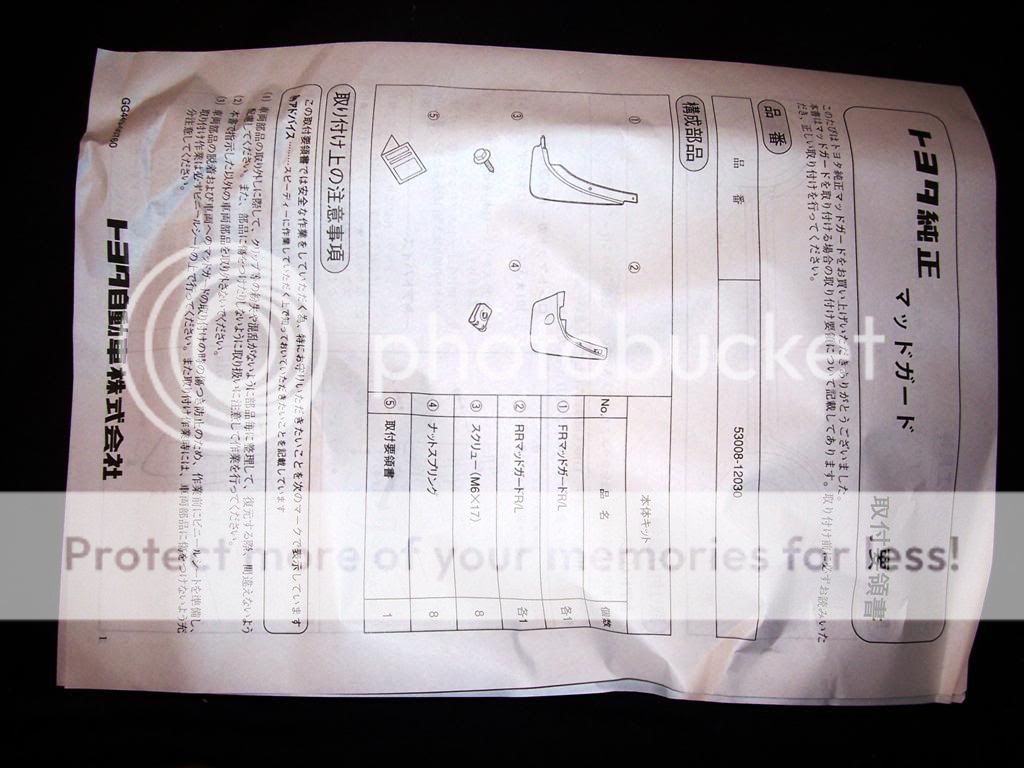
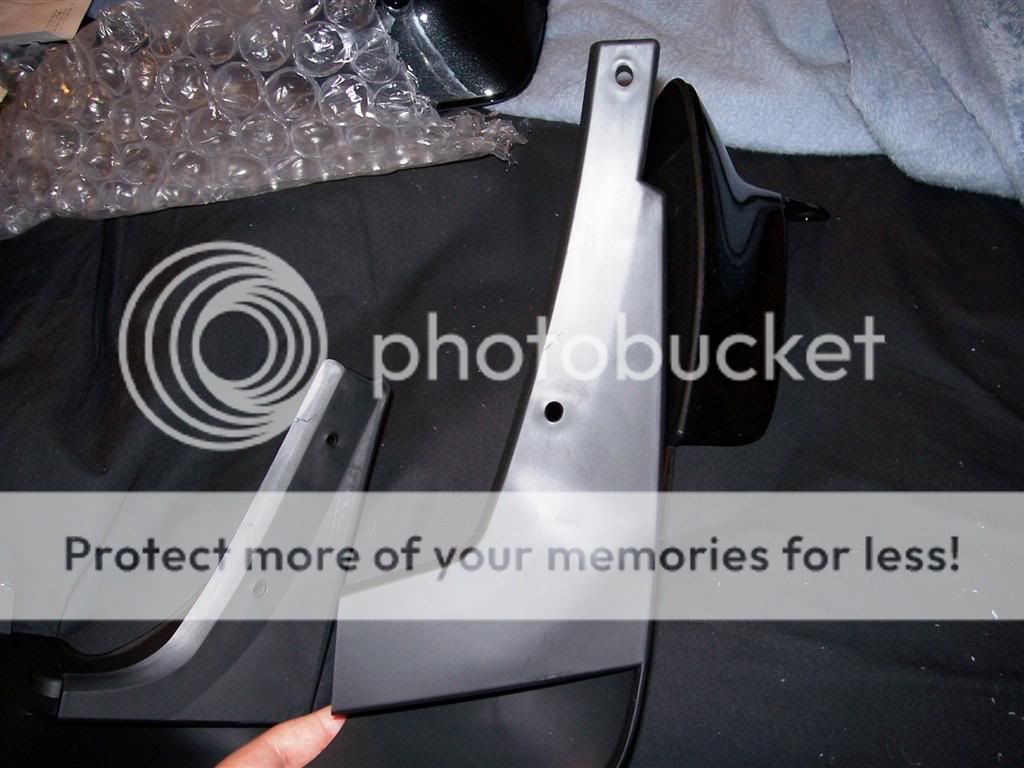
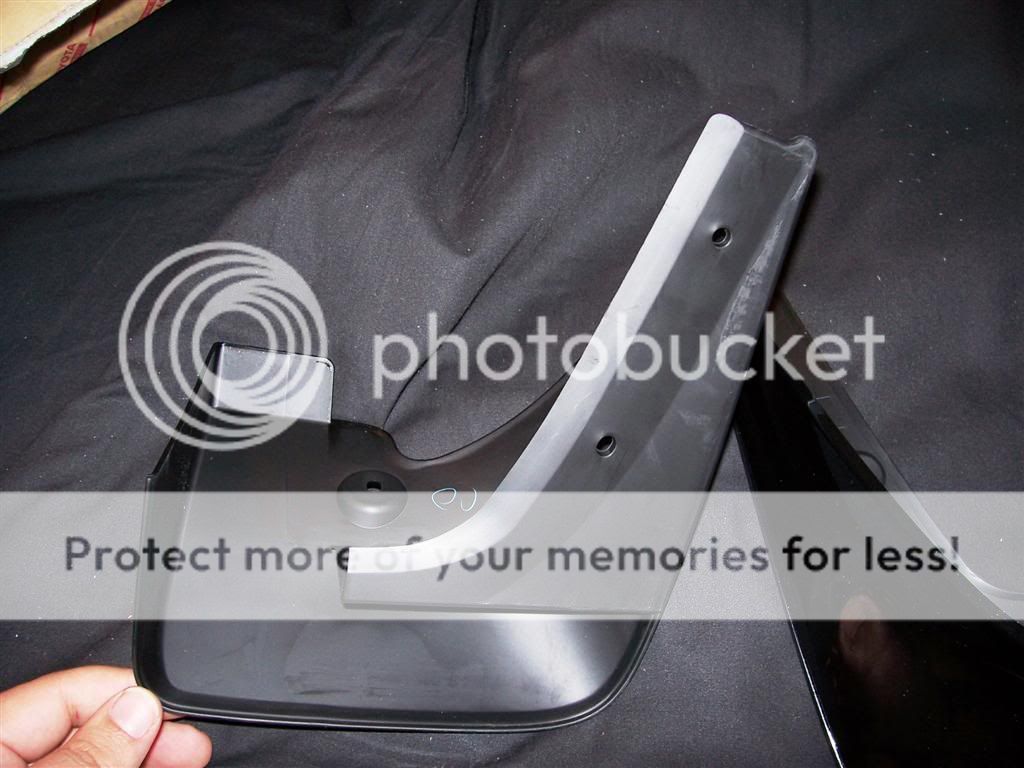
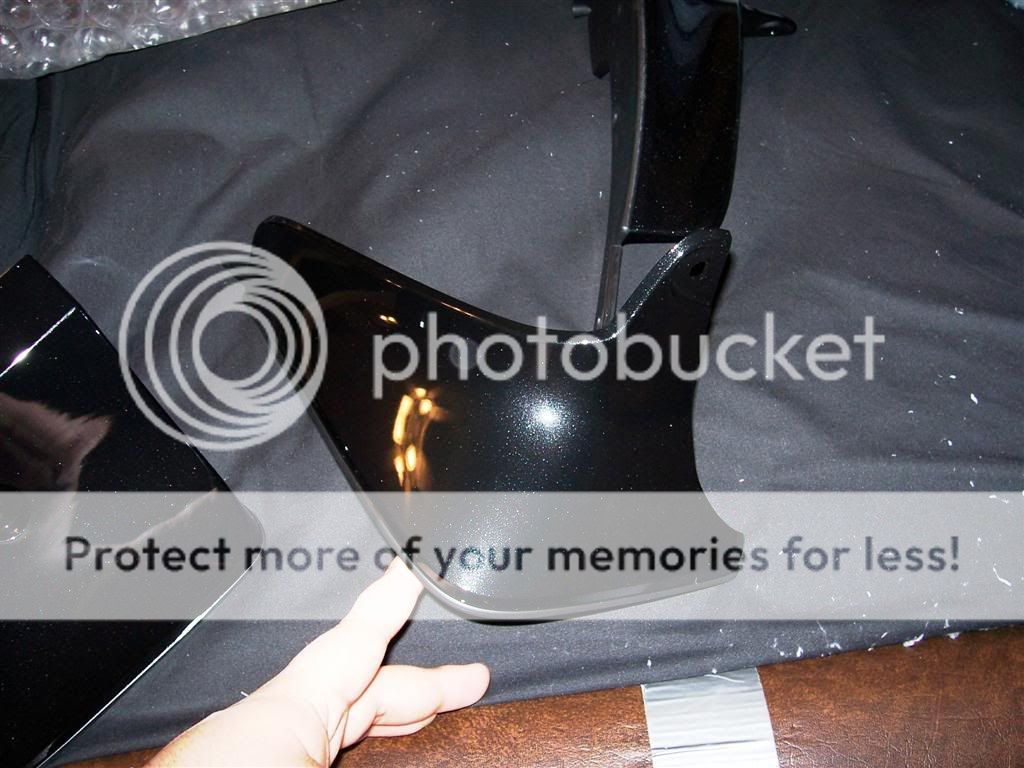
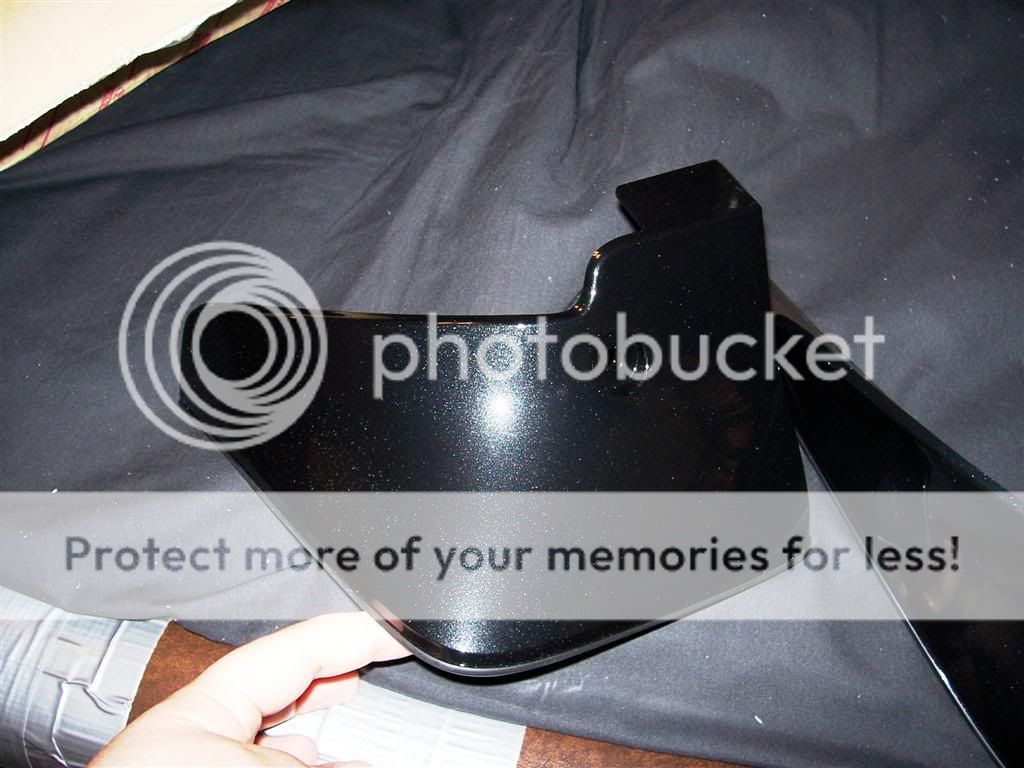
Here are some pictures of the parts and the instructions:
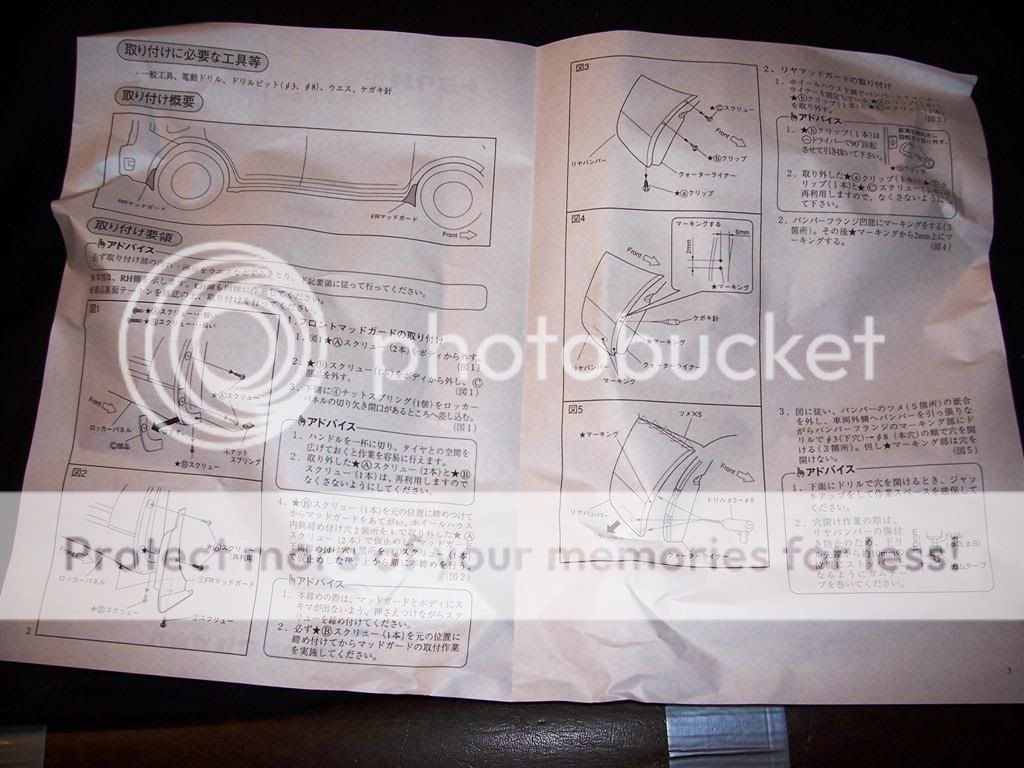
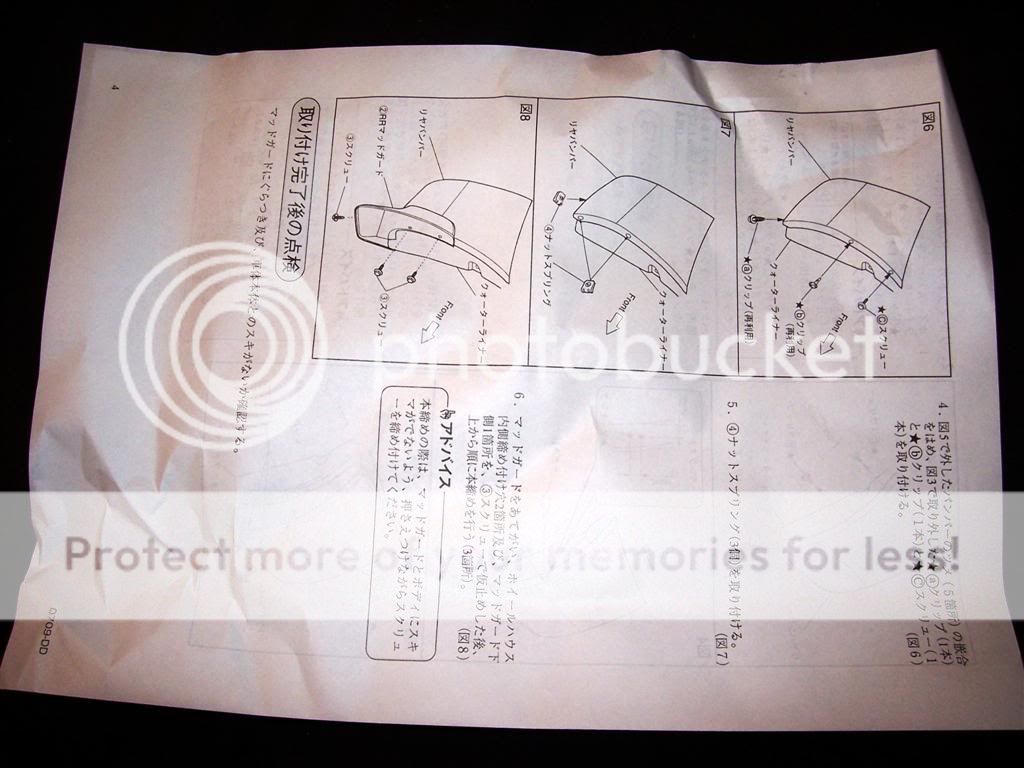
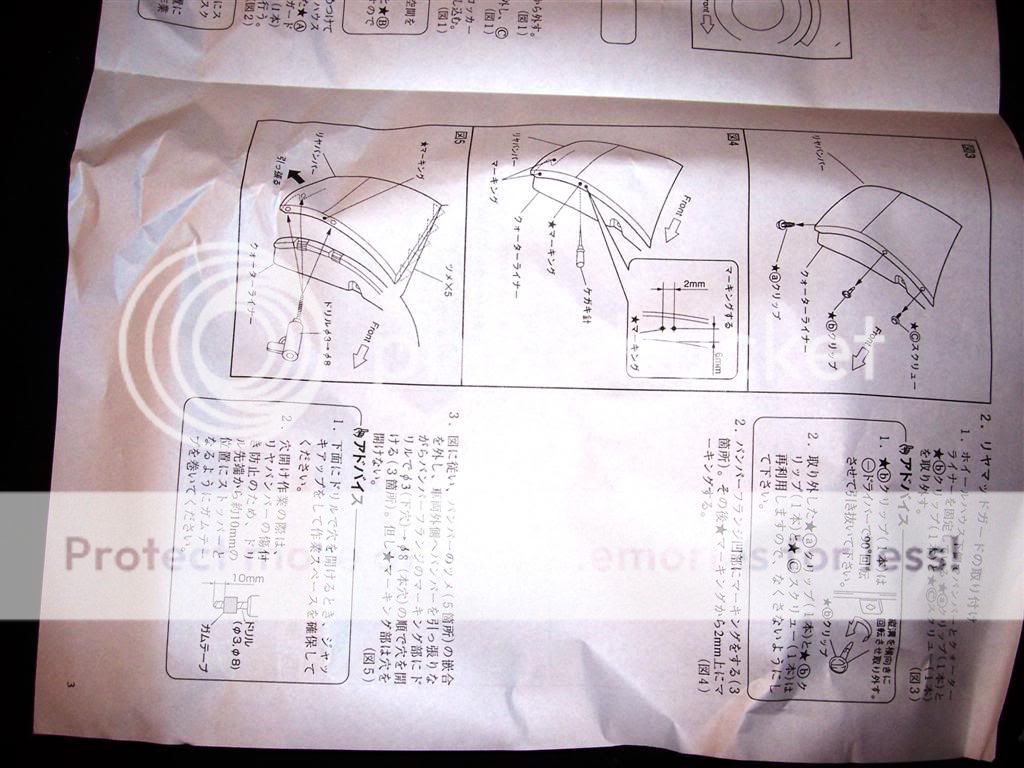
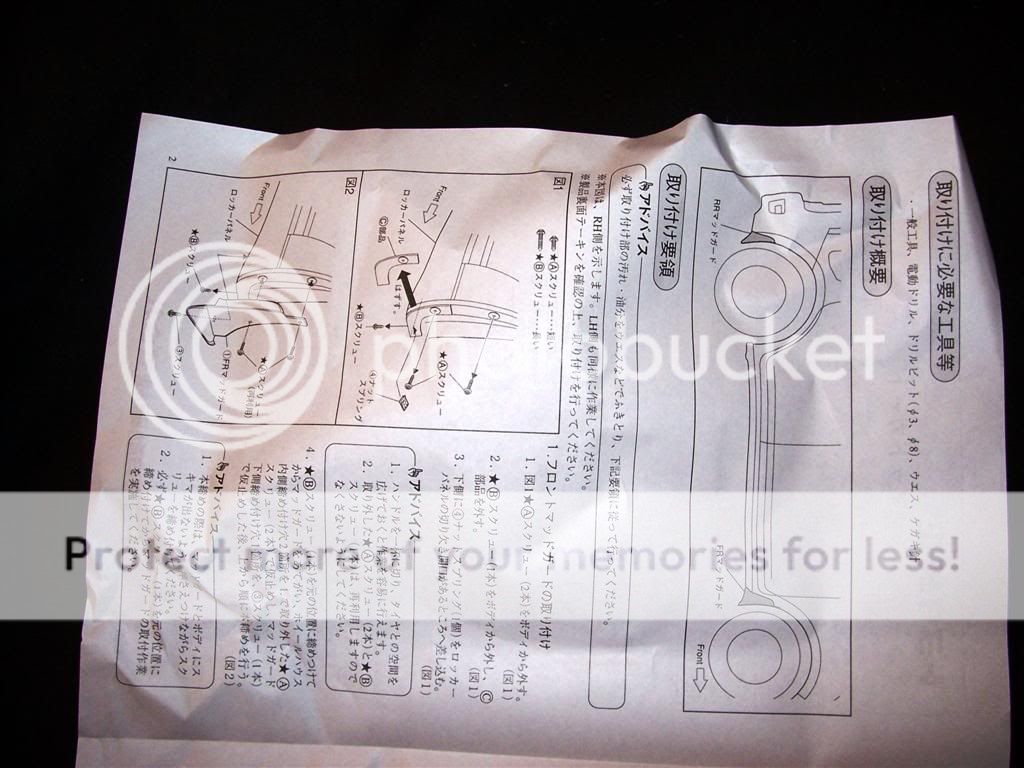

Anyway, I have hundreds of hours of working on cars under my belt, and I am a mechanical engineer, so I gave these flaps a shot. They turned out really great, as can be seen in this thread:
https://www.scionlife.com/forums/vie...203553&start=0
Anyway, several people asked me for a DIY write up, and luckily, I took ~ 30 pictures during the install, so here it is!
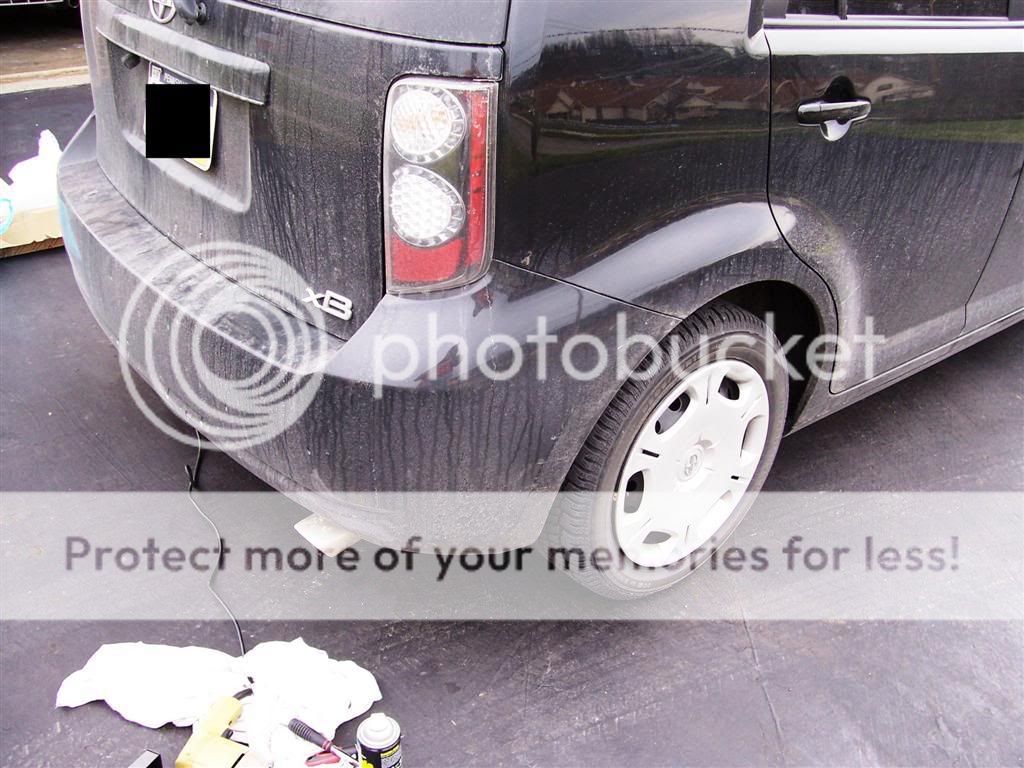
I started with the rear, because they are harder and require holes to be drilled. This is what I started with:
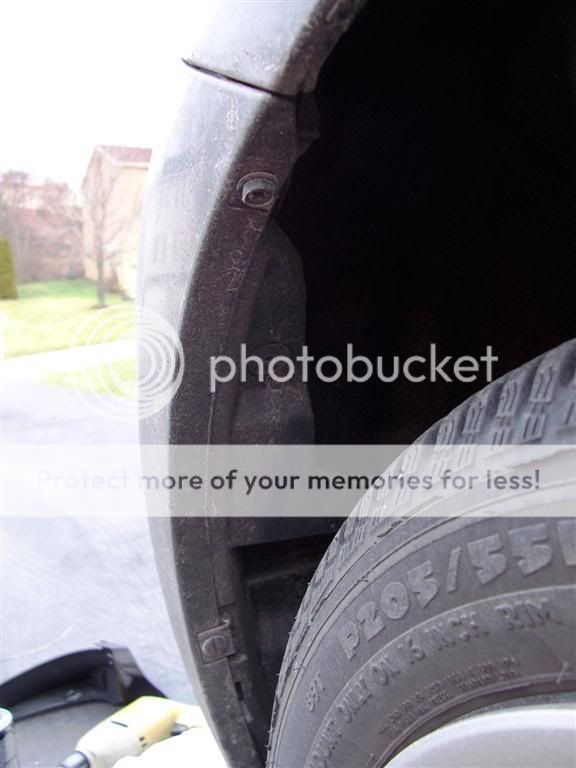
Here is a photo of the fasteners in the wheel well:
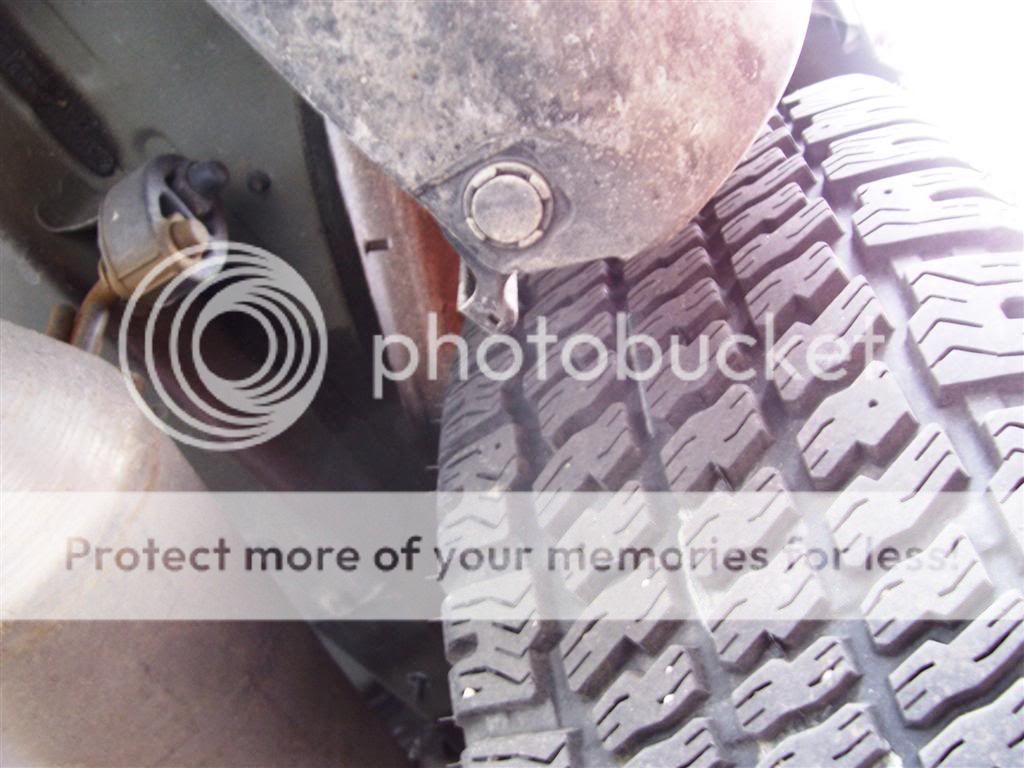
And the bottom of the bumper:
First, make sure the car is clean, or, if you are lazy like me, just clean off the area that the flaps touch. This is the first fastener to remove:
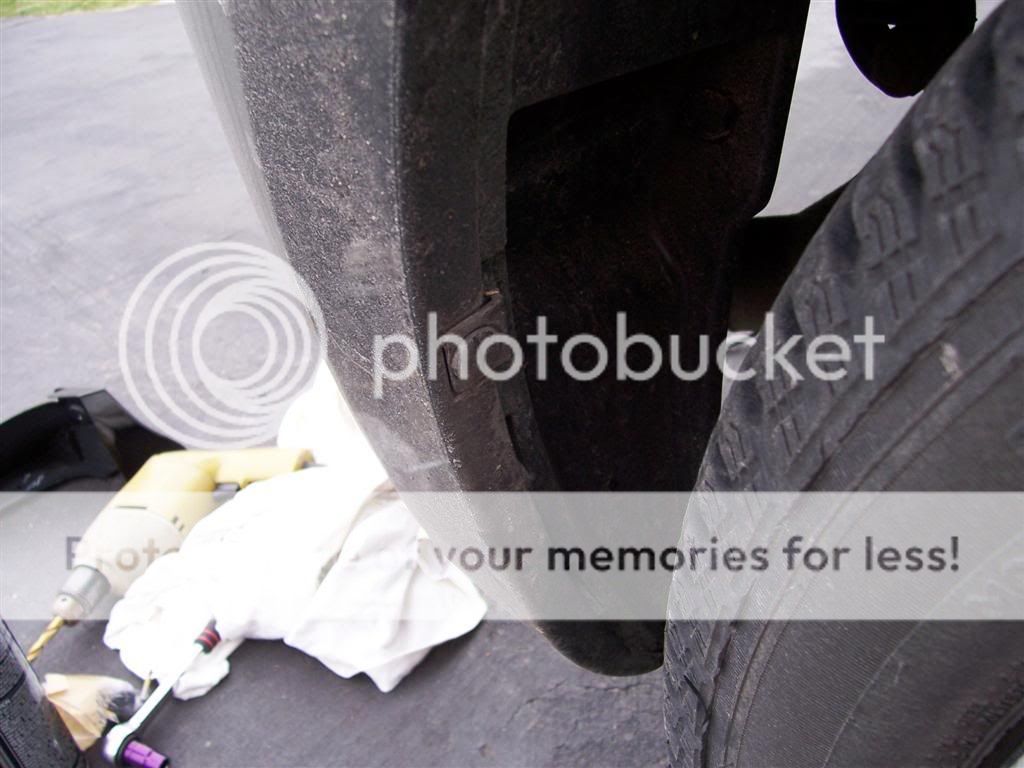
Turn it 90° and remove it:
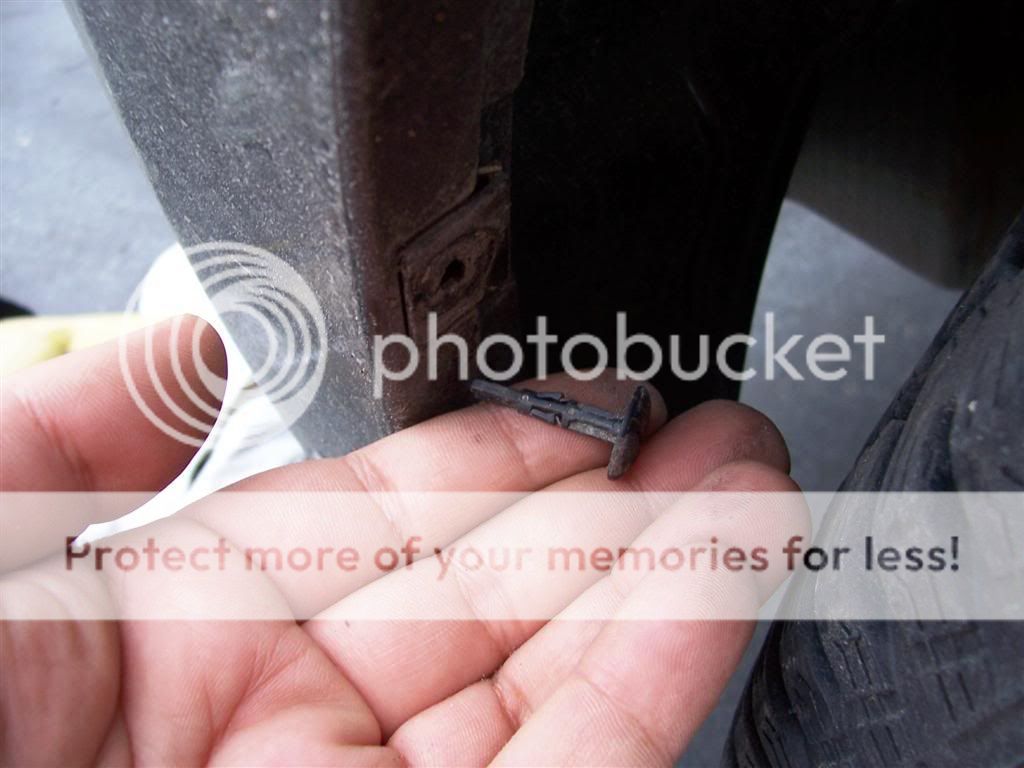
Next, remove the bolt above it, and disconnect the fastener on the bottom. The fastener on the bottom would not cooperate, I eventually removed it by tugging until it popped out of the wheel well liner. Once all the fasteners are removed, you must unclip the liner from the bumper. There is a clip in the wheel well liner where you removed the first fastener:
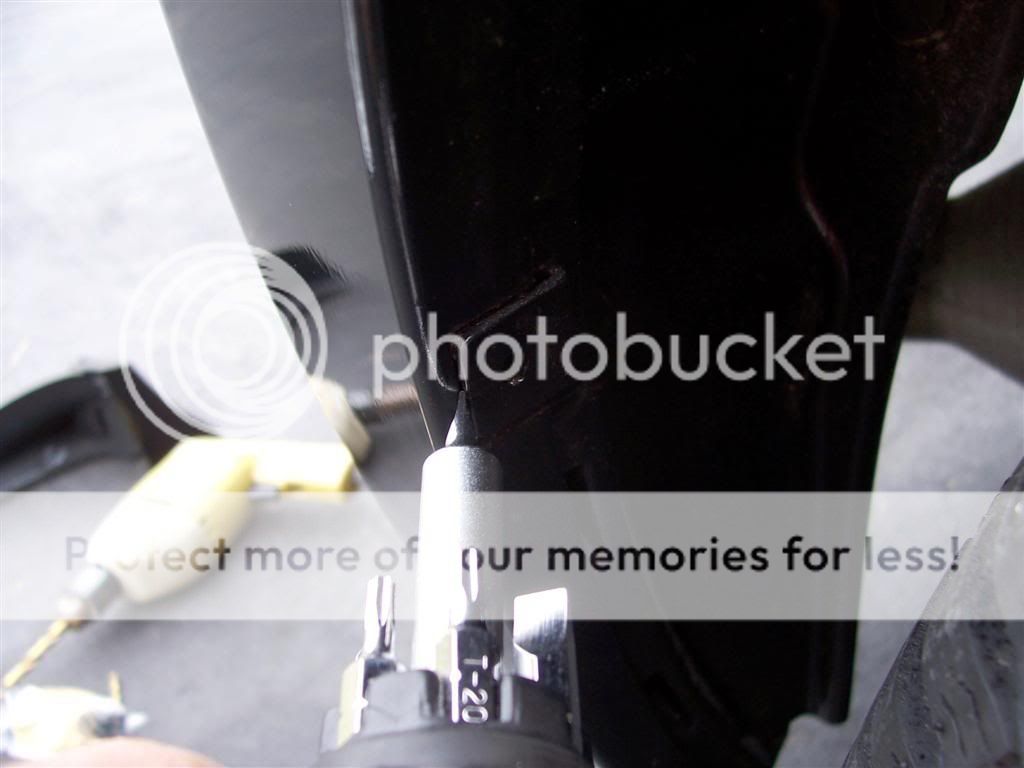
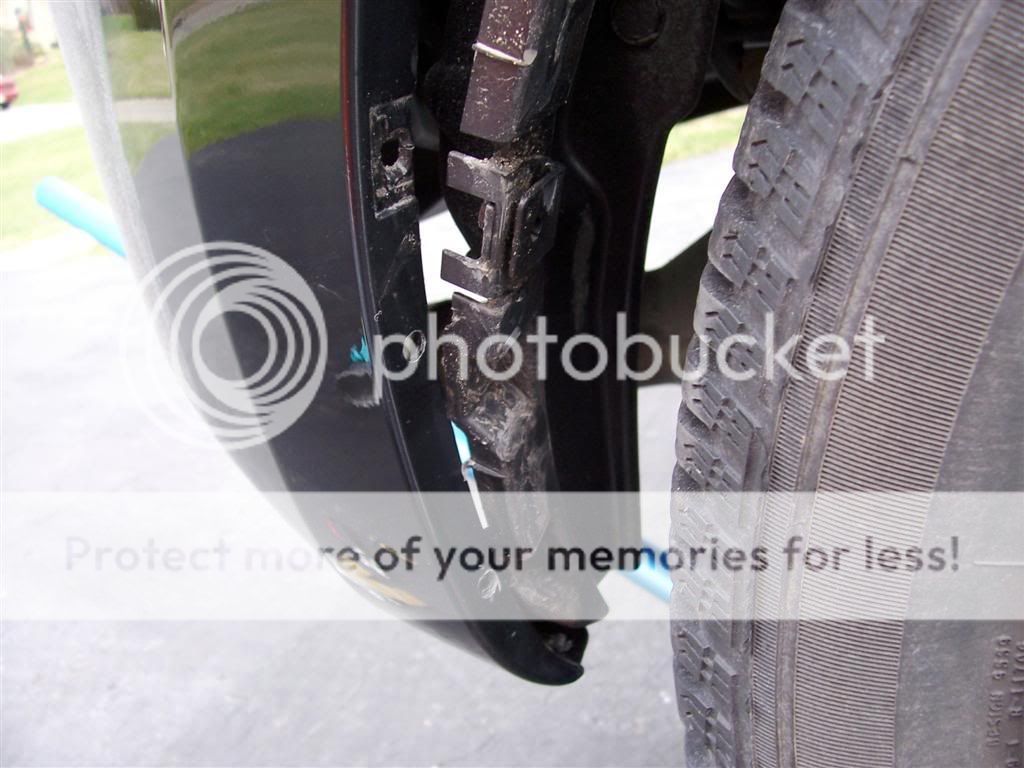
Once the back of the liner is free from the bumper, pull the bumper straight away from the body; it is snapped into place and will snap right out:

Once it is free, clean the leading edge very carefully and look for these tiny dimples:

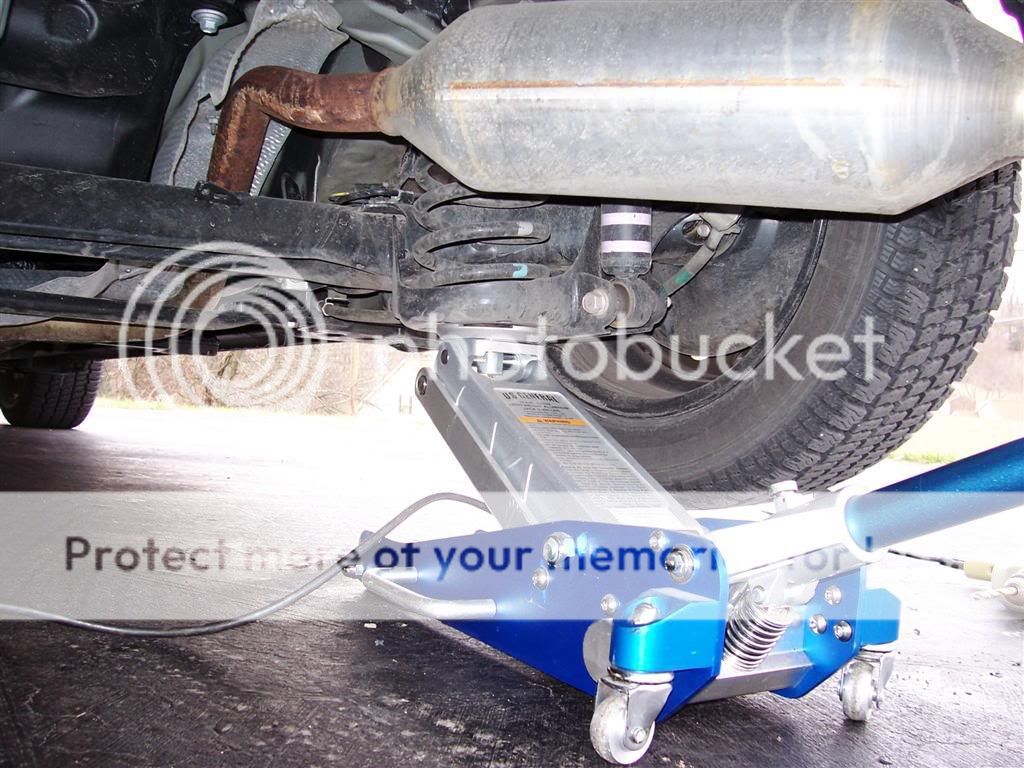
I also jacked up the car at this point. Be sure to use jack stands, wheel chocks, and the emergency brake for safety. I jacked under the spring:
They denote where you need to drill the top two holes. I drilled a pilot hole with a 1/8th bit and then a 5/16” bit. 3mm and 8mm are the proper sizes, but those are very close. To find the bottom hole, I held the mud flap in place and marked the bumper through the bottom hole. It was drilled with the same bits.
Next, slip the speed clips (bent sheet metal clips) that came with the flaps so that its flat side faces the mud flap. Re-attach the bumper to the liner and the body with the clips in place:
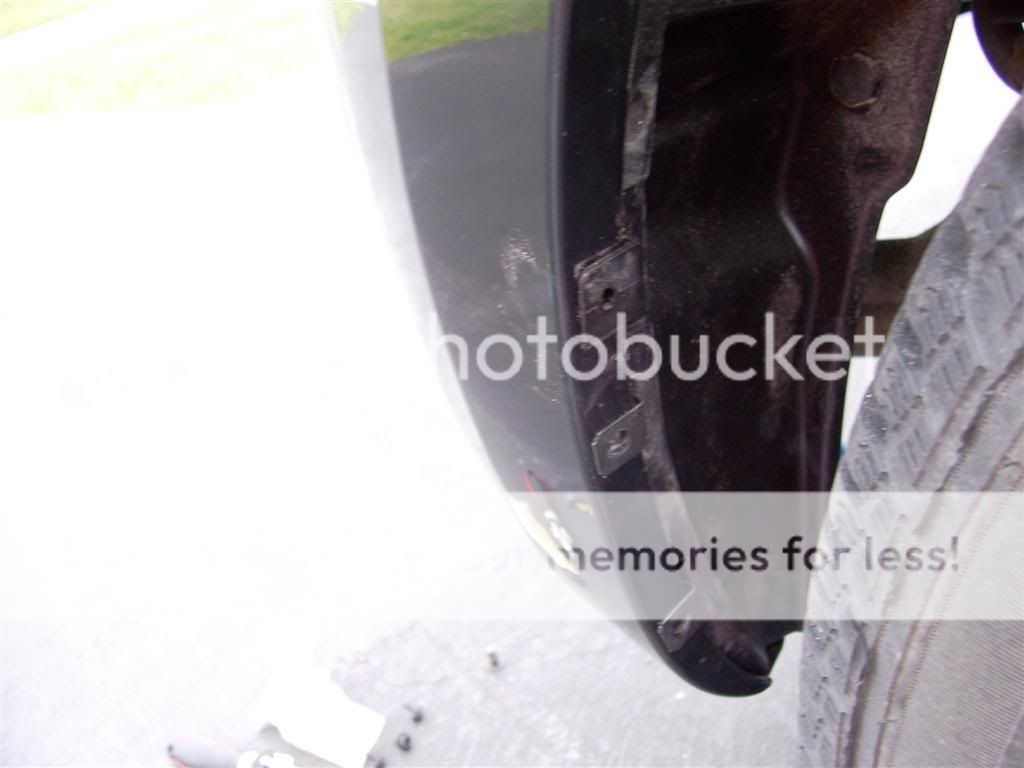
Replace all the fasteners you removed. Again, the bottom one just snaps into the bottom of the bumper. Be sure the clip under the first fastener is properly aligned with the bumper as shown above. During my work, one fastener in the wheel well came undone in the process. It is shown below:


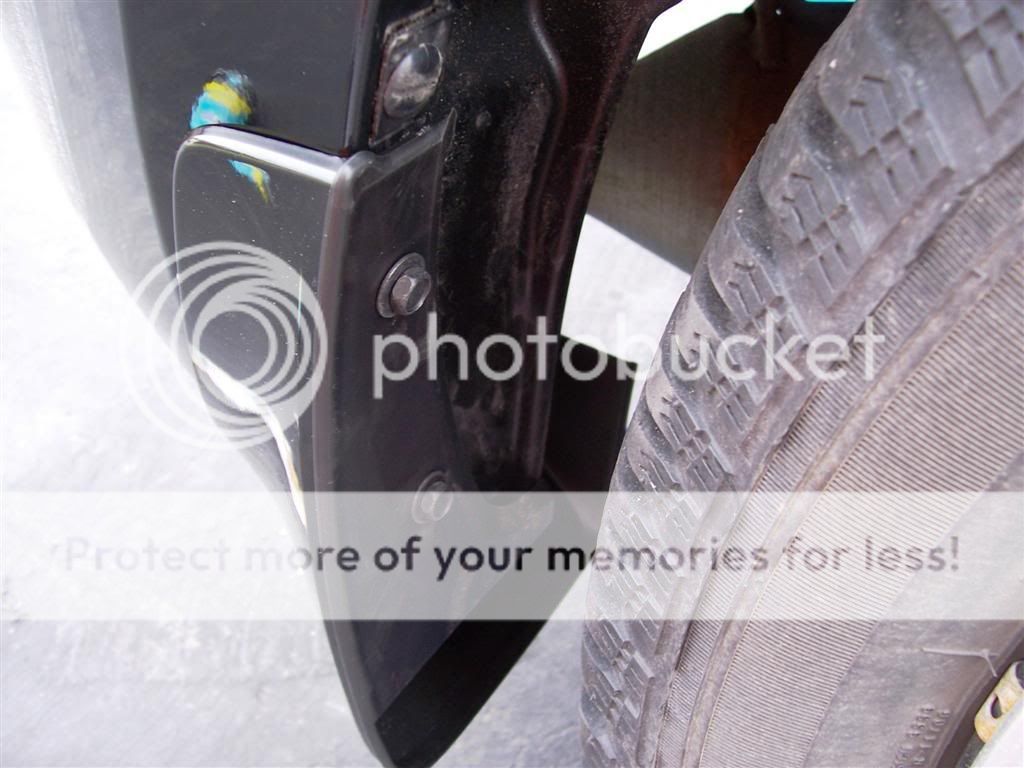
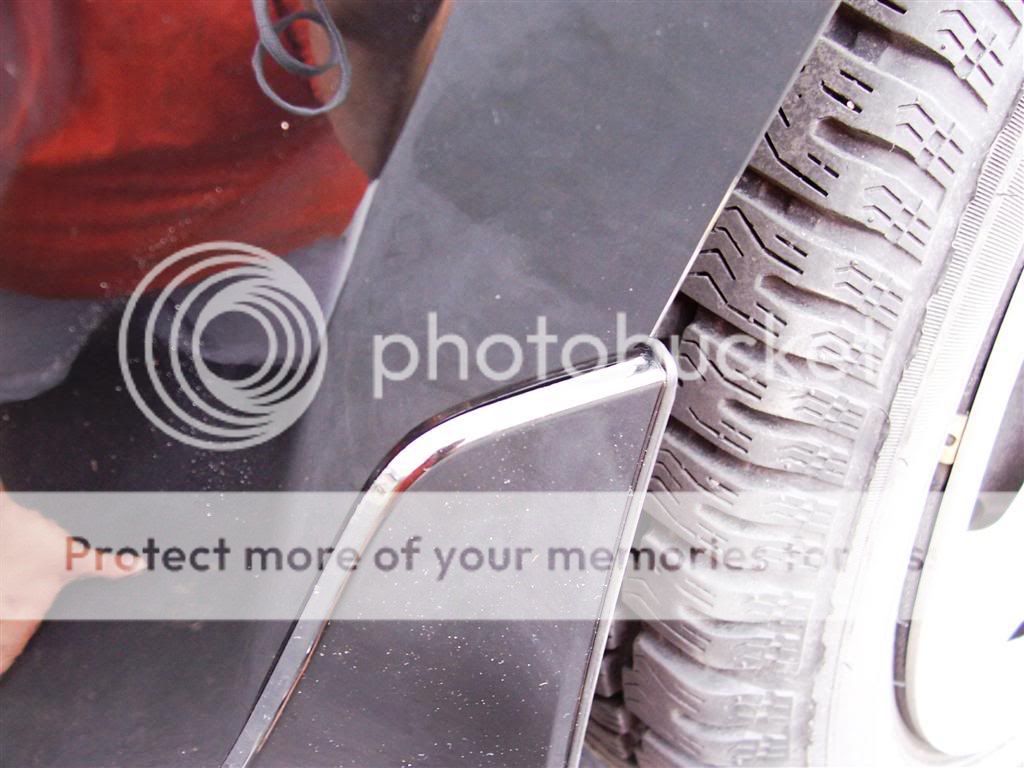
Once all the fasteners are in, hold the mud flap in place and bolt it up! The only tricky part is holding the flap tight to the body (no gaps around the outside) and tightening the bolts to hold it on:
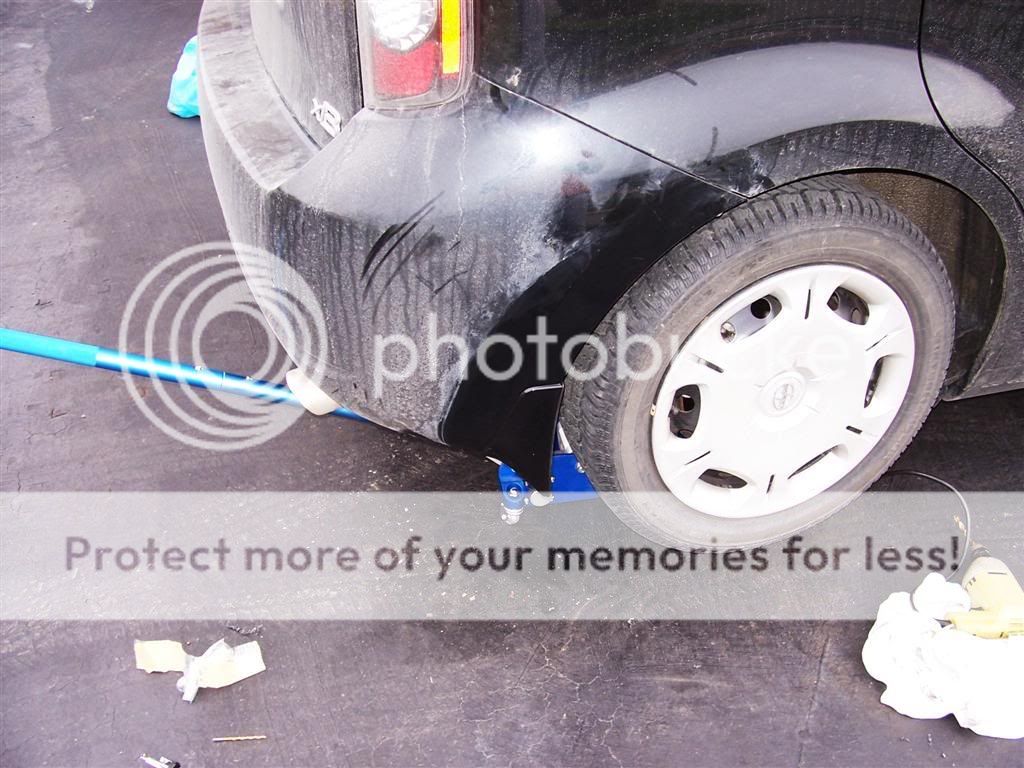
And you are done with the rear! On to the front; again, clean the body and wheel well where the flap resides:
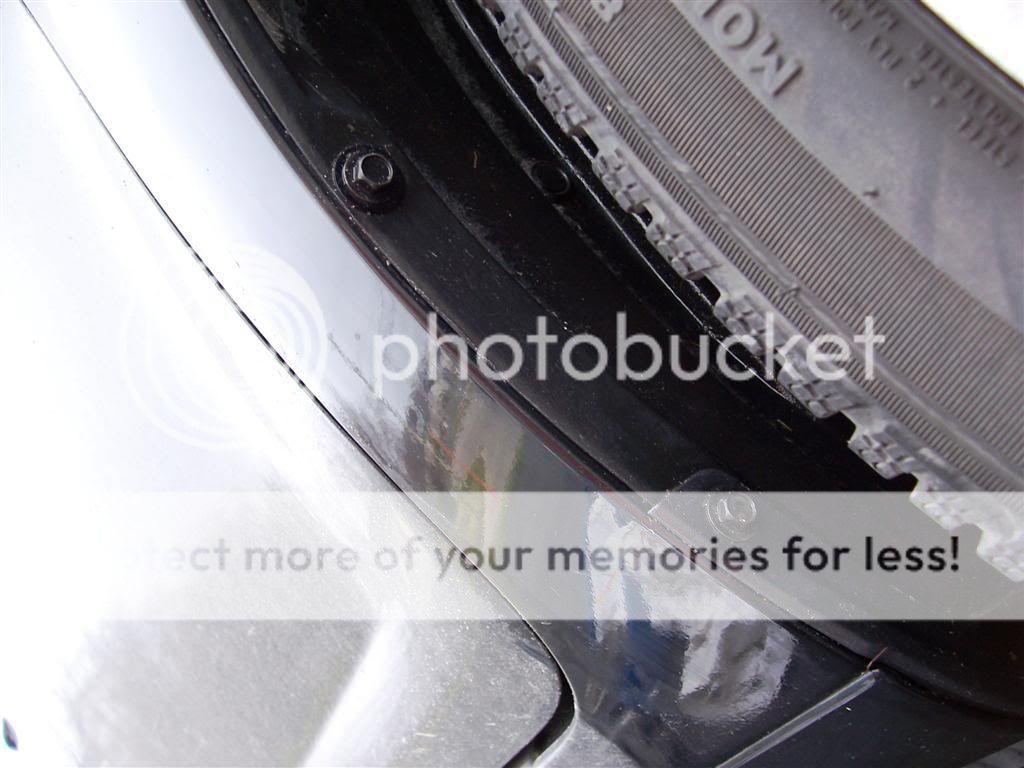
Remove the two bolts in the wheel well in the picture above, and the silver bolt just below them in the picture below:
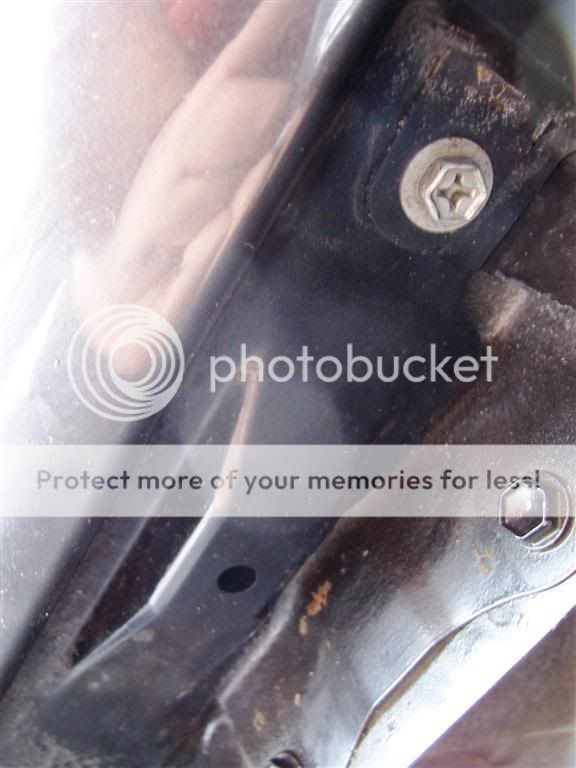
This piece should slide out; it is not reused, feel free to throw it away:
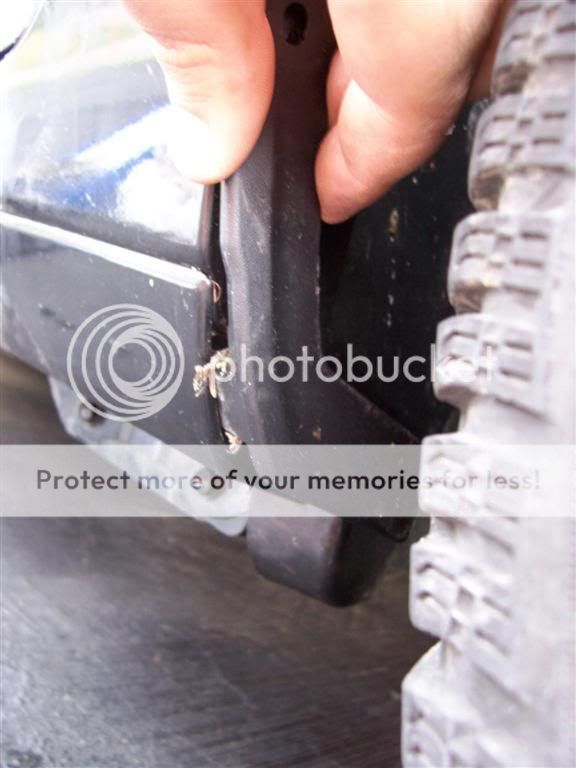
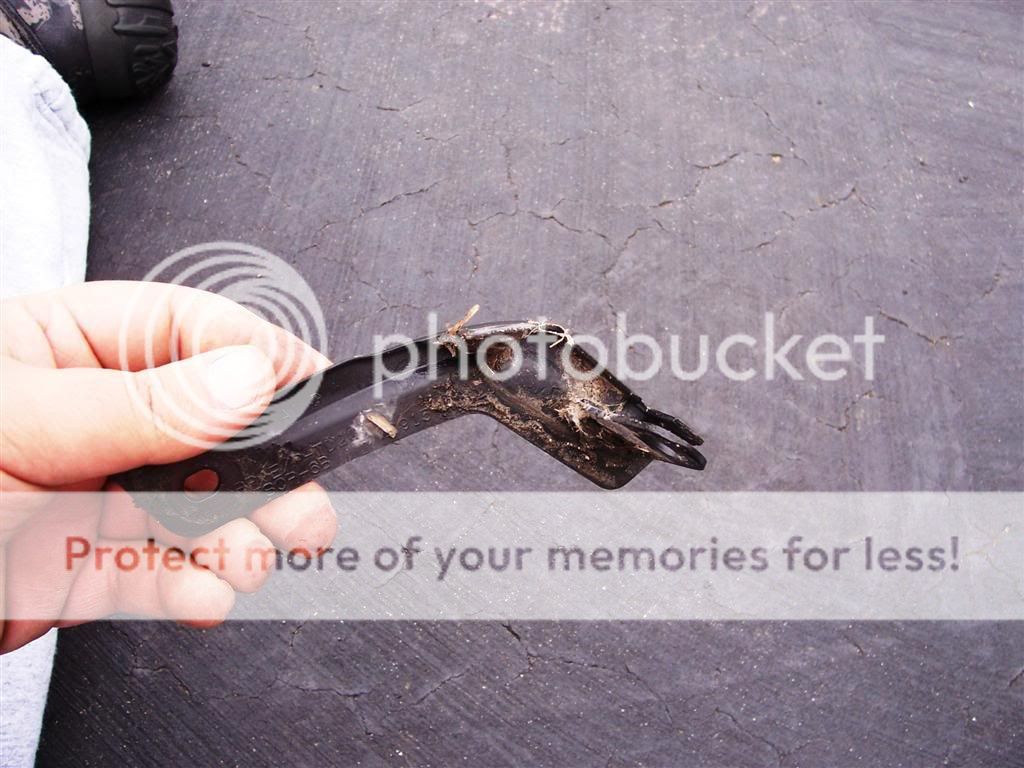
Place a speed clip on the hole on the dedicated boss just behind the silver bolt:
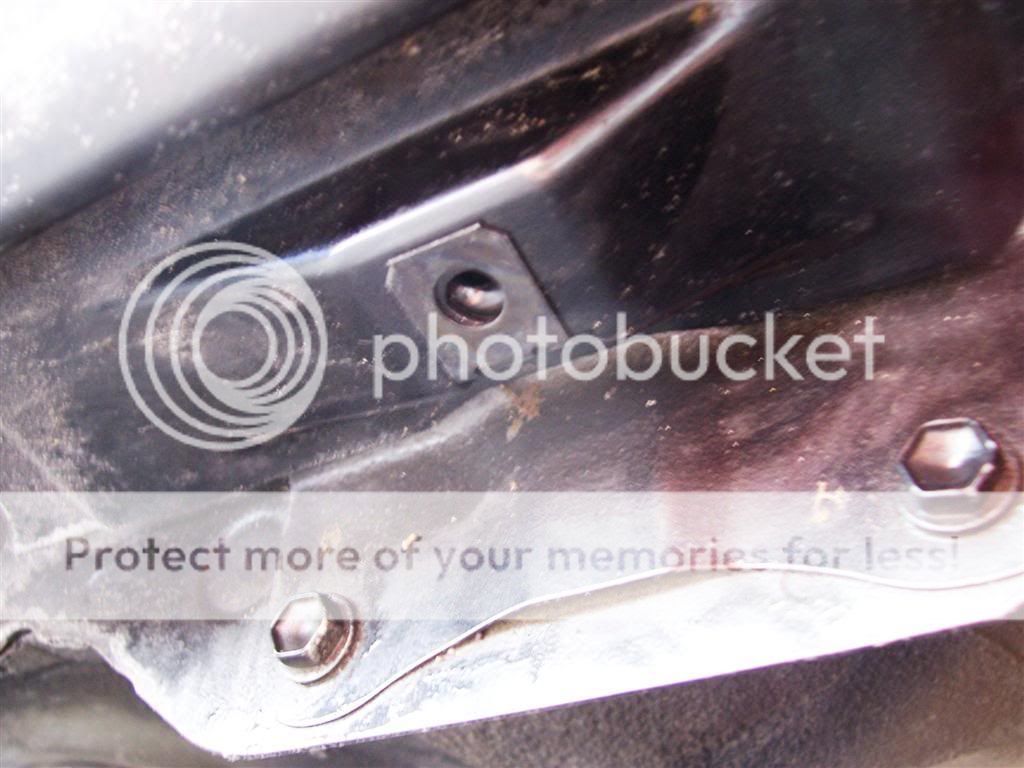
Make sure it is applied from the inside of the car, with the flat side facing the flap, as shown in the picture above. I then replaced the silver bolt (the instructions say to discard it), and bolted the flap in place. Again, align the flap and hold it against the car while tightening to avoid any gaps:
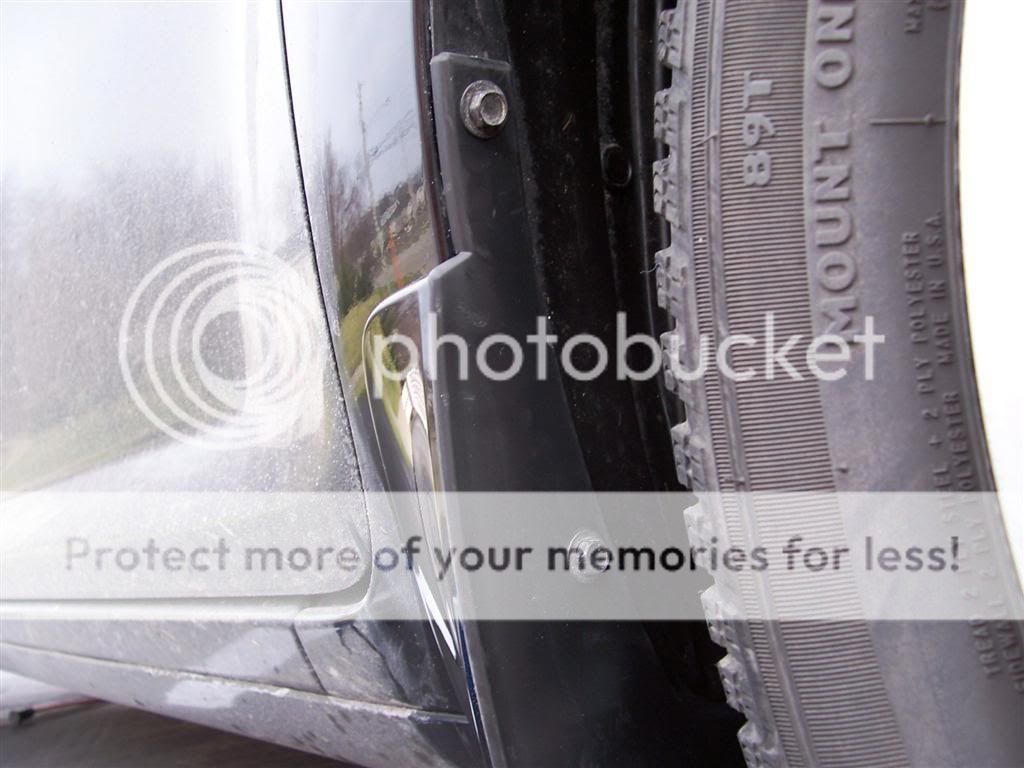
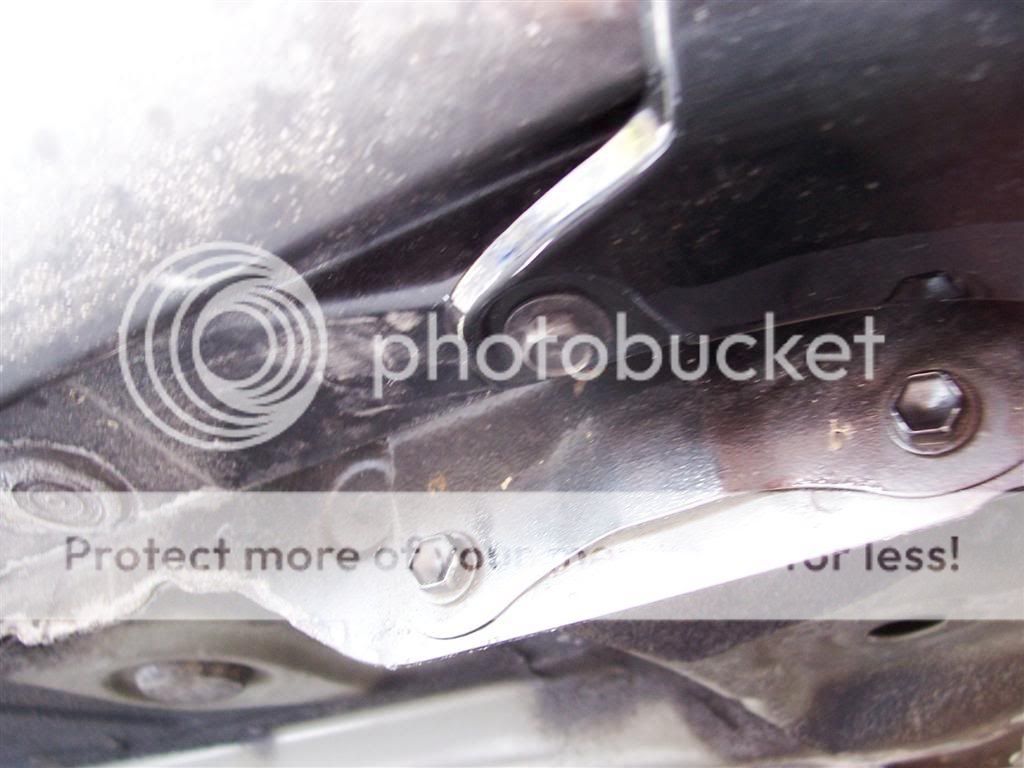
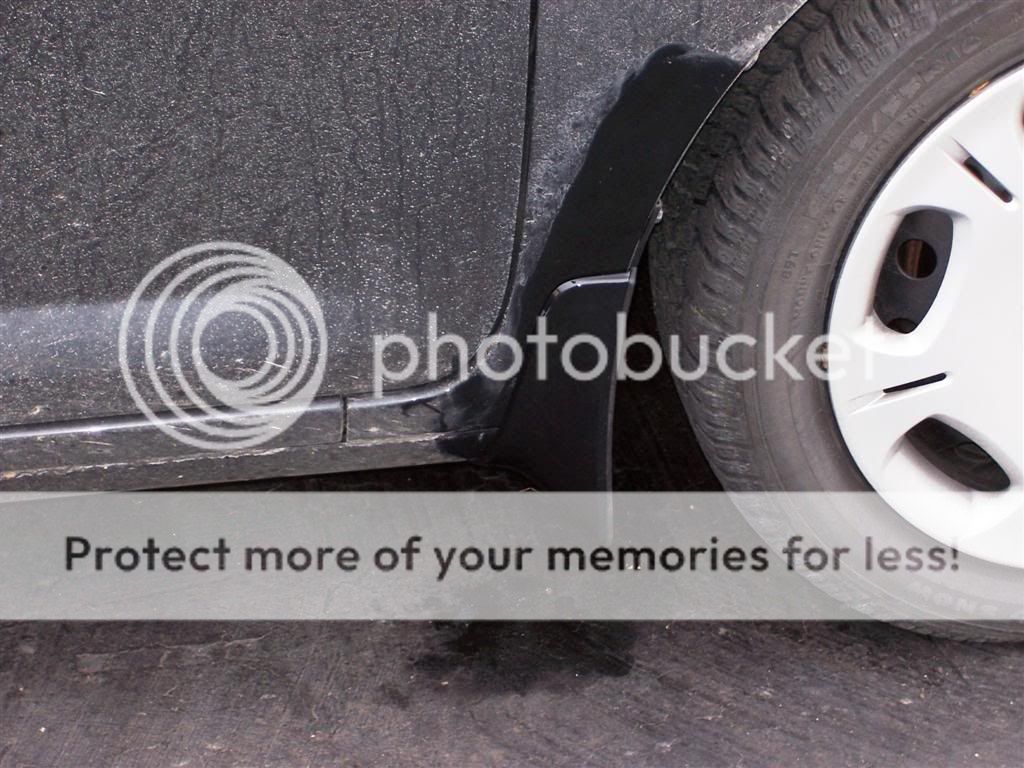
Replicate the install on the other side, and you are done!
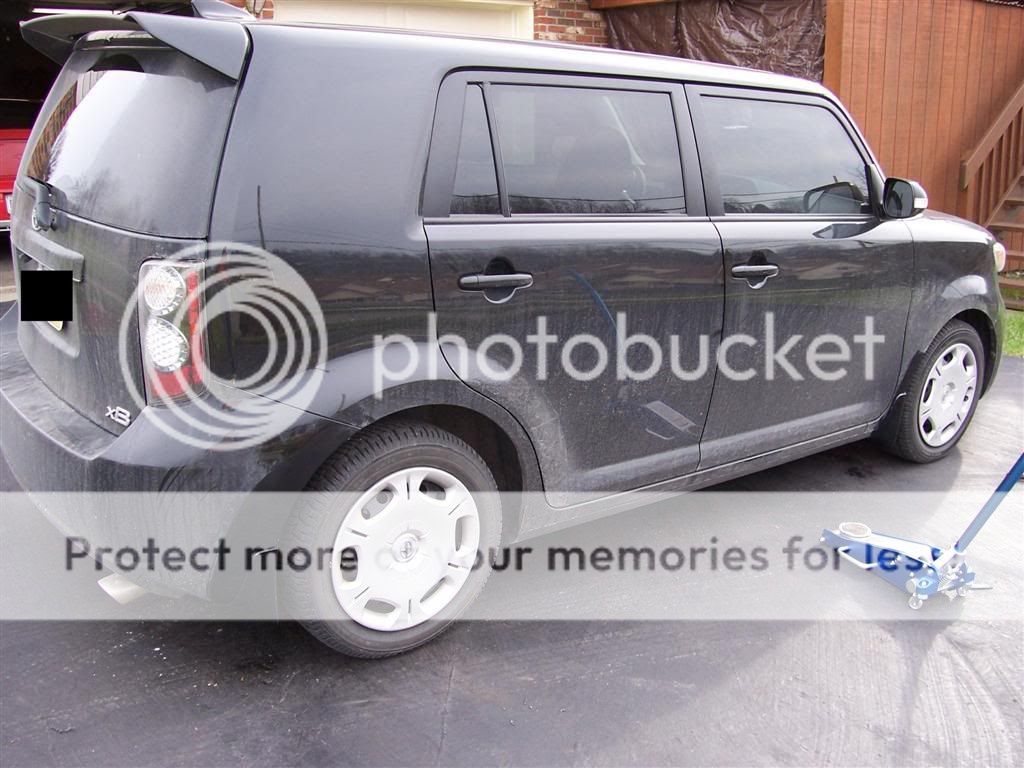

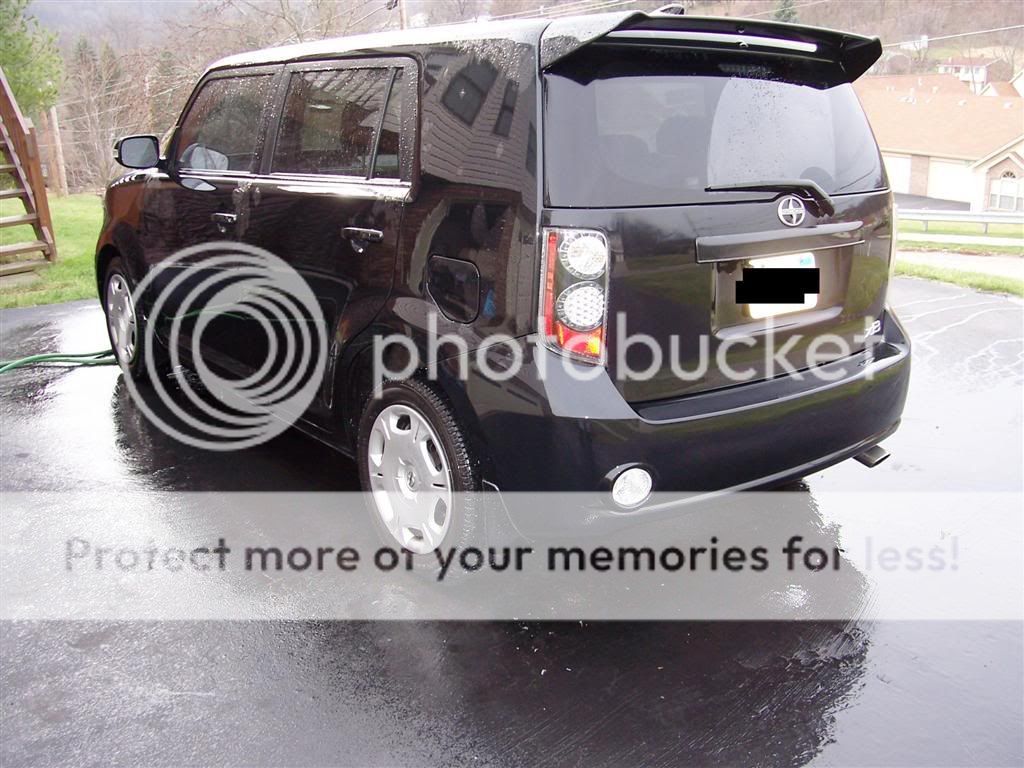
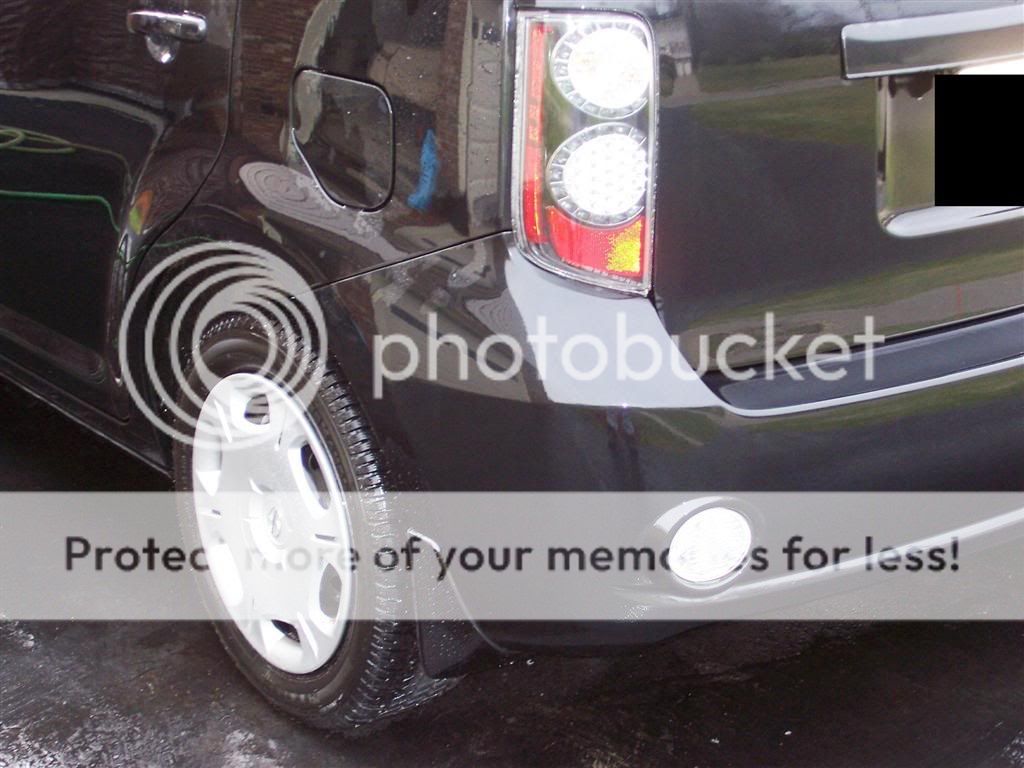
Some pictures of the coverage:

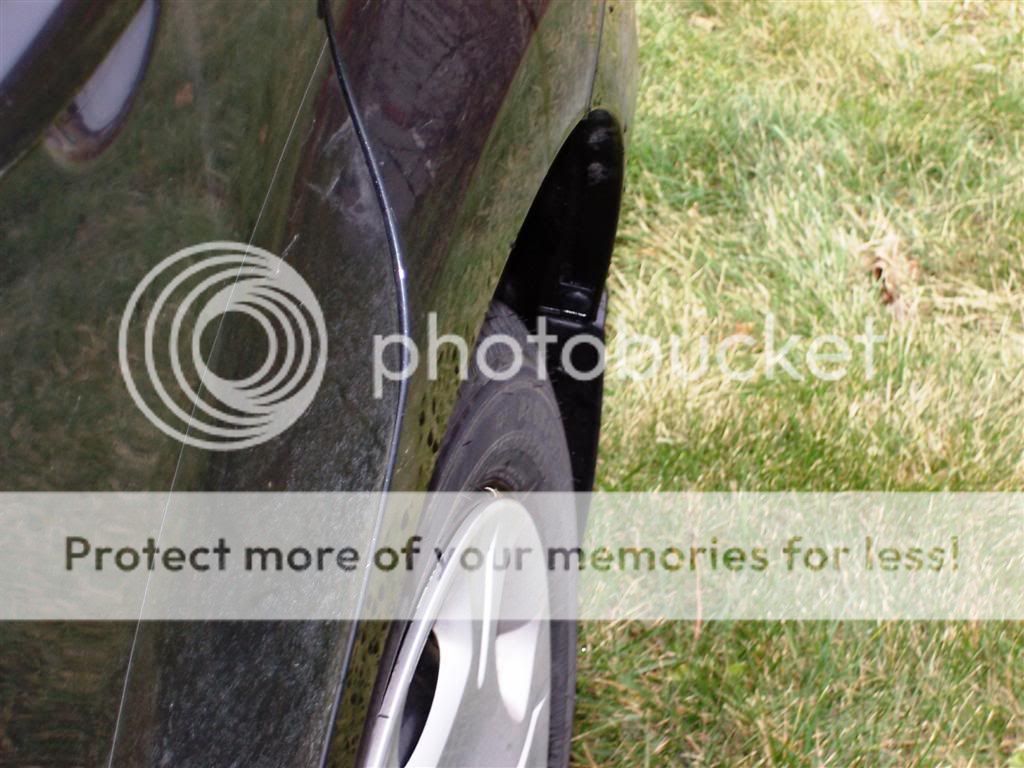
Well done!
Here are some pictures of the parts and the instructions:


Anyway, I have hundreds of hours of working on cars under my belt, and I am a mechanical engineer, so I gave these flaps a shot. They turned out really great, as can be seen in this thread:
https://www.scionlife.com/forums/vie...203553&start=0
Anyway, several people asked me for a DIY write up, and luckily, I took ~ 30 pictures during the install, so here it is!
I started with the rear, because they are harder and require holes to be drilled. This is what I started with:

Here is a photo of the fasteners in the wheel well:

And the bottom of the bumper:

First, make sure the car is clean, or, if you are lazy like me, just clean off the area that the flaps touch. This is the first fastener to remove:

Turn it 90° and remove it:

Next, remove the bolt above it, and disconnect the fastener on the bottom. The fastener on the bottom would not cooperate, I eventually removed it by tugging until it popped out of the wheel well liner. Once all the fasteners are removed, you must unclip the liner from the bumper. There is a clip in the wheel well liner where you removed the first fastener:


Once the back of the liner is free from the bumper, pull the bumper straight away from the body; it is snapped into place and will snap right out:

Once it is free, clean the leading edge very carefully and look for these tiny dimples:

I also jacked up the car at this point. Be sure to use jack stands, wheel chocks, and the emergency brake for safety. I jacked under the spring:

They denote where you need to drill the top two holes. I drilled a pilot hole with a 1/8th bit and then a 5/16” bit. 3mm and 8mm are the proper sizes, but those are very close. To find the bottom hole, I held the mud flap in place and marked the bumper through the bottom hole. It was drilled with the same bits.
Next, slip the speed clips (bent sheet metal clips) that came with the flaps so that its flat side faces the mud flap. Re-attach the bumper to the liner and the body with the clips in place:

Replace all the fasteners you removed. Again, the bottom one just snaps into the bottom of the bumper. Be sure the clip under the first fastener is properly aligned with the bumper as shown above. During my work, one fastener in the wheel well came undone in the process. It is shown below:


Once all the fasteners are in, hold the mud flap in place and bolt it up! The only tricky part is holding the flap tight to the body (no gaps around the outside) and tightening the bolts to hold it on:


And you are done with the rear! On to the front; again, clean the body and wheel well where the flap resides:

Remove the two bolts in the wheel well in the picture above, and the silver bolt just below them in the picture below:

This piece should slide out; it is not reused, feel free to throw it away:


Place a speed clip on the hole on the dedicated boss just behind the silver bolt:

Make sure it is applied from the inside of the car, with the flat side facing the flap, as shown in the picture above. I then replaced the silver bolt (the instructions say to discard it), and bolted the flap in place. Again, align the flap and hold it against the car while tightening to avoid any gaps:


Replicate the install on the other side, and you are done!


Some pictures of the coverage:


Well done!
#4
Originally Posted by ScioXBox
I like it!!! 

I'm tired of mud and crap that gets all over my car.. I don't think I can do this mod unless I get rid of my five axis kit.
I'm tired of mud and crap that gets all over my car.. I don't think I can do this mod unless I get rid of my five axis kit.
All in trade for your 5axis lip kit.
Problem solved!!!
#5
scioXBox by looking at it. i think you can put the flips on with the 5 axis kit. might have to do a few mods to the bolting pattern. it looks like it rides pretty close. you might actually ride directly on the five axis kit. would be interesting to see if it worked
#8
It is supposed to snow for the next couple days, so I should get a better indication of how well they are working.
I can tell you a couple interesting tidbits though; they are designed so they are not much (if at all) lower than the lowest point on the car, so they have not (and should never) scrape pavement even after I lower it.
Also, I have driven it through rain, and there is no spray pattern of dirt down the side of the car like there used to be, but snow will be a better test.
#9
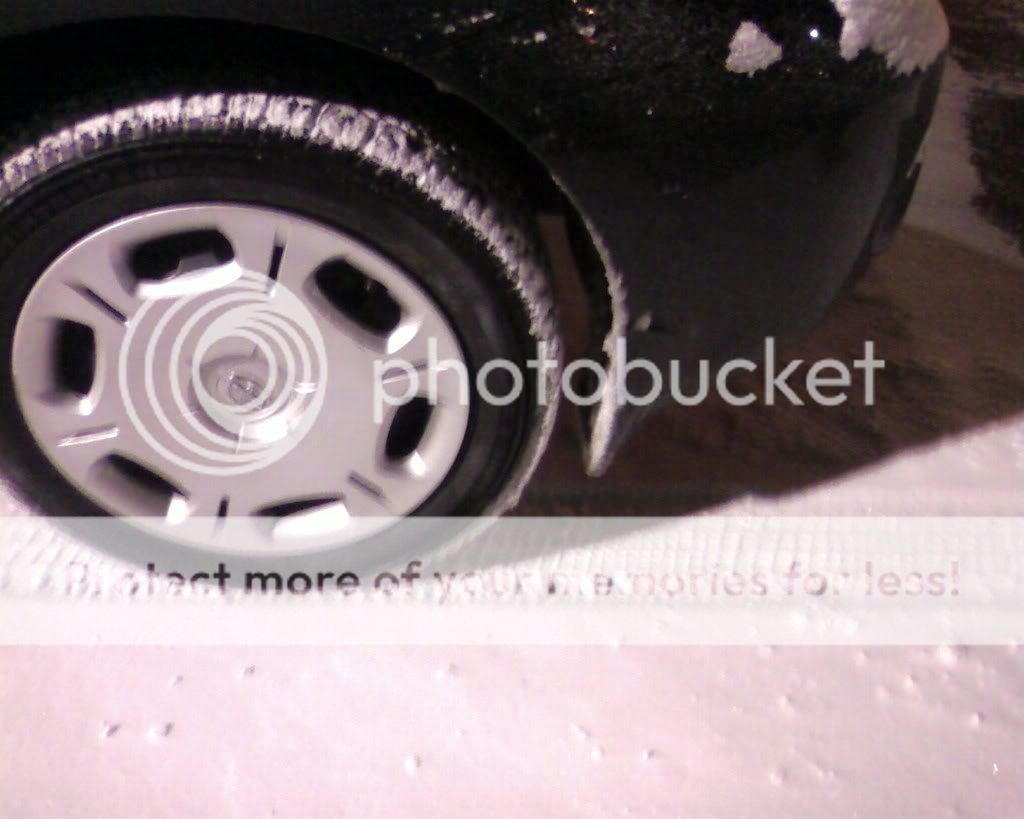
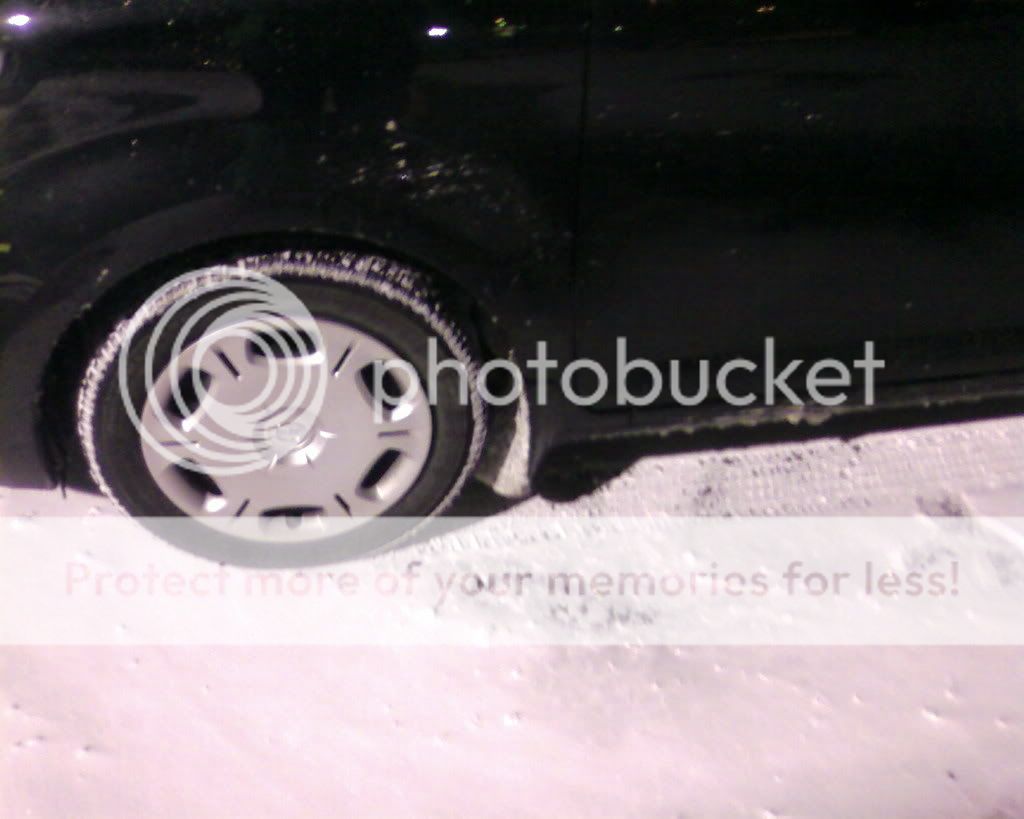
It snowed tonight, and I took some quick pics for your pleasure. As you can see, the front flaps are not COMPLETELY effective, but they are damn close. Once I lower it, I expect them keep all the debris off. As they are, they keep the vast majority off of the body.


#10
Great installation. My white xb2 NEEDS these.
-QUESTION: How flexible are the mudflaps? After the accumulated slush freezes into a solid block, can you give the mudflap a twist to release the ice (like a tray of ice cubes)?
-QUESTION: How flexible are the mudflaps? After the accumulated slush freezes into a solid block, can you give the mudflap a twist to release the ice (like a tray of ice cubes)?
#11
You technically COULD, they are made of a fairly flexible plastic, but there are problems.
First of all, there is something called a "Glass Transition Temperature" for amorphous solids like the polypropylene of which these flaps are made. They be come VERY brittle below that temperature, and tend to snap before bending very far. The temp for polypropylene is between 0°C and -20°C depending on formula, which virtually guarantees that you will be tempting fate if you flex them.
http://en.wikipedia.org/wiki/Glass_t...on_temperature
Second of all, they are bolted in three places, which would resist twisting...they were flexible at room temperature sitting on the table, but bolted up would be a different story.
Finally, as you can see in the first few pics, they are not perfectly smooth inside, they hollow out below the body. That would hinder release.
So....I wouldn't recommend it. Considering how expensive they are, I would hesitate to even try a light kick to the slush.
#12
Originally Posted by SlowRider
-QUESTION: How flexible are the mudflaps? After the accumulated slush freezes into a solid block, can you give the mudflap a twist to release the ice (like a tray of ice cubes)?
Thanks for the pics fiero. I think you are right and since mine is already lowered I would see a huge improvement over my current situation.
Guess it's time to do some business with Steve even though the price is pretty painful.
For SlowRider: For whatever it's worth, I have had other cars with this type of mudflap in snow conditions and I find that they are kind of self cleaning. The tires keep the build up to a minimum as you can kind of see on Bigfieroman's car. Then all it takes is a garage or a slightly warm day to drop the big chunk off the car. I find that they are actually more effective with some build up. Anyway, I find it works pretty well to just ignore the snow/slush build up.
#13
Originally Posted by roXor_boXor
You should really know better than to ask an engineer a question like that. You know you are going to get way more answer than you bargained for. :D
#14
Originally Posted by Bigfieroman
Originally Posted by roXor_boXor
You should really know better than to ask an engineer a question like that. You know you are going to get way more answer than you bargained for. :D
I'm just in the habit of poking fun at the engineers. We have about 75 at work. Lots of entertaining targets.
Just for a little fun, one of my favorite "G" rated engineer jokes is:
How do you spot an extroverted engineer?
He stares at your shoes when he's talking to you instead of his own.
Something tells me you don't fit that joke very well.
#16
Originally Posted by roXor_boXor
Originally Posted by Bigfieroman
Originally Posted by roXor_boXor
You should really know better than to ask an engineer a question like that. You know you are going to get way more answer than you bargained for. :D
I'm just in the habit of poking fun at the engineers. We have about 75 at work. Lots of entertaining targets.
Something tells me you don't fit that joke very well.
#17
You did a great job on these mudflaps and they look good. No way I can justify the cost however. I went looking for plain vanilla flat mudflaps like you used to be able to buy anywhere. They seem to be a relic of the past. Local chains here are Autozone and Pep Boys. Neither had anything suitable.
If I could find some good material, I'd cut my own, but I'm coming up empty so far on what to use. Any ideas?
If I could find some good material, I'd cut my own, but I'm coming up empty so far on what to use. Any ideas?
#18
Uhh...maybe one of those chair mats, painted black? The kind that go under a wheeled chair to let it roll more easily? Those are roughly the correct thickness and are designed not to snap. Plus, the spikes will make sure that any animals you run over..."return to the earth".
#19
Originally Posted by Bigfieroman
Uhh...maybe one of those chair mats, painted black? The kind that go under a wheeled chair to let it roll more easily? Those are roughly the correct thickness and are designed not to snap. Plus, the spikes will make sure that any animals you run over..."return to the earth".
Maybe call them the Deathrace 2008 mudflaps?
#20
Originally Posted by roXor_boXor
Originally Posted by Bigfieroman
Uhh...maybe one of those chair mats, painted black? The kind that go under a wheeled chair to let it roll more easily? Those are roughly the correct thickness and are designed not to snap. Plus, the spikes will make sure that any animals you run over..."return to the earth".
Maybe call them the Deathrace 2008 mudflaps?


