
My Homebrew CAI Version II :)!
 07-11-2011, 11:23 PM
#1

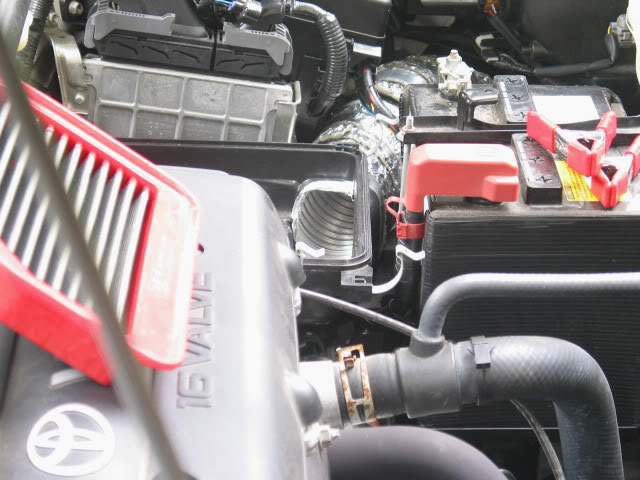
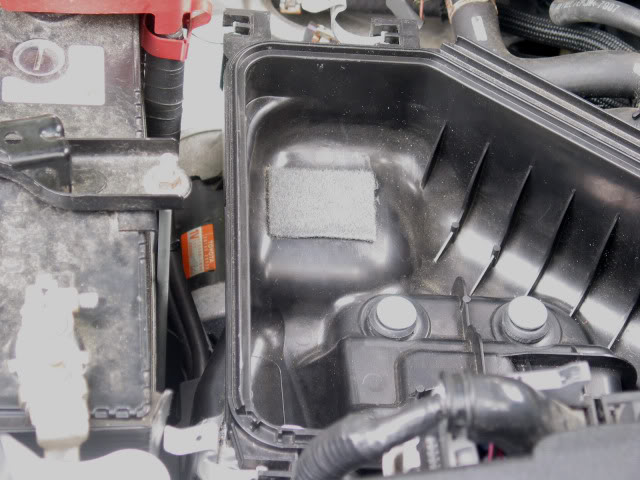
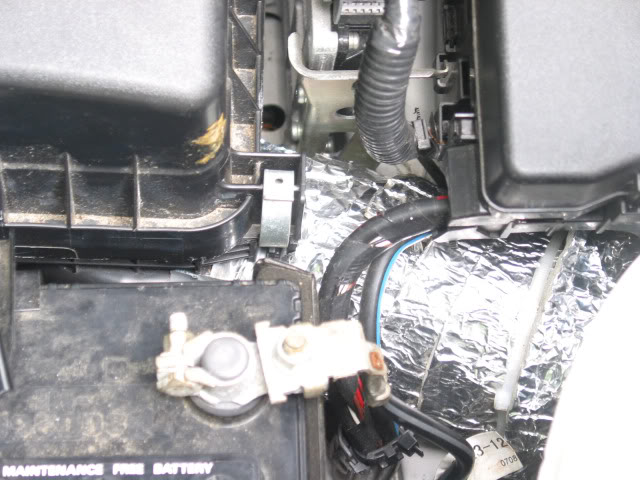
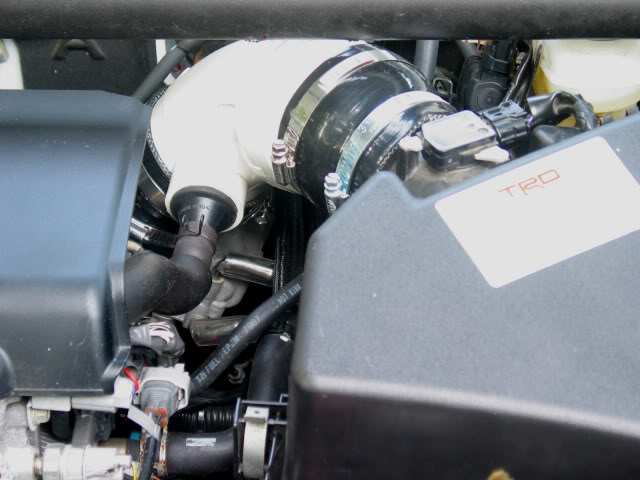
I saw TRD had introduced an OE air box based CAI for the 2011 (also compatible with earlier xB2), and felt compelled to raise the ante' on my original air box based CAI  . I kept a few inches of my original 3" aluminum flex duct at the entry to the air box to accommodate attachment, but then ran 3" PVC to a 3" to 4" flare wedged at the top of my TRD inlet and angled towards it. Then I made a 3" PVC pipe to fit between the TB and the air-box outlet with a couple flexible couplers and clamps. Took a test run and it's happy as a clam, so I took some photos before insulating the TB pipe. Not fancy, but it works for me -- most expensive components were the two couplers
  !
!


It's OK to laugh, I'll try not to take it too personally!
. I kept a few inches of my original 3" aluminum flex duct at the entry to the air box to accommodate attachment, but then ran 3" PVC to a 3" to 4" flare wedged at the top of my TRD inlet and angled towards it. Then I made a 3" PVC pipe to fit between the TB and the air-box outlet with a couple flexible couplers and clamps. Took a test run and it's happy as a clam, so I took some photos before insulating the TB pipe. Not fancy, but it works for me -- most expensive components were the two couplers !It's OK to laugh, I'll try not to take it too personally
!
Last edited by TrevorS; 07-11-2011 at 11:34 PM.

 07-13-2011, 06:55 PM
#5
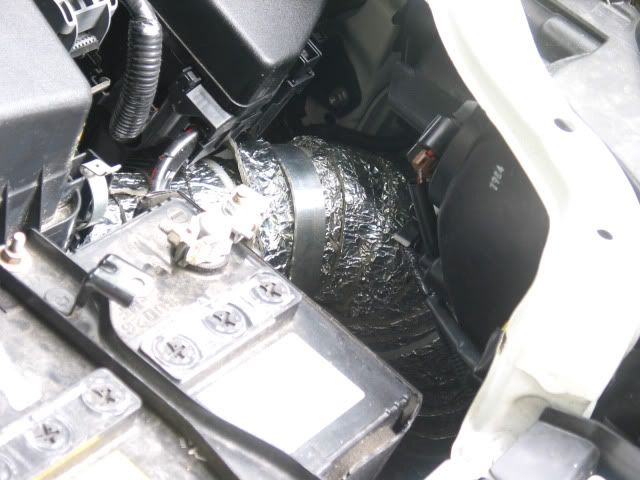
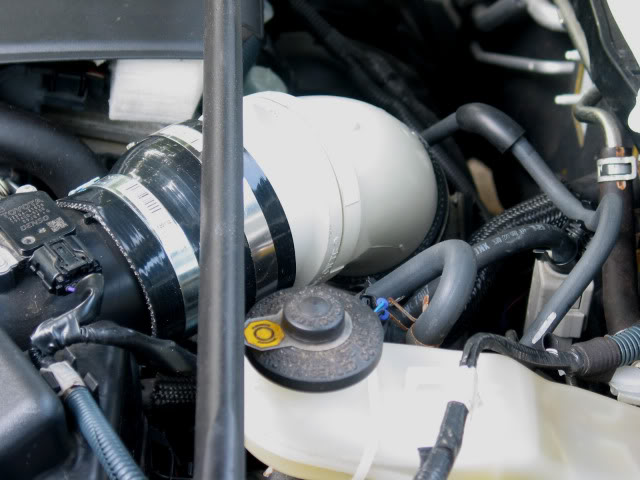
I had the intake pipe installed for near a week before TB pipe install and basic checkout. The TB pipe is definitely working properly, but I haven't played with it yet. Regarding noise, I insulate my piping both to help keep the air cool (also protects PVC against engine heat) and to damp resonances. The aluminum intake used to bellow when leaned on, the insulation made it sound much better (IMO) -- lower pitched. The insulated PVC intake is also low pitched, but now the air itself is more audible
!!
07-13-2011, 10:54 PM
#6
Gave it a try on the hill approaching my development in fourth gear (30 to 45+ mph) and I think it may be pulling a little harder than before, though it was already doing pretty well. I also noticed the engine was responsive to more pedal travel than before, which indicates the intake manifold is drawing more air than before within the torque band. Fifth on that hill seemed a little stronger too. The sound on the hill was a fairly low growl which is pretty normal for it, but I notice the sound level is generally a little higher and I'm guessing that's due to loss of the TB pipe Helmholtz Resonance Chamber. I'm actually a little sorry to lose that because it boosts the stealth aspect of my xB2 (also acts to smooth midrange air flow past the MAF, not sure what if any performance effect that has), but it would be a real mess to fit back in with the new setup. In any case, so far so good !
(also acts to smooth midrange air flow past the MAF, not sure what if any performance effect that has), but it would be a real mess to fit back in with the new setup. In any case, so far so good !
07-13-2011, 11:24 PM
#7
Senior Member
SL Member

Join Date: Mar 2011
Location: Vacaville, CA
Posts: 481
Fortunately, these things are really pretty simple, the only critical aspects are avoiding air leaks after the MAF and allowing for engine motion. I ported and smoothed the piping interior as needed and used the slowest curves I could fit for best flow. The only real stress is at the TB pipe with both those couplings trying to redirect it in the opposite direction -- however, that's 1/4" thick 3" PVC, I doubt it'll have a problem. I'm expecting it to work pretty well !
!
07-13-2011, 11:28 PM
#8
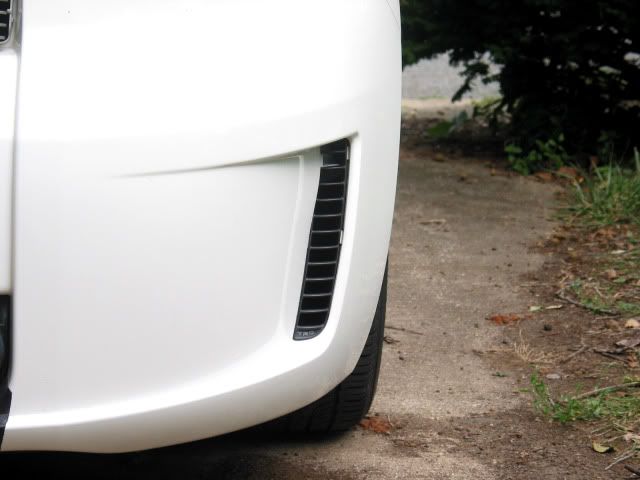
I'll be darned -- just noticed in that last photo my front right hood bumper is missing  ! Must have had it turned just a little too high and knocked it out while working under the hood. Just hunted for it down there, but there are a couple holes big enough for it to fall through -- nothing like an "opportunity" to visit the dealer .
.
07-14-2011, 01:59 AM
#10
No doubt you're right, I just hate having to spend money due to goofs !
Cool ! Haven't seen any black PVC, only black ABS plastic. That's neat it turned out so well -- congrats !
when i made mine for my truck i used black PVC and you honestly couldnt even tell by the look of it. When i had it custom tuned i had the tuner check the filter and he said there was no signs of air leak or any other signs to notate that it was faulty or bad in any way. He actually was impressed.
! Haven't seen any black PVC, only black ABS plastic. That's neat it turned out so well -- congrats !
07-21-2011, 05:53 PM
#11
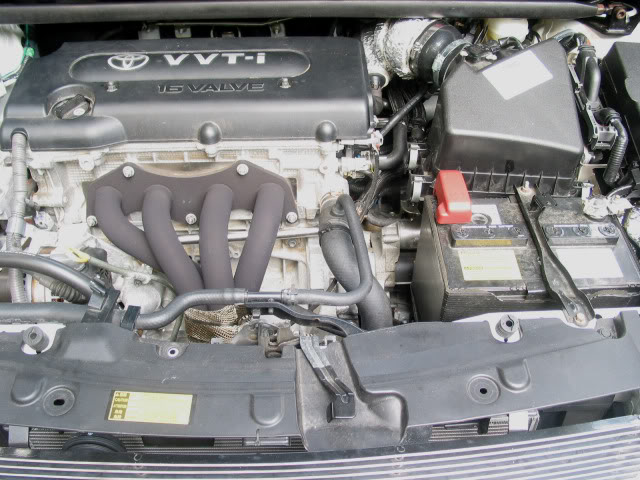
My $3.45 replacement hood "cushion" arrived at the dealer yesterday, is installed, and the above photos updated. Looks much better without important pieces missing and now I don't have to worry about damaging the right eyelid paint when closing the hood. Lowered both another 1/2 rotation to hopefully avoid recurrence.
As far as the mod, it's doing great!
As far as the mod, it's doing great
!
 08-10-2011, 07:27 PM
#15
Thanks ! I had to look that one up in the urban dictionary -- I'm hoping this is the definition you had in mind  !
!
! I had to look that one up in the urban dictionary -- I'm hoping this is the definition you had in mind
02-17-2012, 12:49 AM
#16
Member

Join Date: Feb 2012
Posts: 47
Hey nice intake I just got my Trd drop in filter today and I have been drawing designs for this lol what did you use for the connector from air box to throttle body where the hose comes in on the side? I love homemade stuff it's so much more cost effective.
Last edited by sjthompson01; 02-17-2012 at 05:22 PM. Reason: wrong wording
 03-05-2012, 01:36 PM
#18
Member
Join Date: Feb 2012
Posts: 47
You have to drill a hole and either cement a piece in or you can get a threaded/ glue in adapter to screw one in and use a rubber groumet. Just take your factory piece with you so you can get the right size for the vacum. autozone sells the silicone couplers for cheap by spectre, you will need 1 with a reducer and 1 straight. I would use a 45 bend drain pipe not schedual 40 its thinner and the size is right on the money. I bought all the stuff to do it but a guy swapped me his ingen cai for my trd drop in filter so back to the store it went lol.
