Headlight Removal DIY
#1
A few people have been asking for a DIY over this, so here is the best I can do. It will show you everything you have to remove to do it. Also it will have instructions on how to bake the headlights, although without pics on that subject.
*****DO AT YOUR OWN RISK, I WONT BE RESPONSIBLE IF YOU MESS UP****
First step: Pop all the black parts out. All you have to do is push up from the bottom or push the center circle in which is easiest.
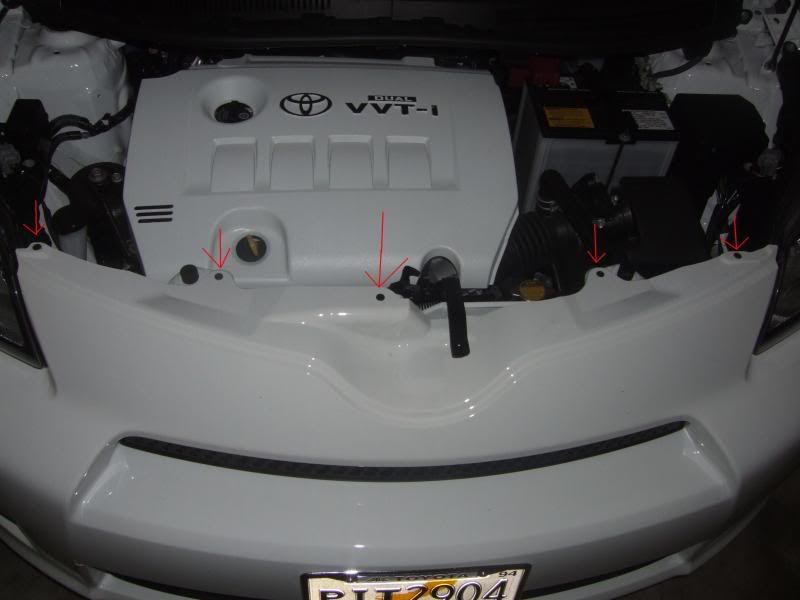
Second step: Now you will see there is only 1 little push pop thing in the wheel well, so just pop that out. The larger one you actually have to pry it out. It is just an anchor looking thing. It will take some force but dont use to much that it will break.
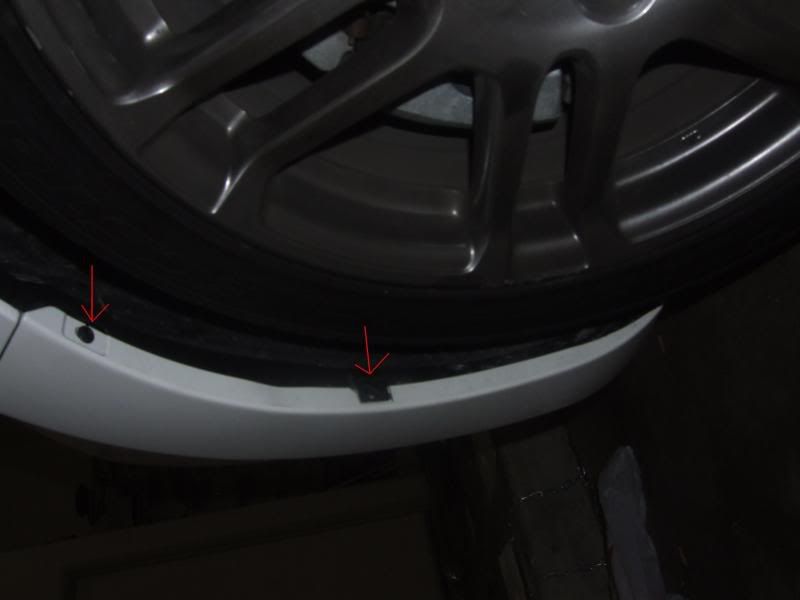
Third step: There are 5 10mm screws that hold the bottom of the bumper on. So just take those out then the bumber is ready to be taken off.
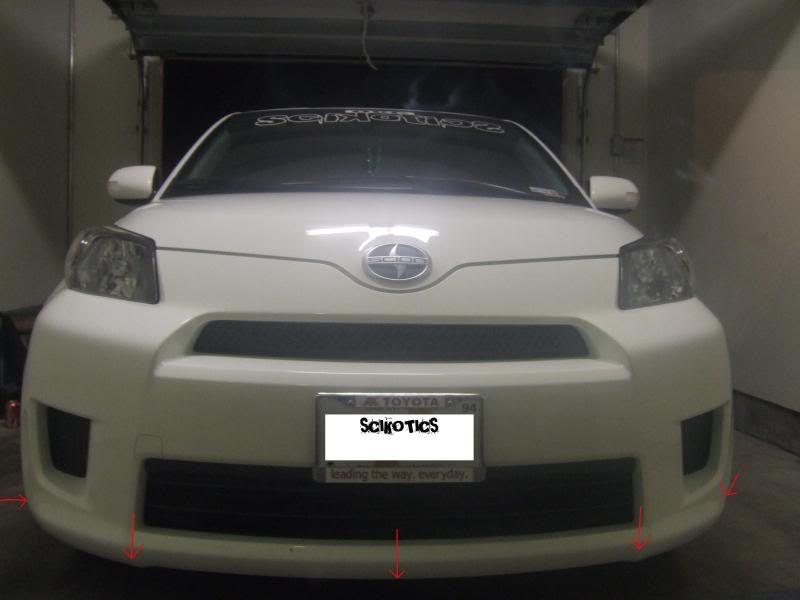
Forth step: Unhook all the lights. Didnt take a picture of it, but you should beable to figure it out. There are 5 lights in each headlight.
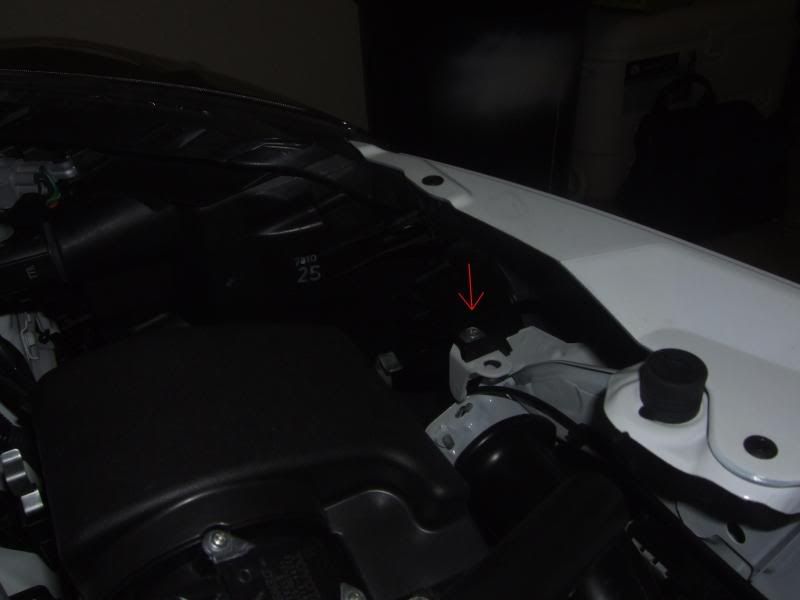
Fifth step: Remove these 3 10mm screws to take the headlights out of the car.
These are the ones for the drivers side. Both sides are the same.
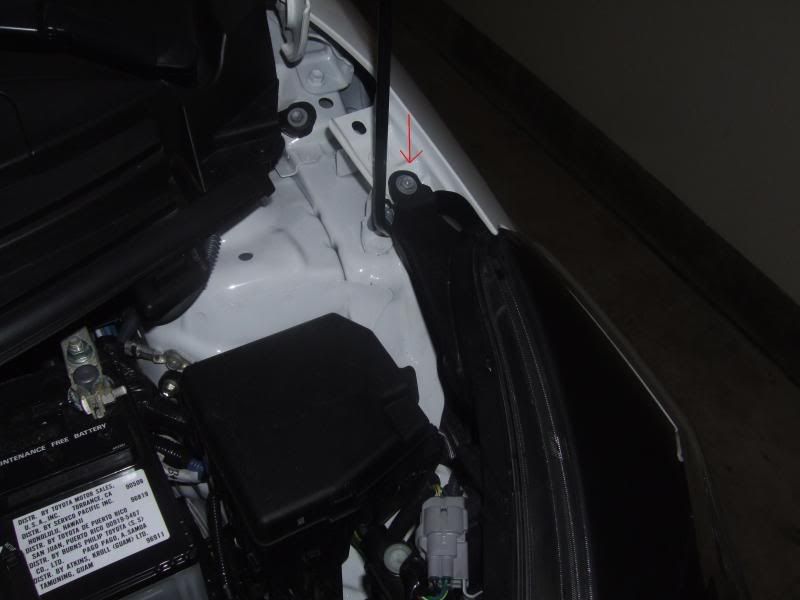
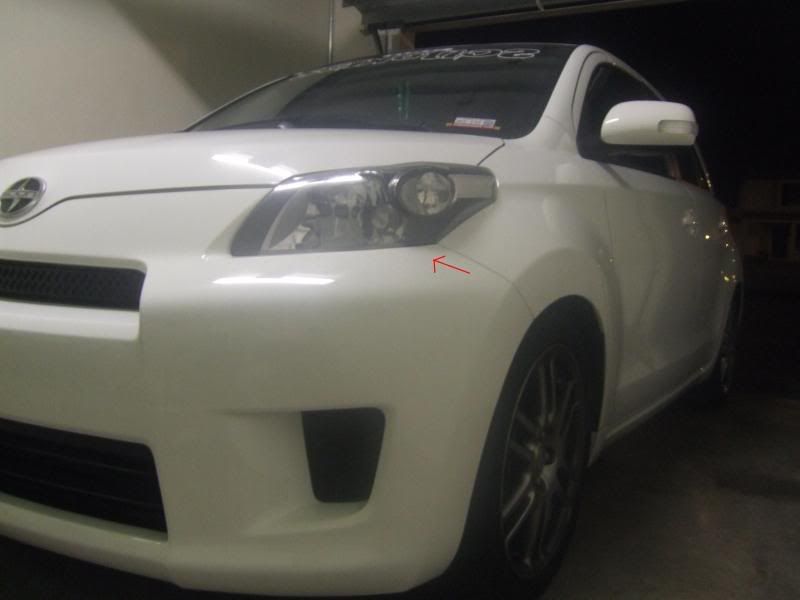
This following picture the screw is about where the arrow is pointing to on my bumper. It looks like all the other screws so its easy to find.
Re-Asymbly is the reverse.
Now if you are wanting to do some custom work on them you have to bake them in your oven. I dont have pics of that process but its straight forward.
First step: Get the wife outta the house. Mine doesnt like me cooking car parts in the oven.
Second step: Pre-Heat your oven to about 210*F
Third step: There is 1 screw that you have to take out of the back of the headlight before you bake. Good thing there are only like 2 screws back there so take them both out. I cant remember which one it was. Also double check to make sure there are no more lights in it.
Forth: Lower your rack to the bottom spot, the place a towel on a cookie sheet or what ever you may have to protect the headlight on the pan. Cook for about 10 min.
Fifth step: Once they come out of the oven you can use mits or something to take them out. They really wont be to hot, I take them out with my hands without burning myself. Quickly start trying to pry them apart, you will need a small flatblade screwdriver to help with the clips. Its going to use alot of force to seperate them and you may have to bake more than once.
Sixth step: Now you have the headlights seperated. There are only 2 screws holding the chrome bezel together.
After you have finished whatever you may be doing to your headlights, just reverse order.
I hope this helps everybody. If you have any questions feel free to PM me and I will try to help you through it.
*****DO AT YOUR OWN RISK, I WONT BE RESPONSIBLE IF YOU MESS UP****
First step: Pop all the black parts out. All you have to do is push up from the bottom or push the center circle in which is easiest.

Second step: Now you will see there is only 1 little push pop thing in the wheel well, so just pop that out. The larger one you actually have to pry it out. It is just an anchor looking thing. It will take some force but dont use to much that it will break.

Third step: There are 5 10mm screws that hold the bottom of the bumper on. So just take those out then the bumber is ready to be taken off.

Forth step: Unhook all the lights. Didnt take a picture of it, but you should beable to figure it out. There are 5 lights in each headlight.
Fifth step: Remove these 3 10mm screws to take the headlights out of the car.
These are the ones for the drivers side. Both sides are the same.


This following picture the screw is about where the arrow is pointing to on my bumper. It looks like all the other screws so its easy to find.

Re-Asymbly is the reverse.
Now if you are wanting to do some custom work on them you have to bake them in your oven. I dont have pics of that process but its straight forward.
First step: Get the wife outta the house. Mine doesnt like me cooking car parts in the oven.
Second step: Pre-Heat your oven to about 210*F
Third step: There is 1 screw that you have to take out of the back of the headlight before you bake. Good thing there are only like 2 screws back there so take them both out. I cant remember which one it was. Also double check to make sure there are no more lights in it.
Forth: Lower your rack to the bottom spot, the place a towel on a cookie sheet or what ever you may have to protect the headlight on the pan. Cook for about 10 min.
Fifth step: Once they come out of the oven you can use mits or something to take them out. They really wont be to hot, I take them out with my hands without burning myself. Quickly start trying to pry them apart, you will need a small flatblade screwdriver to help with the clips. Its going to use alot of force to seperate them and you may have to bake more than once.
Sixth step: Now you have the headlights seperated. There are only 2 screws holding the chrome bezel together.
After you have finished whatever you may be doing to your headlights, just reverse order.
I hope this helps everybody. If you have any questions feel free to PM me and I will try to help you through it.
Thread
Thread Starter
Forum
Replies
Last Post


